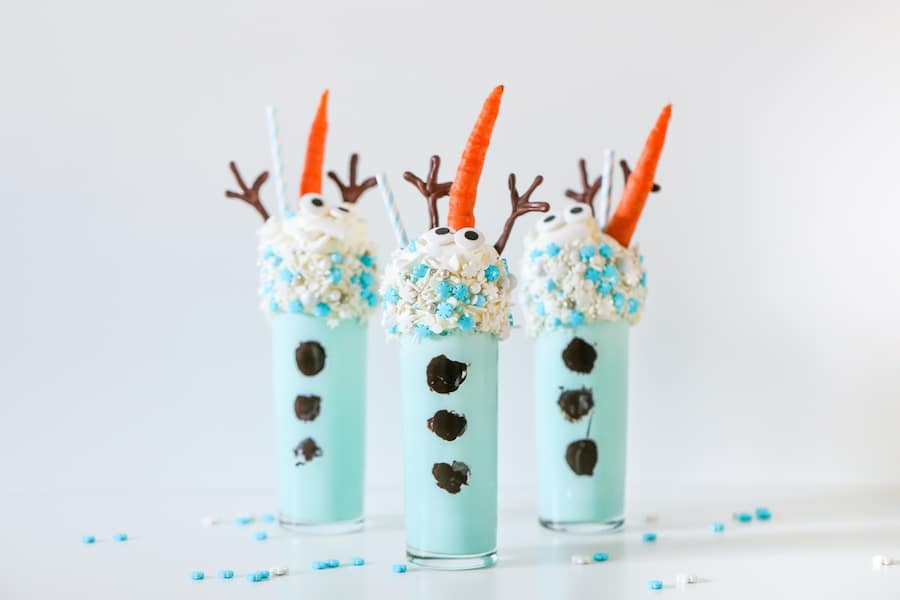
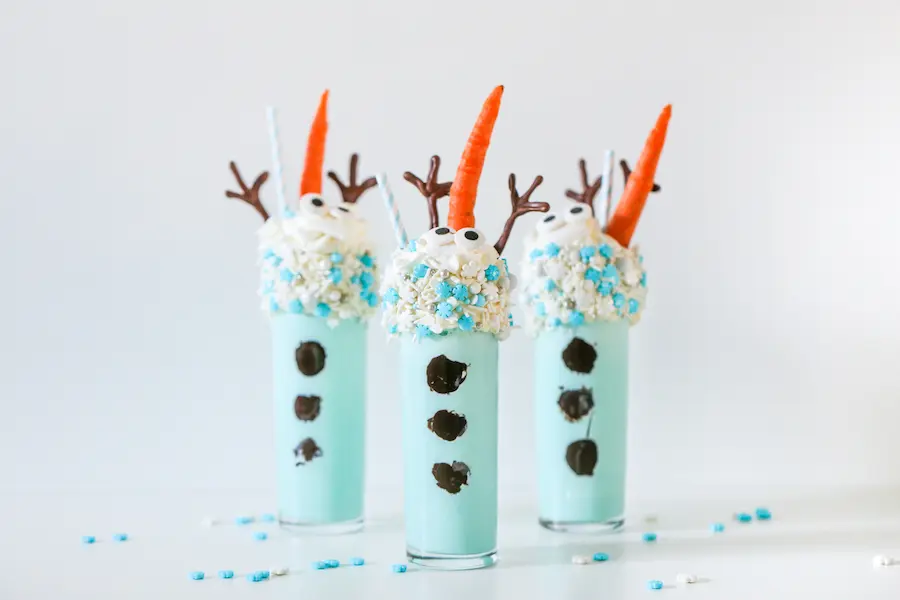
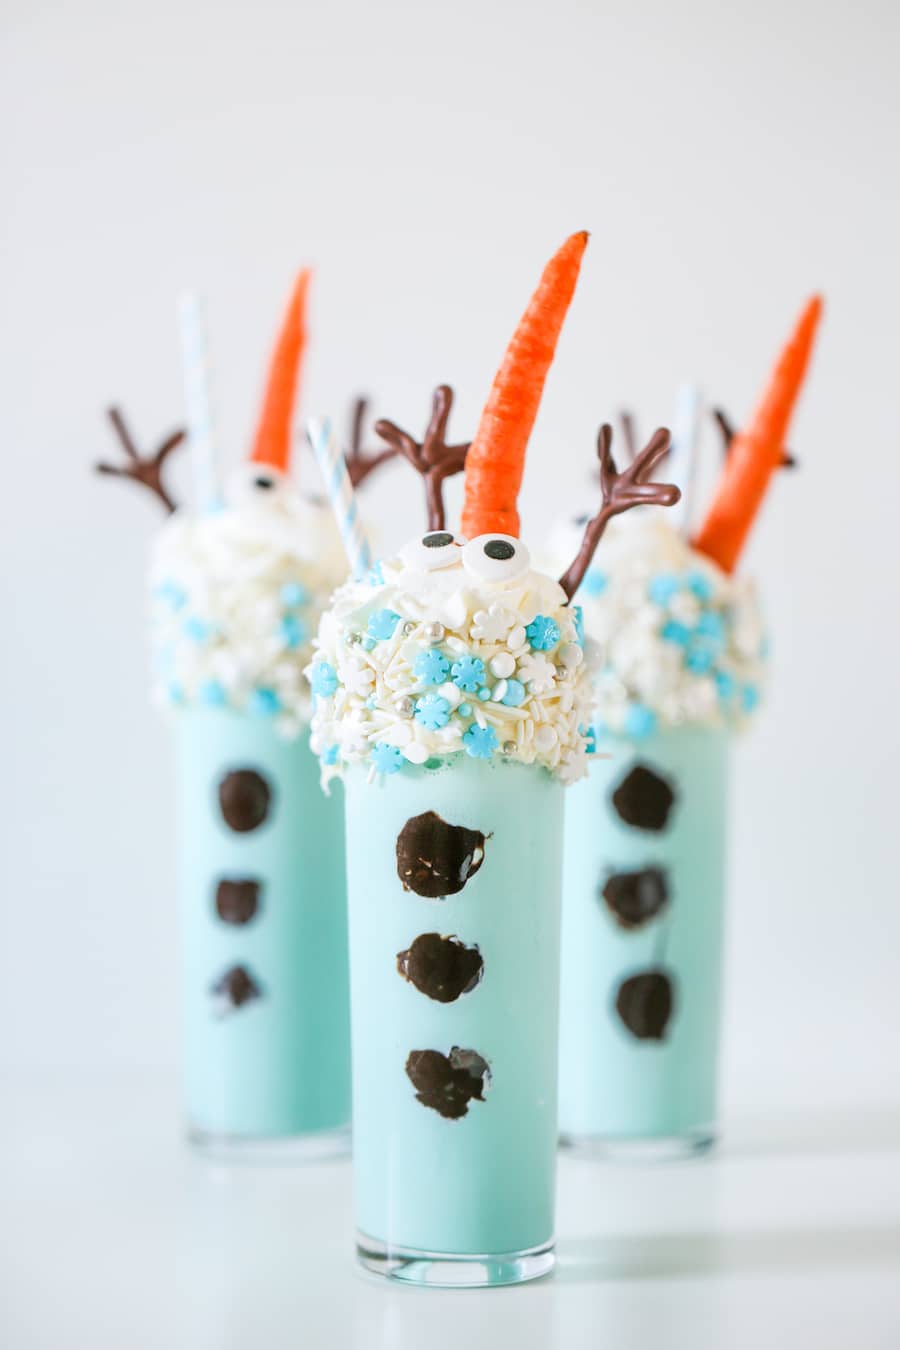
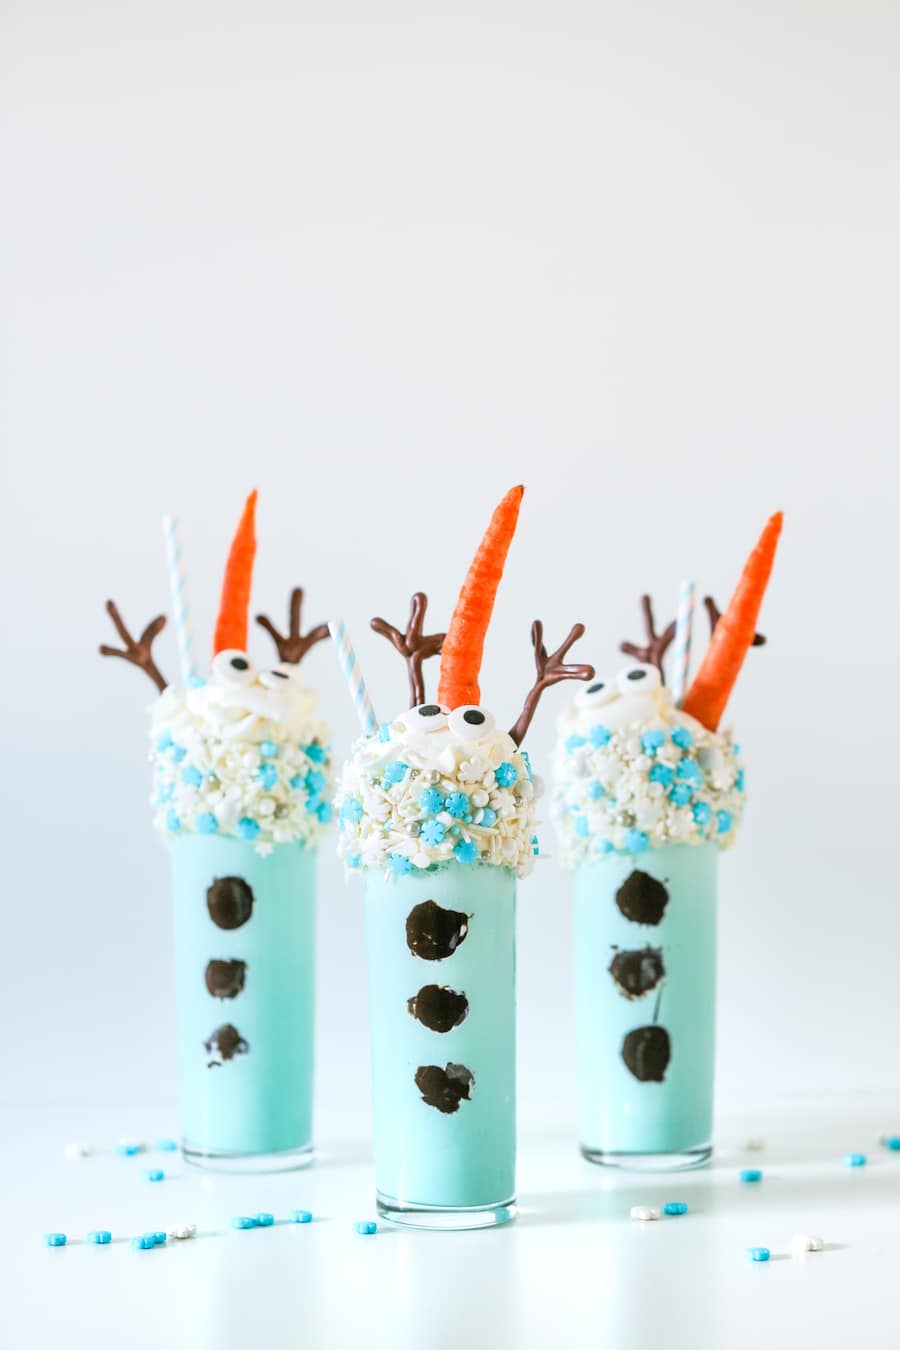
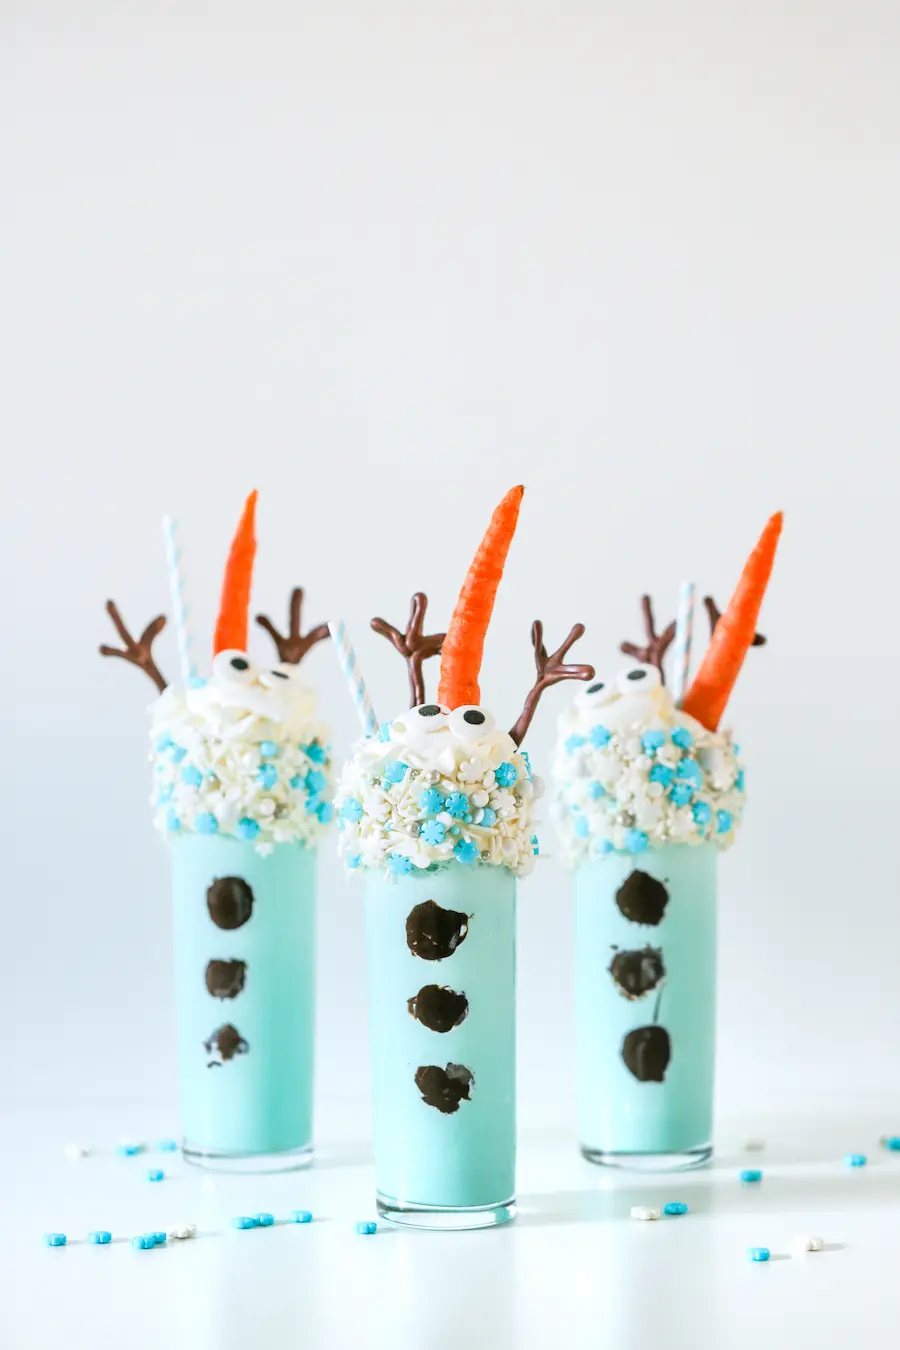
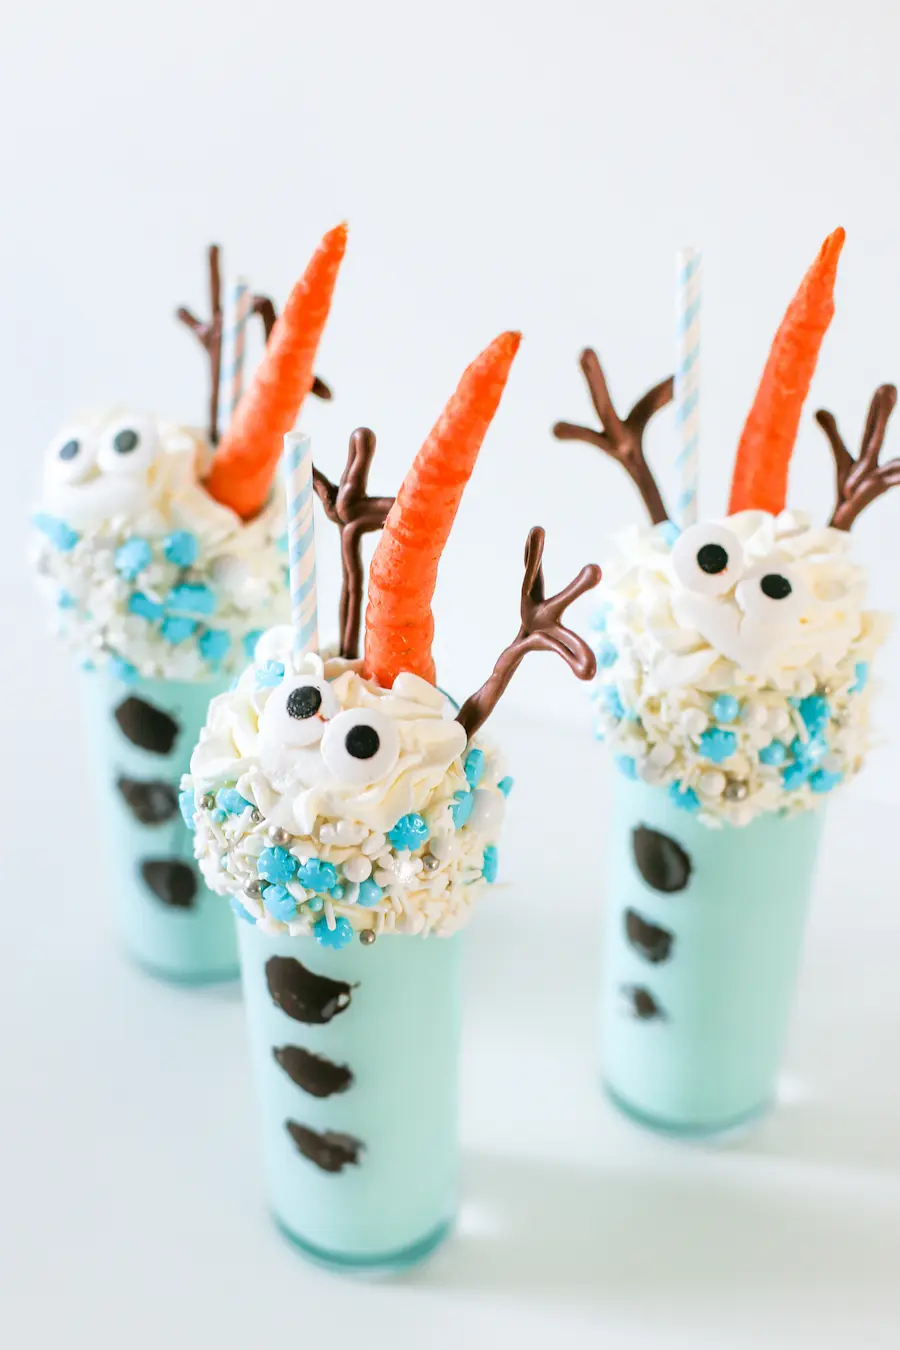
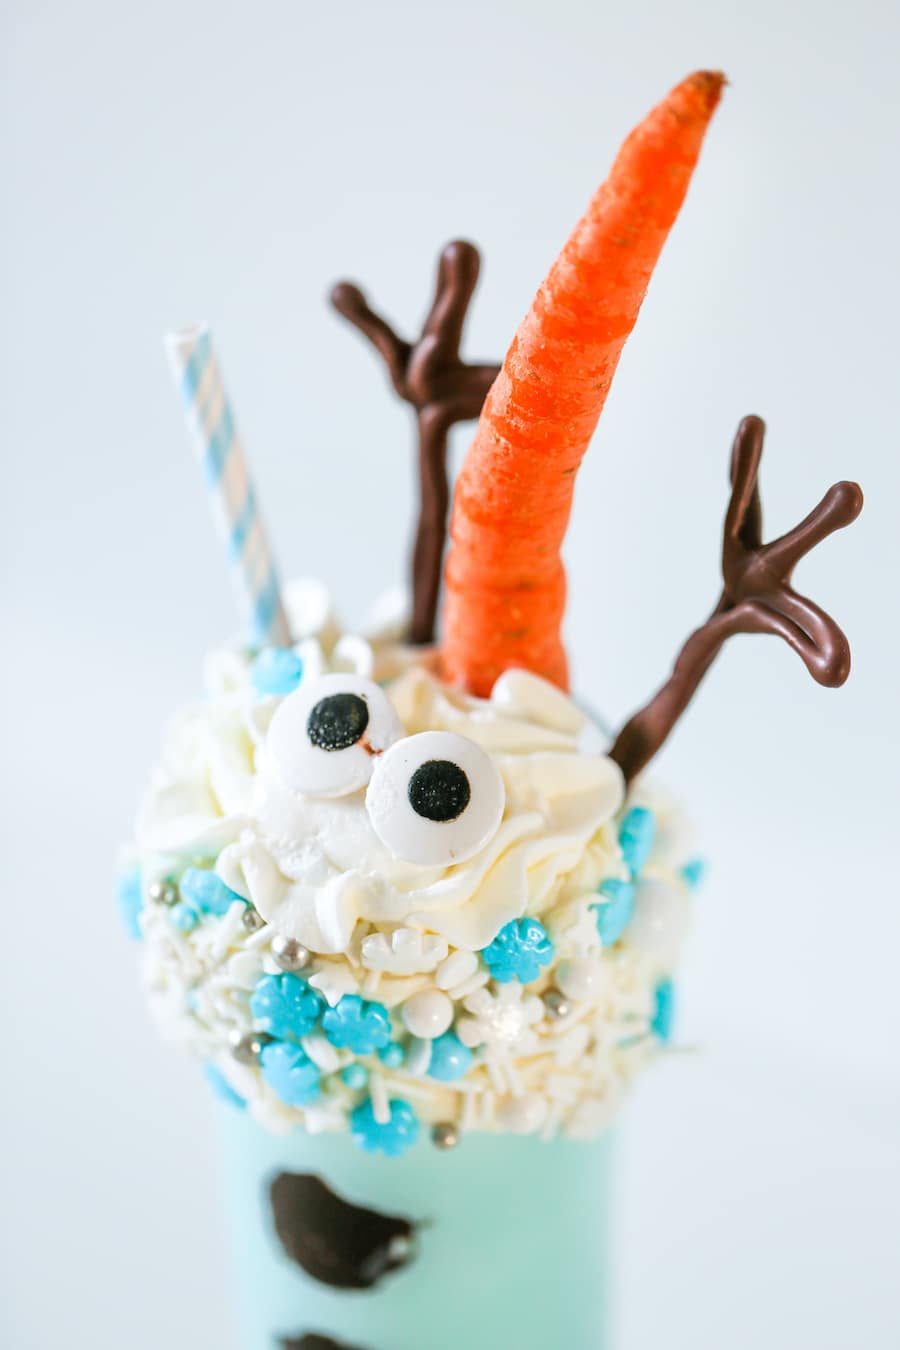
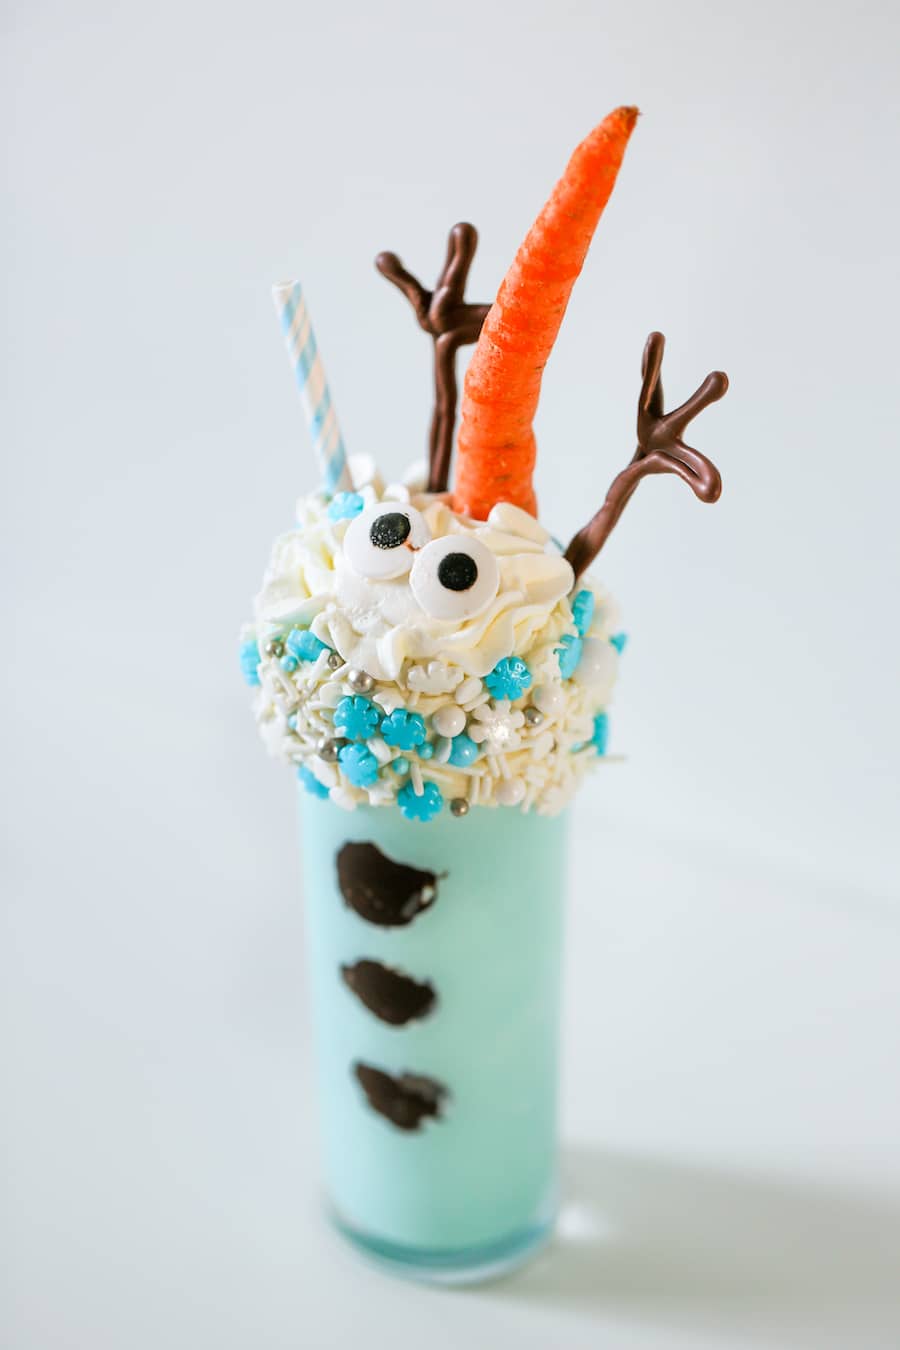
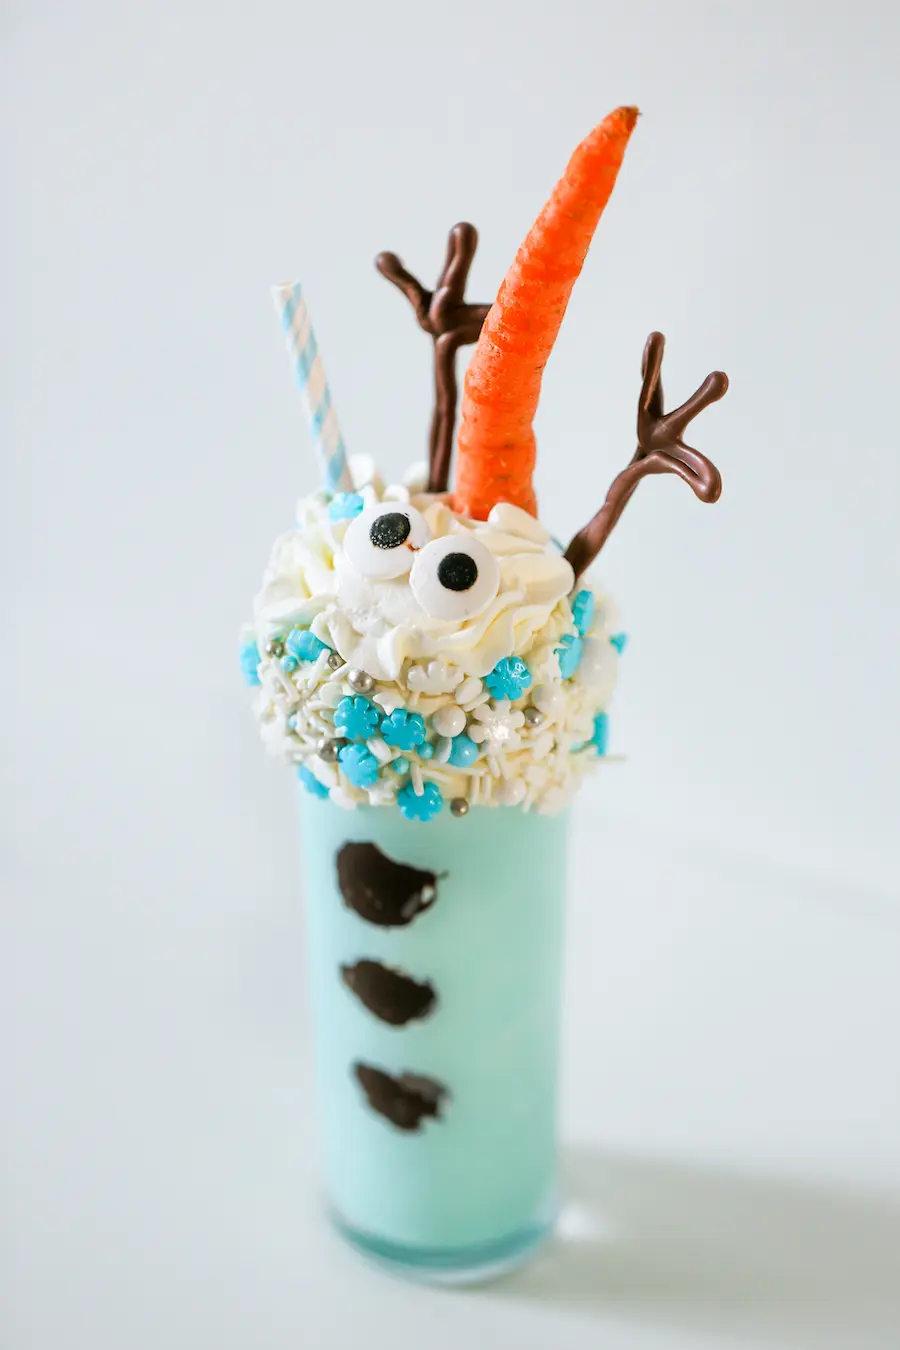
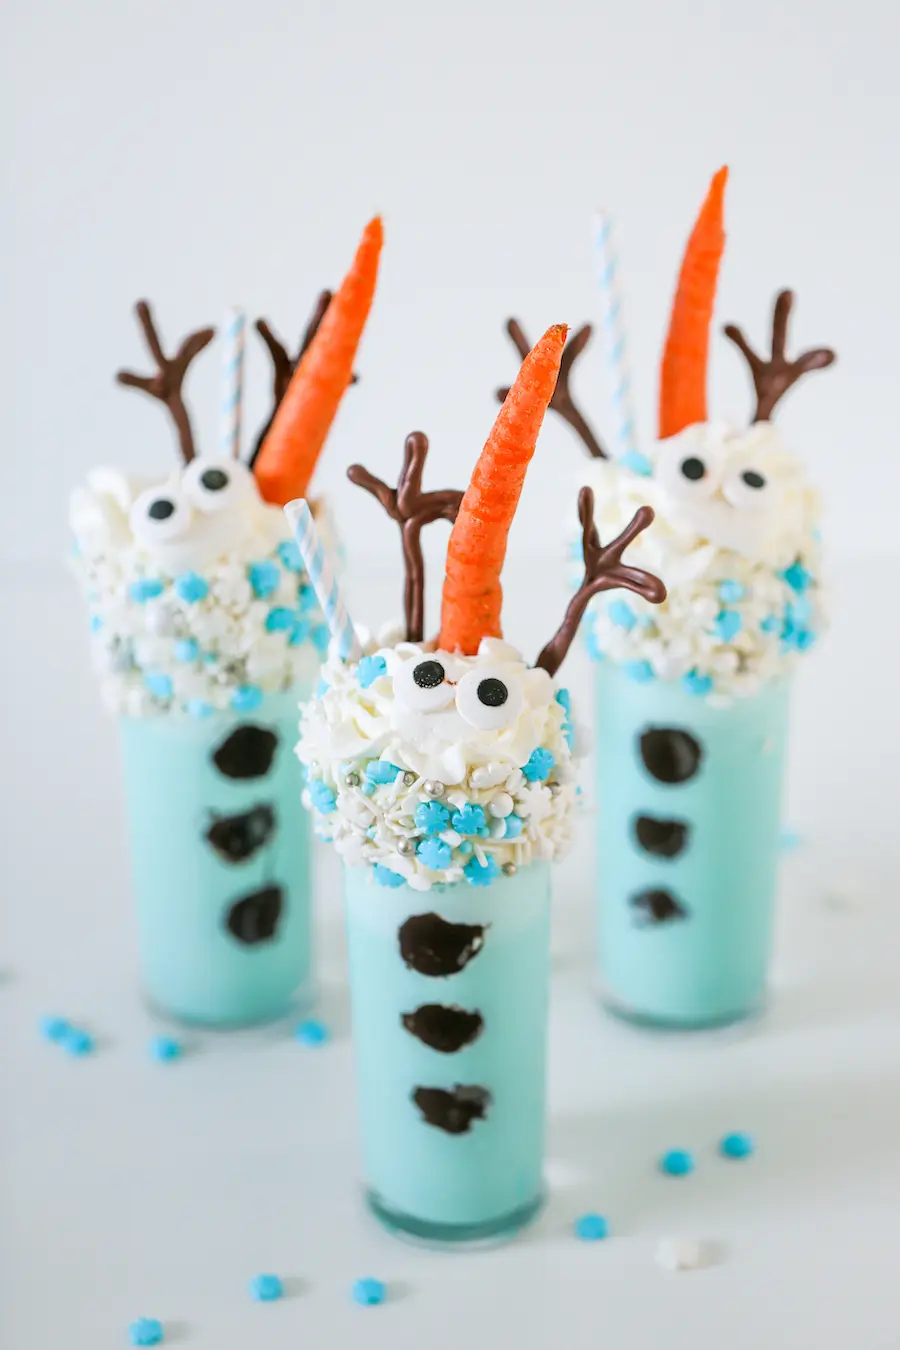
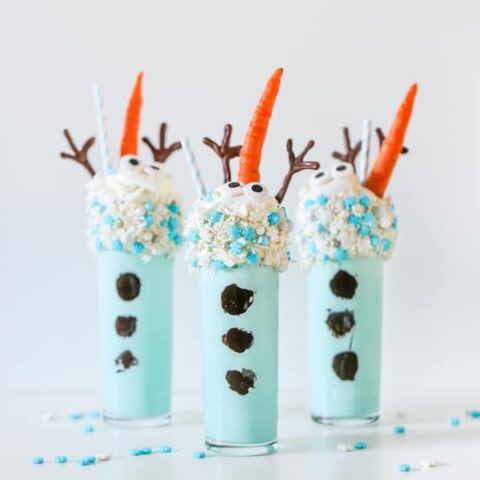
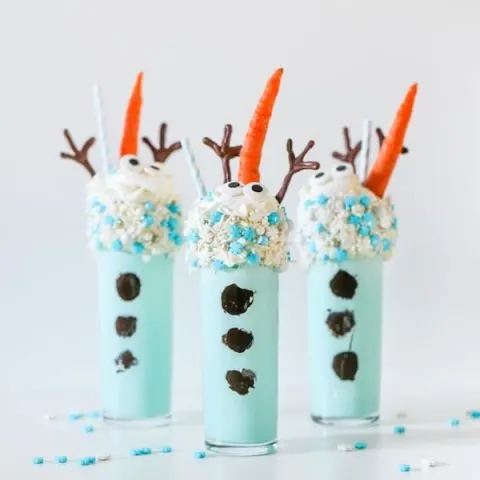
Do you or your kids LOVE all things Frozen? Make some Melted Olaf Snowman Milkshakes for your next Frozen movie night or Frozen party! They’re simple vanilla milkshakes decorated to look like Olaf melted inside and each includes an entire REAL carrot for his nose!
Our best purchase so far during the pandemic has been a Roku Streaming Stick so that we could subscribe to Disney+! Yes, we try to limit screen time, but with three kids under three (and one of them being born during a pandemic with the worst fire season California has ever seen) the tv saves my life when I want to make dinner or do the dishes!
Luckily for me, my twins have been too young to really “get into” Frozen, but we will for sure watch the prequel Olaf origin story, Once Upon A Snowman, which comes out this Friday and I’ll make them miniature versions of these Melted Olaf Milkshakes! My son saw these milkshakes and said, “That’s funny!”

Melted Olaf Snowman Milkshake Recipe
The full printable recipe for these Melted Olaf Snowman Milkshakes is below, but here’s a quick run-down of the needed ingredients, along with some substitution ideas to make things easier:

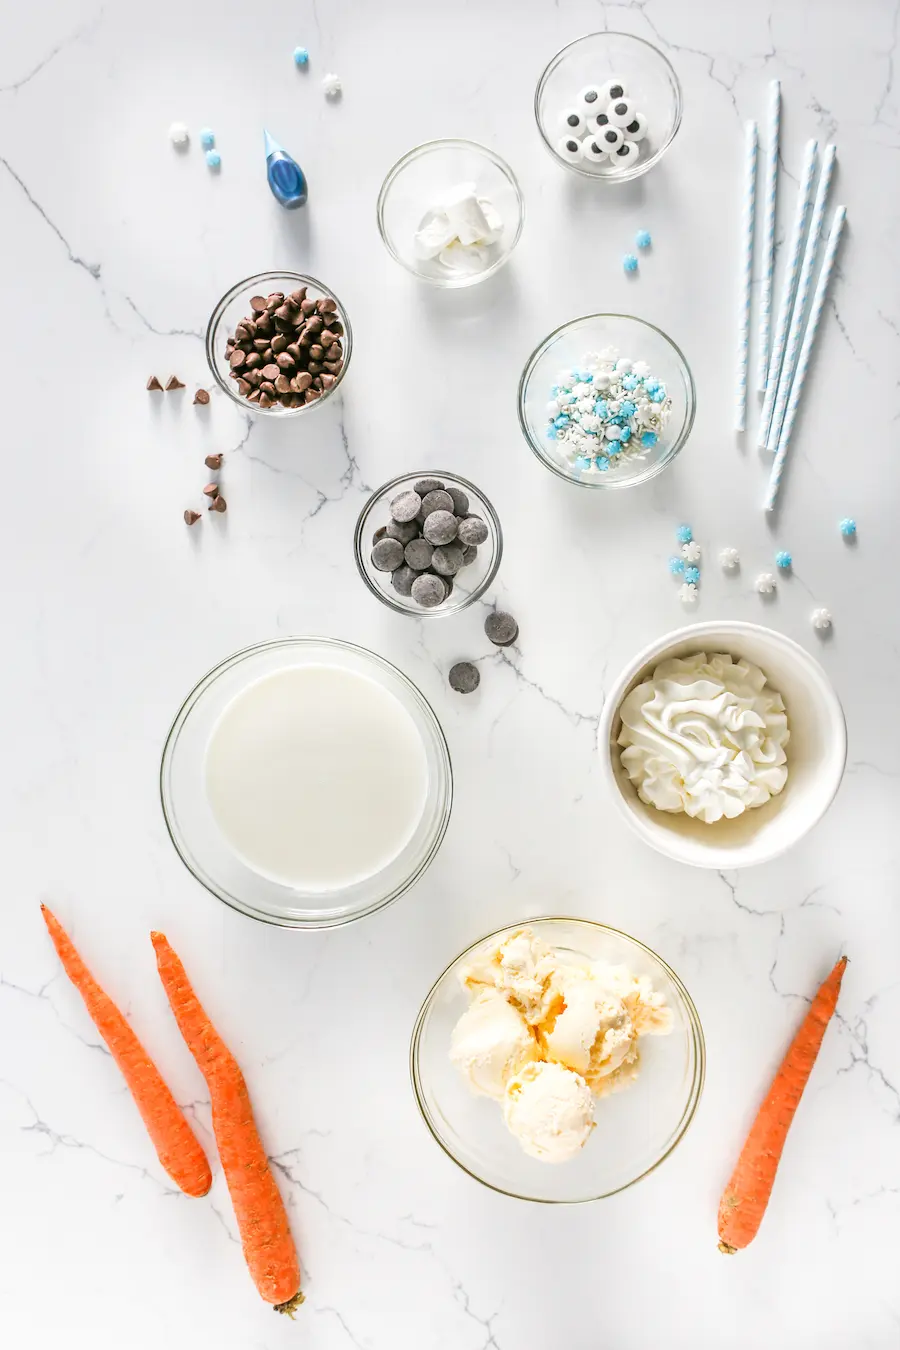
Ingredients:
- Vanilla Ice Cream
- Milk
- Whipped Cream (I strongly recommend homemade, see ingredients below)
- Carrots
- Candy Eyeball Sprinkles – links below
- Chocolate Chips
- Black or Dark Brown Candy Melts
- Vanilla Frosting – I use store-bought, but you can make your own using your favorite recipe.
- Frozen-themed Sprinkles – links below
- Optional: blue food coloring to make it more “Frozen-y”
- Substitute: Pretzel sticks instead of milk chocolate stick arms
- Substitute: Melted milk chocolate dots on mini marshmallows instead of candy eyeball sprinkles
I recommend making homemade whipped cream because you can whip it stiffer to hold up better/longer which is especially nice if you’re assembling several milkshakes:
- Heavy Whipping Cream
- Granulated Sugar
- Vanilla Extract
Recommended Kitchen Equipment:
- Kitchen Aid Stand Mixer or Hand Mixer
- Blender
- Disposable Pastry Bags or Reusable Silicone Pastry Bags
- Star 1M Size Pastry Bag Tip
- Round #4 Size Pastry Bag Tip
- Parchment Paper
- Highball Glasses
- Blue and White Straws!

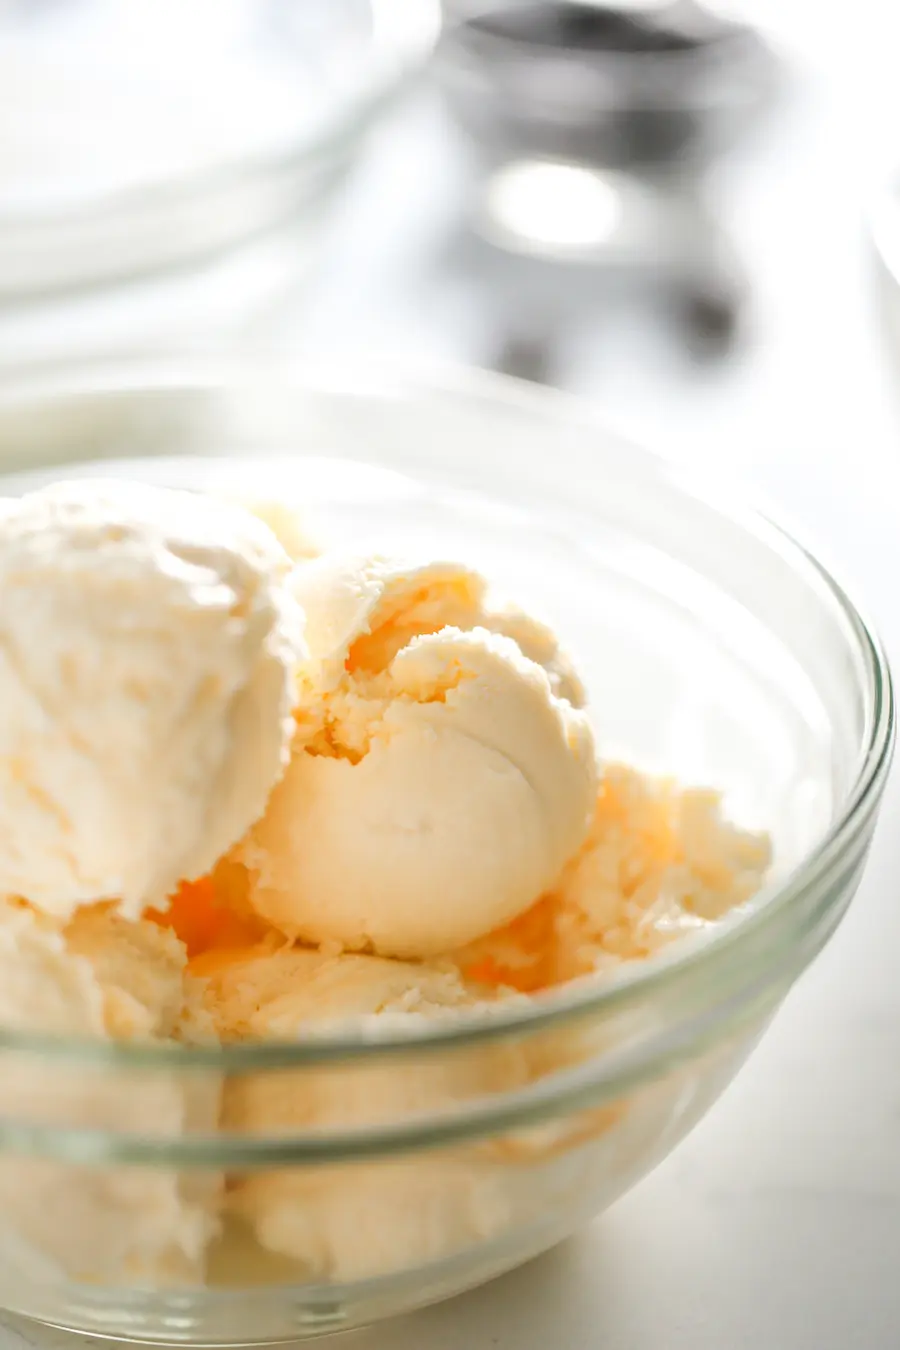
I recommend getting the whitest possible vanilla ice cream you can find.
Unfortunately, thanks to the pandemic, we’re doing grocery orders with drive-up pickups, so I kinda just get what I get with whatever the shopper picks out if my main choice is unavailable.
So, if you can’t find bright white ice cream and you’re planning to use the blue food coloring to make the milkshakes more Frozen themed, then just know that they may turn slightly greenish thanks to the yellow creamy color of the ice cream.

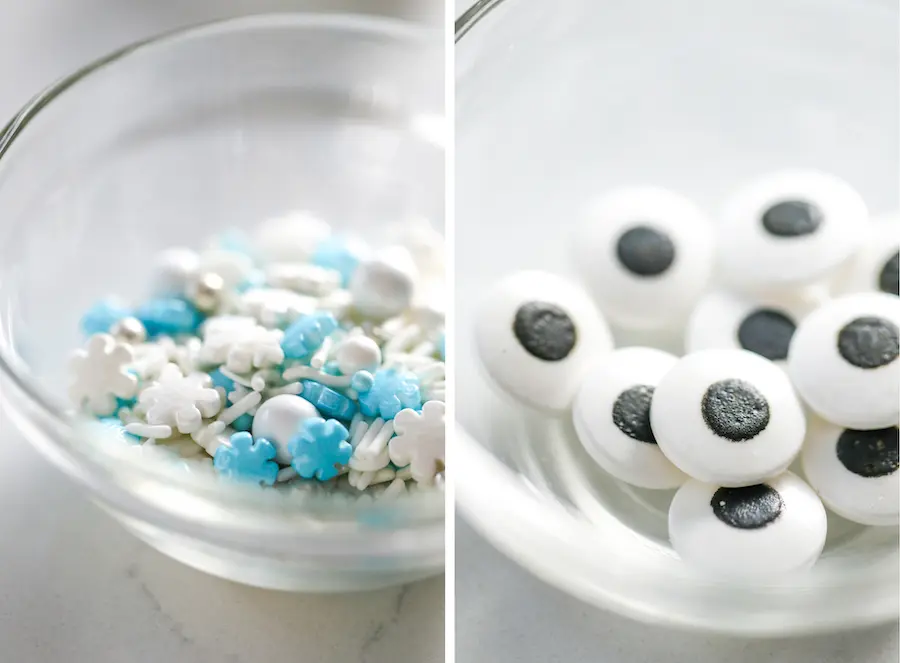
I made my own Frozen-themed sprinkles mix using some white and silver sprinkles I already had in my pantry plus these Blue & White Snowflake Sprinkles. You don’t have to add Frozen-themed sprinkles, but if you want to, here’s a link to the ones I used as well as a few links to other Frozen-themed sprinkles:
- Blue & White Snowflake Sprinkles
- Sprinkles Mix
- Frozen Sprinkles with Prime delivery – I would use these if I made these milkshake again!
And you may be able to find large eyeball sprinkles at the grocery store (I sometimes find them in the baking aisle); however, they may be picked over because it’s so close to Halloween, so I’m going to link to a few because the big-sized candy eye sprinkles are hard to find:
Can’t find candy eye sprinkles? Substitute with melted milk chocolate dots on mini marshmallows instead.
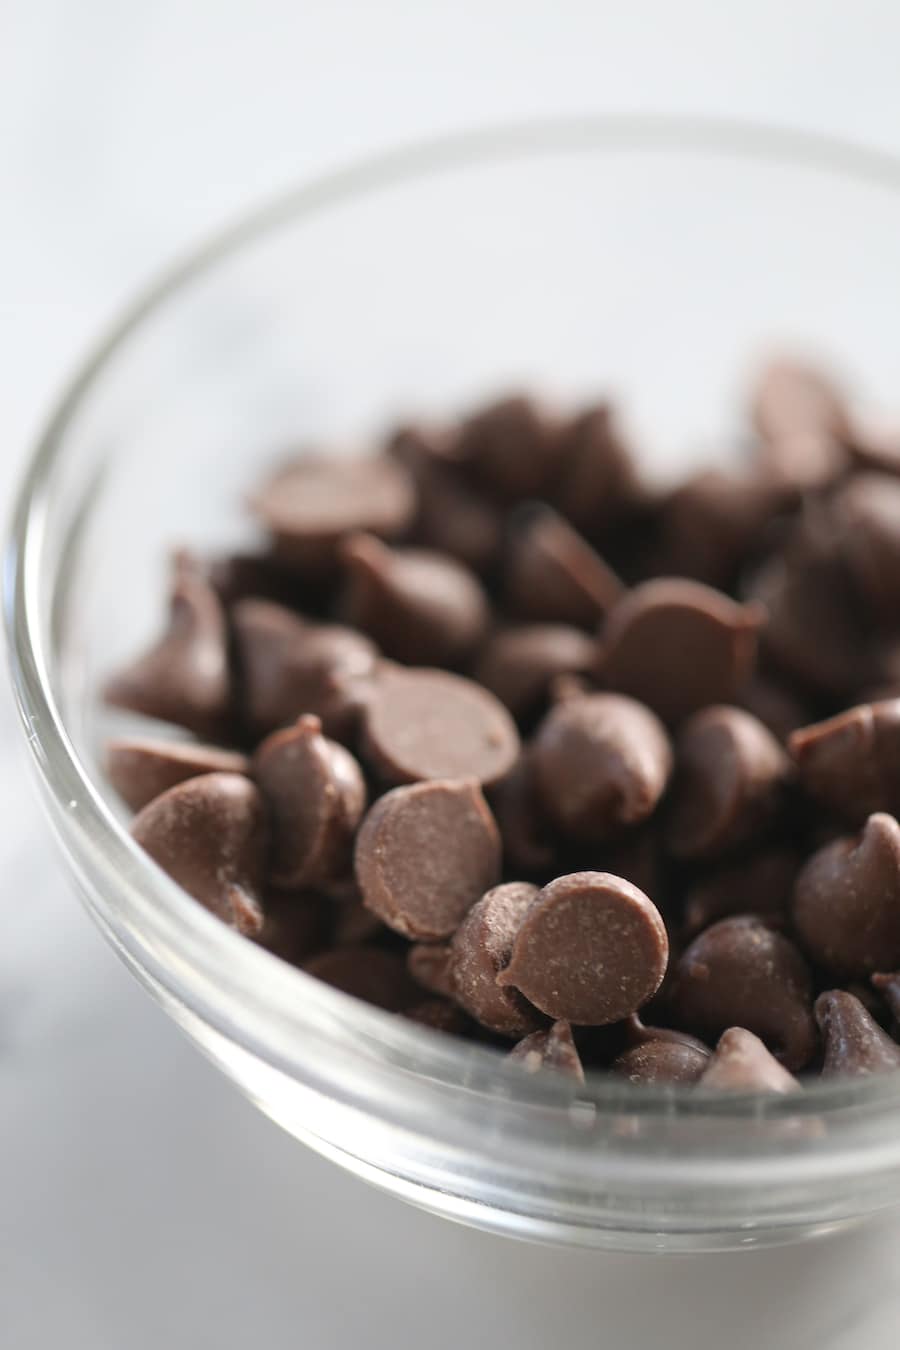

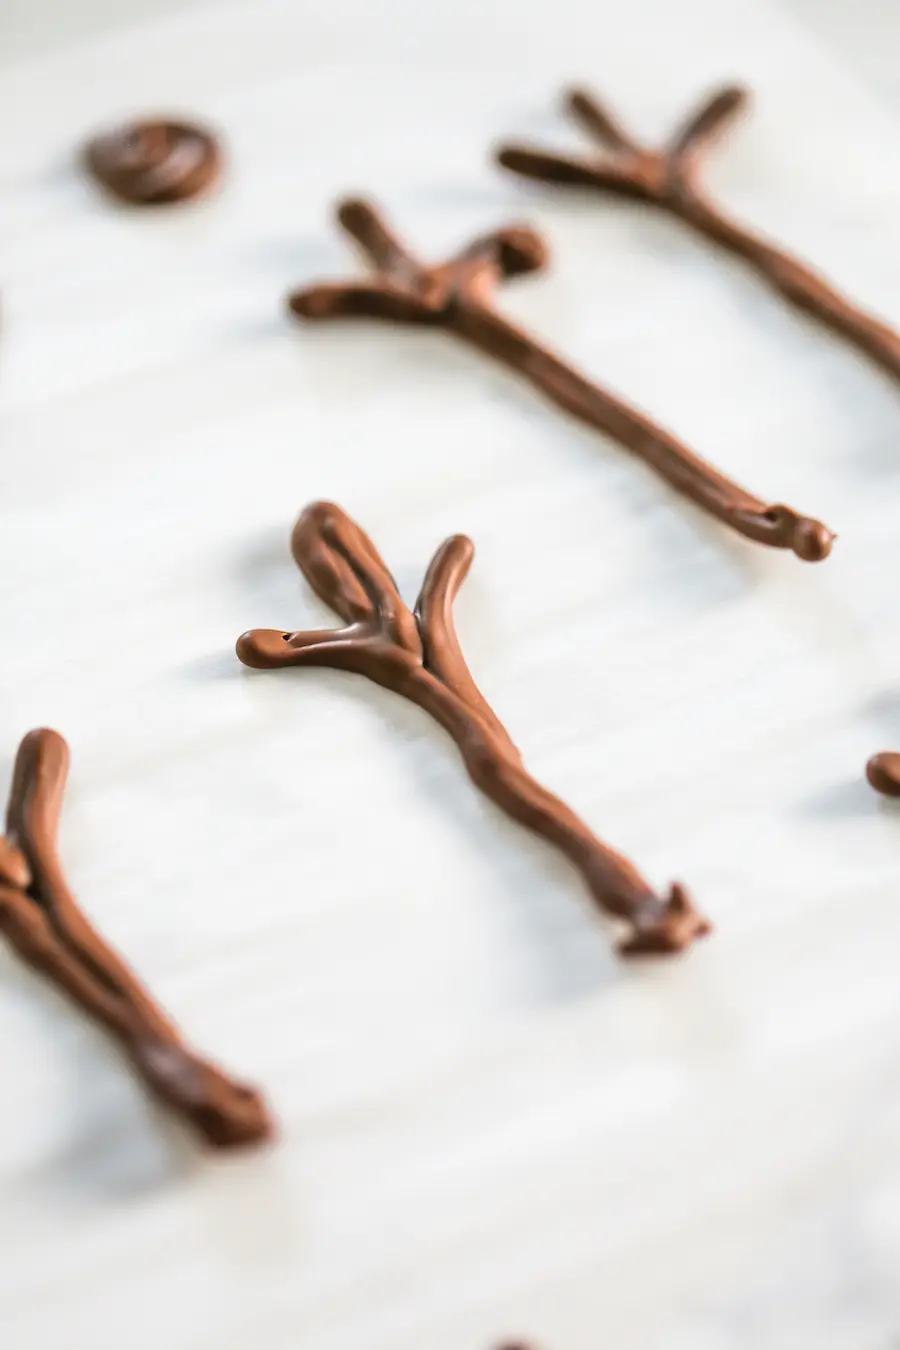
I made Olaf’s stick arms using milk chocolate, but I almost regretted it because it’s still so hot here in Los Angeles! (Yes, climate change is real! And it’s HOT!) I made the stick arms and put them in the fridge to set, but within 5 minutes of getting them out of the fridge to assemble the milkshakes, the arms started bending. Luckily, as soon as I stuck them into the ice cream, they got cold again!
But if you want to make sure your stick arms aren’t going to melt and don’t care if they’re chocolate/tasty, then you might want to use brown candy melts which will stay firmer, but won’t taste as good.
I didn’t include any “twigs” for his hair because I already had too many things sticking out of these milkshakes, but if you want to get technical, then add some straight twigs, too!
Sounds too difficult or too time consuming? Substitute using pretzel sticks as stick arms instead.
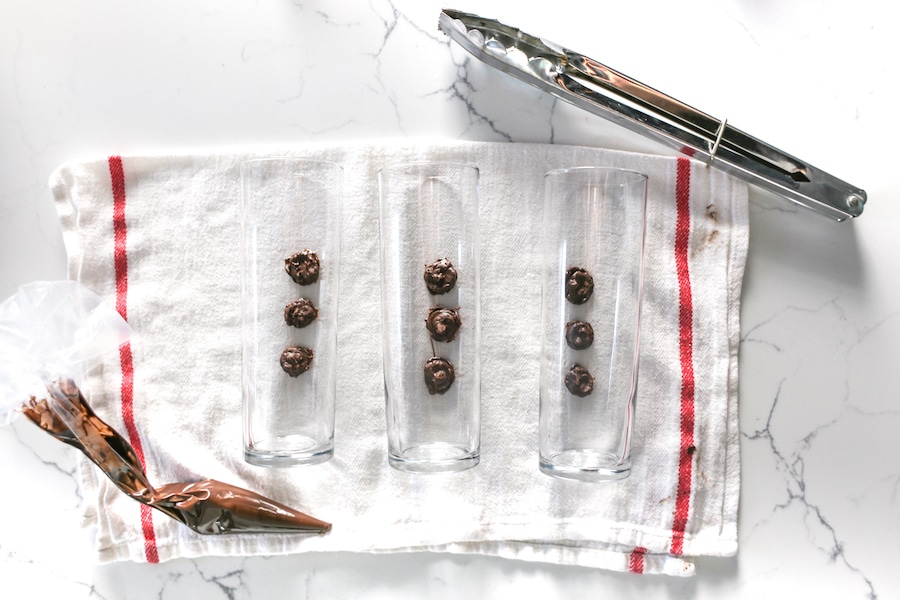

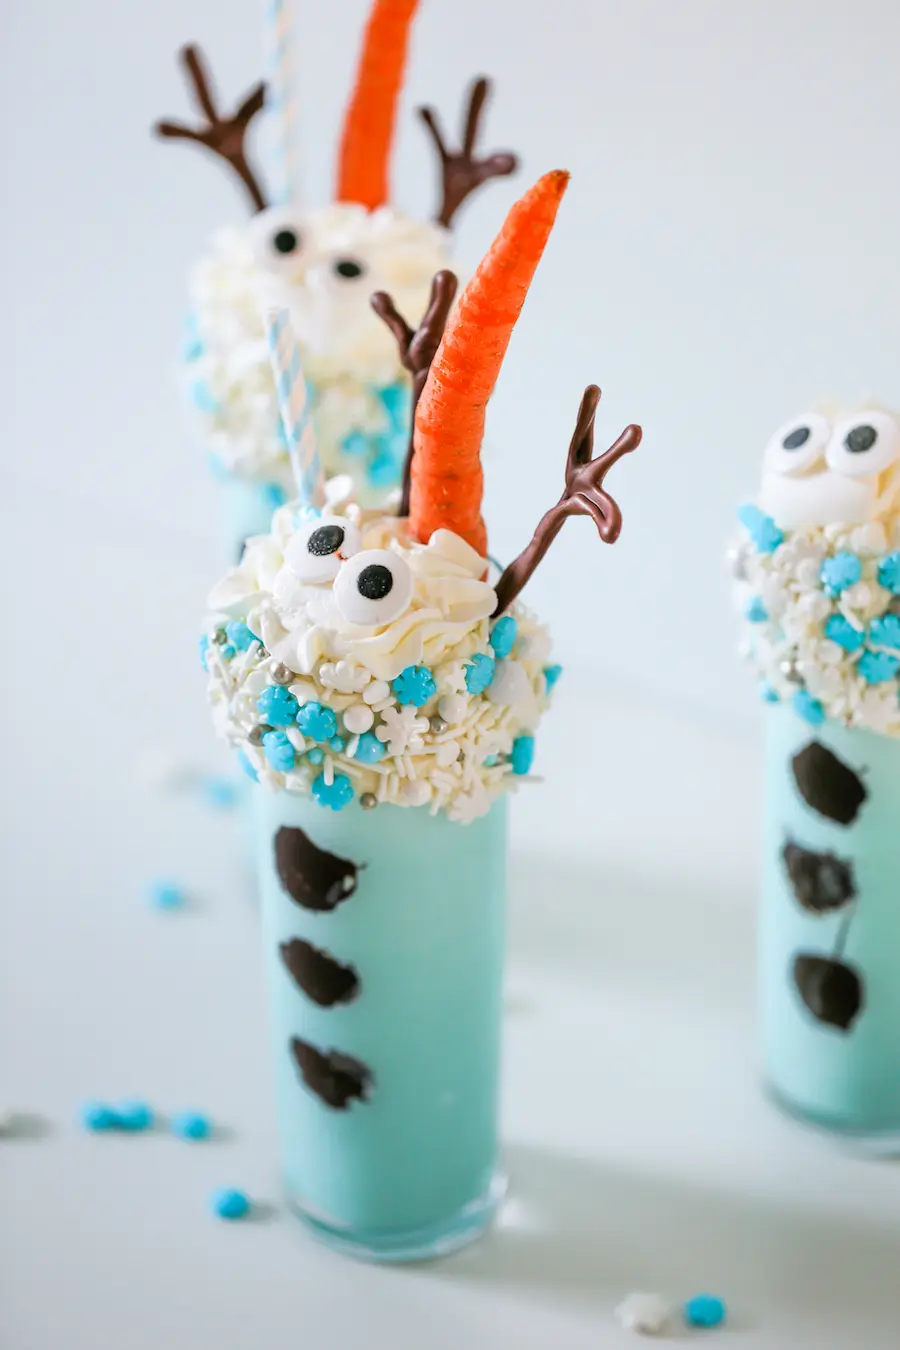
Ok, so here’s the hardest part: I used dark cocoa candy melts for Olaf’s “coal” and I stuck them onto the inside of the glasses using more melted dark cocoa candy melts. I have four tips for doing this:
- You can do this part ahead of time if needed (like the night before) and set the glasses aside
- Use tongs and work fast
- When “gluing” the “coals” to the inside of the glasses, be sure to take into account that you’ll be adding frosting/sprinkles to the rim, so be sure to go low enough.
- They don’t have to be perfect. Mine certainly are not perfect!
I explain in detail how to make and “glue” the coals in the printable recipe instructions below!

I use my Ninja blender for all my milkshakes! I can’t say enough good things about this blender! It’s not super cheap and won’t fall apart like some $20-30 brands (like Hamilton Beach), but it also doesn’t cost an arm and a leg like a Vitamix.
If you’re in need of a new blender, I definitely recommend this one. My only tip is that even though the pitcher says it’s dishwasher safe, be sure to hand wash it. Our first one cracked in the dishwasher, but our replacement pitcher has been going strong for 2-3 years now.

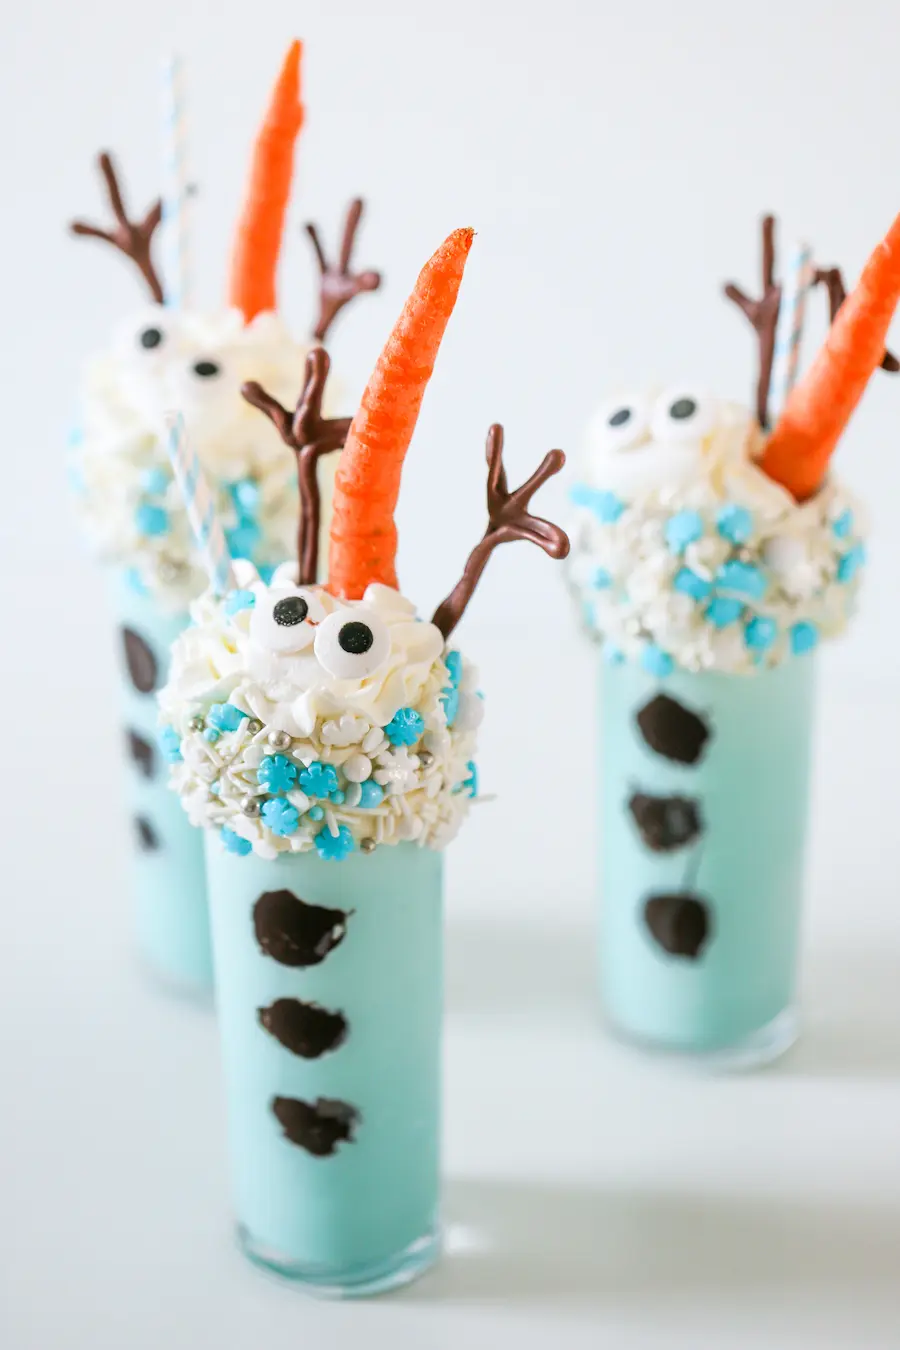
I think these Melted Olaf Milkshakes are so cute and they’re just perfect for anyone who LOVES Olaf and the movie Frozen!
Melted Olaf Milkshake Recipe
Melted Olaf Milkshake Recipe for Frozen Movie Night or Frozen-themed Party!
Ingredients
- 1 cup Heavy Whipping Cream
- 1 TB Granulated Sugar
- 1 Tsp Vanilla Extract
- 1/2 cup Chocolate Chips
- 1/2 cup Black or Dark Brown Candy Melts
- 1 cup Vanilla Frosting
- 1/2 cup Frozen-themed Sprinkles
- 4 cups Vanilla Ice Cream
- 1 1/4 cup Milk
- Optional: blue food coloring
- 3 Carrots
- 6 Large Candy Eyeball Sprinkles
Instructions
- Start by making your homemade whipped cream. Using either a hand mixer or your stand mixer fitted with the whisk attachment, combine the heavy whipping cream, granulated sugar, and vanilla extract into a bowl and whip until stiff peaks form. Spoon into a large pastry bag fitted with a 1M size star tip or a large Ziploc bag and store in the fridge until needed.
- Next, follow the manufacturer’s instructions to melt the milk chocolate chips or brown candy melts either via microwave or the double boiler method to make Olaf’s stick arms. Once melted, spoon into a pastry bag fitted with a Round #4 pastry tip or a small Ziploc bag with a small corner cut off and pipe Olaf’s arms onto parchment paper. Allow them to set in the fridge until needed.
- Next, follow the manufacturer’s instructions to melt black candy melts either via microwave or the double boiler method to make Olaf’s coal buttons. Once melted, spoon into a small Ziploc bag with a small corner cut off and pipe Olaf’s coal buttons onto parchment paper.
- Once coal buttons are set, melt additional black candy melts to use as “glue” to attach coal buttons to the inside of glasses. Working quickly, spoon some melted candy melts onto the back of a coal button and, using tongs, “glue” the coal button into a glass starting with the lowest coal button. Keep adding additional coal buttons until finished. See above photo.
- Spoon vanilla frosting onto the top rims of the glasses using the back of a spoon. Then add sprinkles onto the frosting or roll the frosting edges in sprinkles to adhere the sprinkles.
- Next, combine vanilla ice cream, milk, and optional blue food coloring in a blender and mix until combined. Add additional milk if too stiff or to desired consistency.
- Place a carrot in each glass, pour the milkshake up to the frosting line, add a straw, pipe whipped cream on top, add 2 eyes and 2 stick arms per milkshake. Optional: add a few sprinkles on top.
- Enjoy!
Notes
Substitute: Pretzel sticks instead of milk chocolate stick arms
Substitute: Melted milk chocolate dots on mini marshmallows instead of candy eyeball sprinkles