
I am so excited to share my first Cricut Design Space Star Challenge project!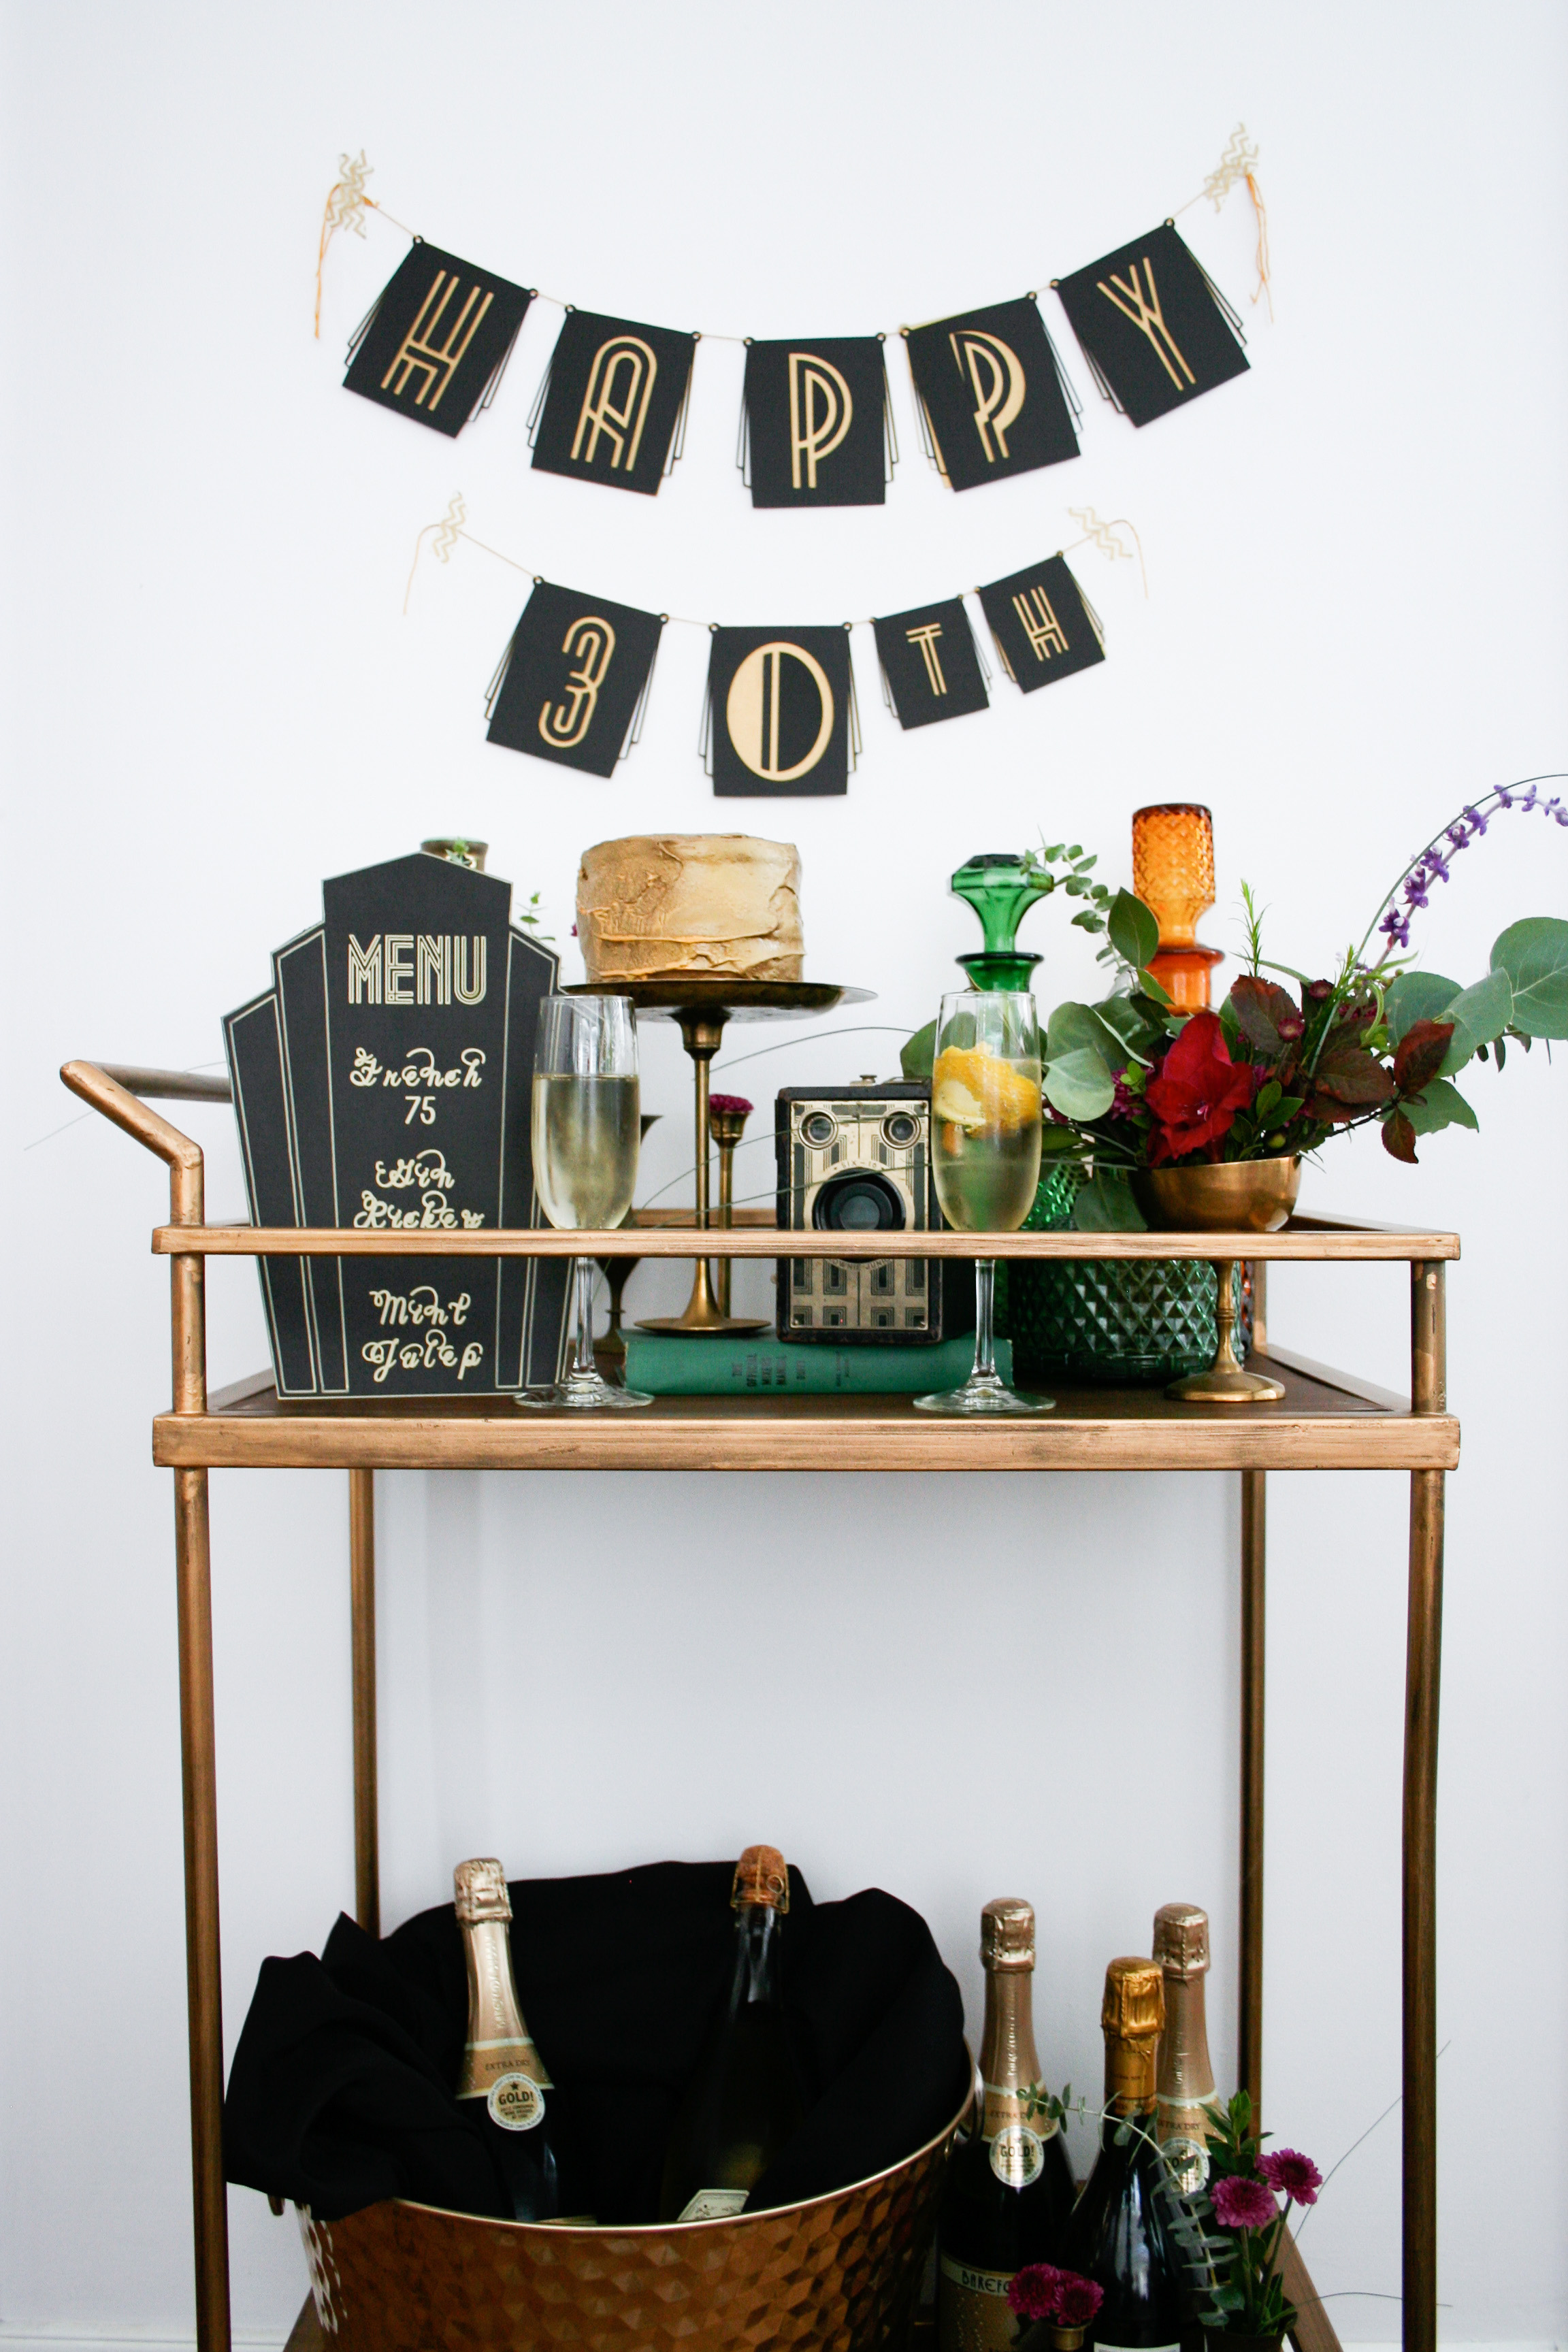 Remember a couple of weeks ago when I announced a giveaway for a Cricut Explore™? Well, it was because I was chosen to participate in the Cricut Design Space Star Challenge! Ha! Right? Me? I can plan a vacation, but I can’t design anything … oh, but I can with the Cricut Explore™! The Happy 30th banner, the Menu, and the stencil to create the Pop, Fizz, Clink doormat were all created using the Cricut Explore™!
I hadn’t been interested in the die-cutting machines before the Cricut Explore™ because you had to use their designs, and I like being a little more … one-of-a-kind. But, with the Cricut Explore™, you can upload YOUR OWN DESIGNS! So cool right? And, the Cricut Explore™ can cut so many different types of materials including paper, card stock, felt, fabric, metal, and wood! Check out the Cricut Explore Cut List here. You can kiss your Exacto knife goodbye. Ok, maybe don’t do that.
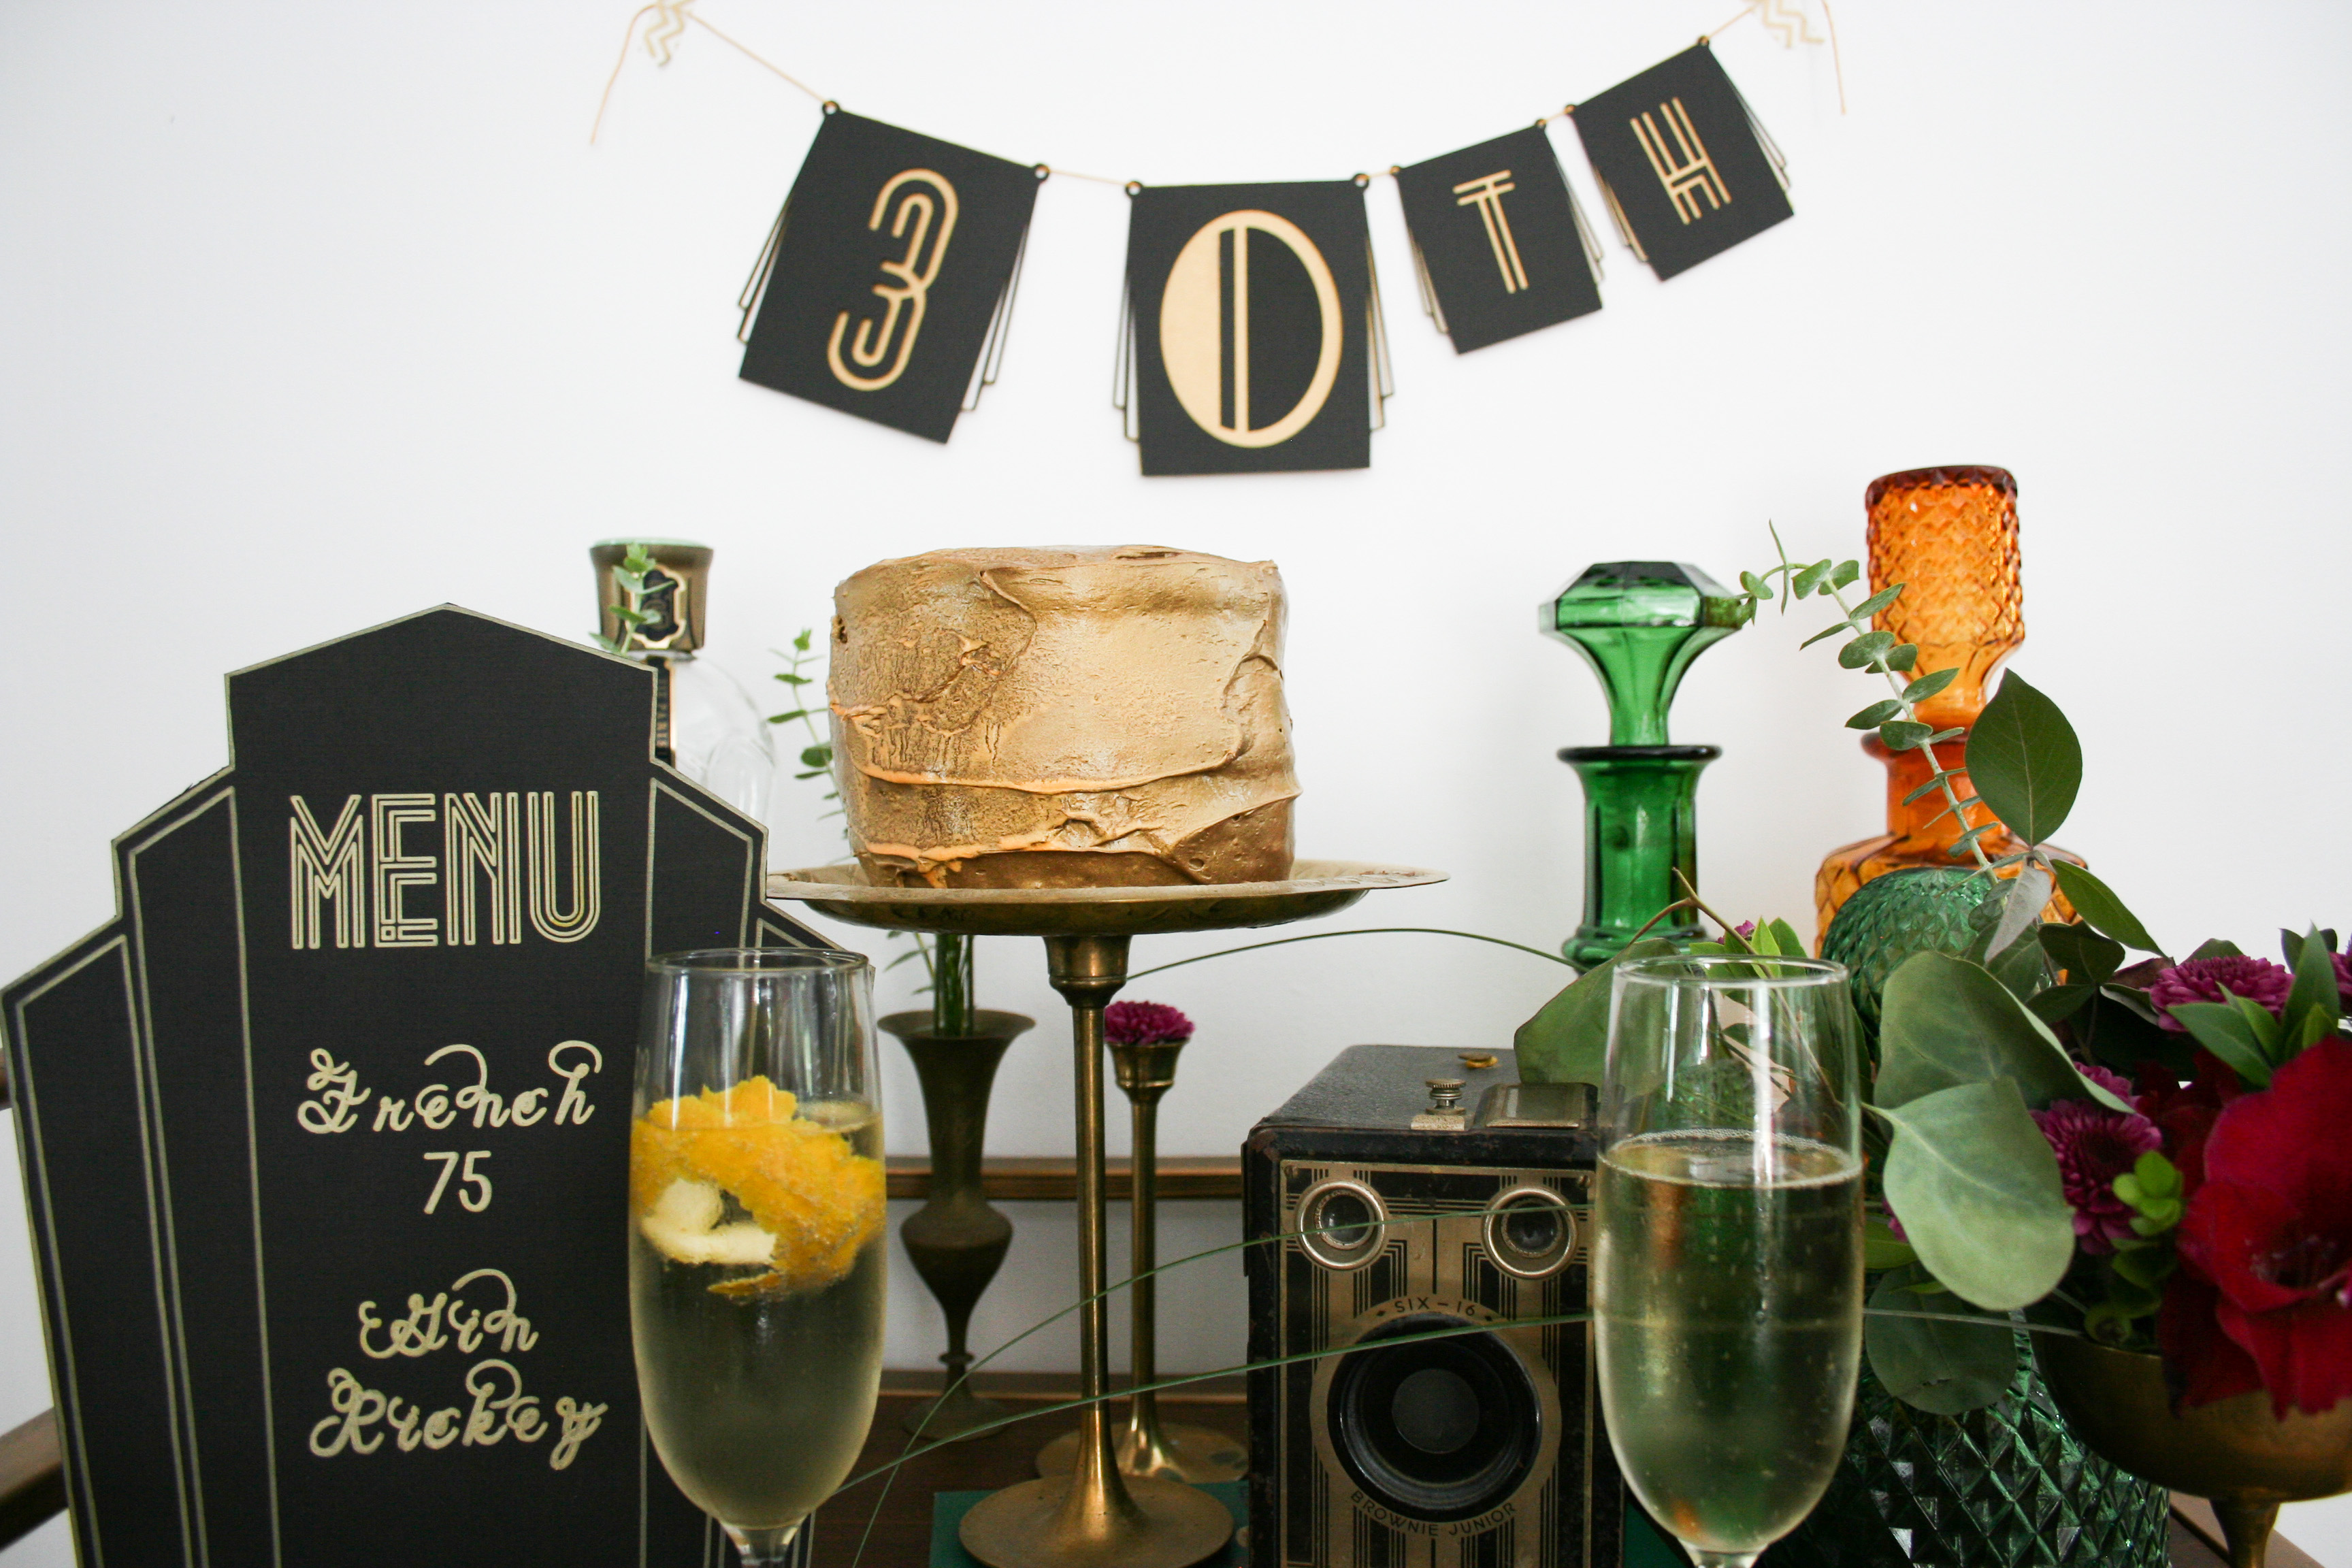
As part of the Cricut Design Space Star Challenge, I am a member of a team of talented bloggers and each month we choose a theme and create a project based on that theme. This month our theme is a Roaring ’20s Birthday Party! I was thinking of hosting a girlfriend’s 30th Birthday party! The perfect way for her to say goodbye to her roaring twenties with an End-of Prohibition-Style Roaring ’20s 30th Birthday Party!
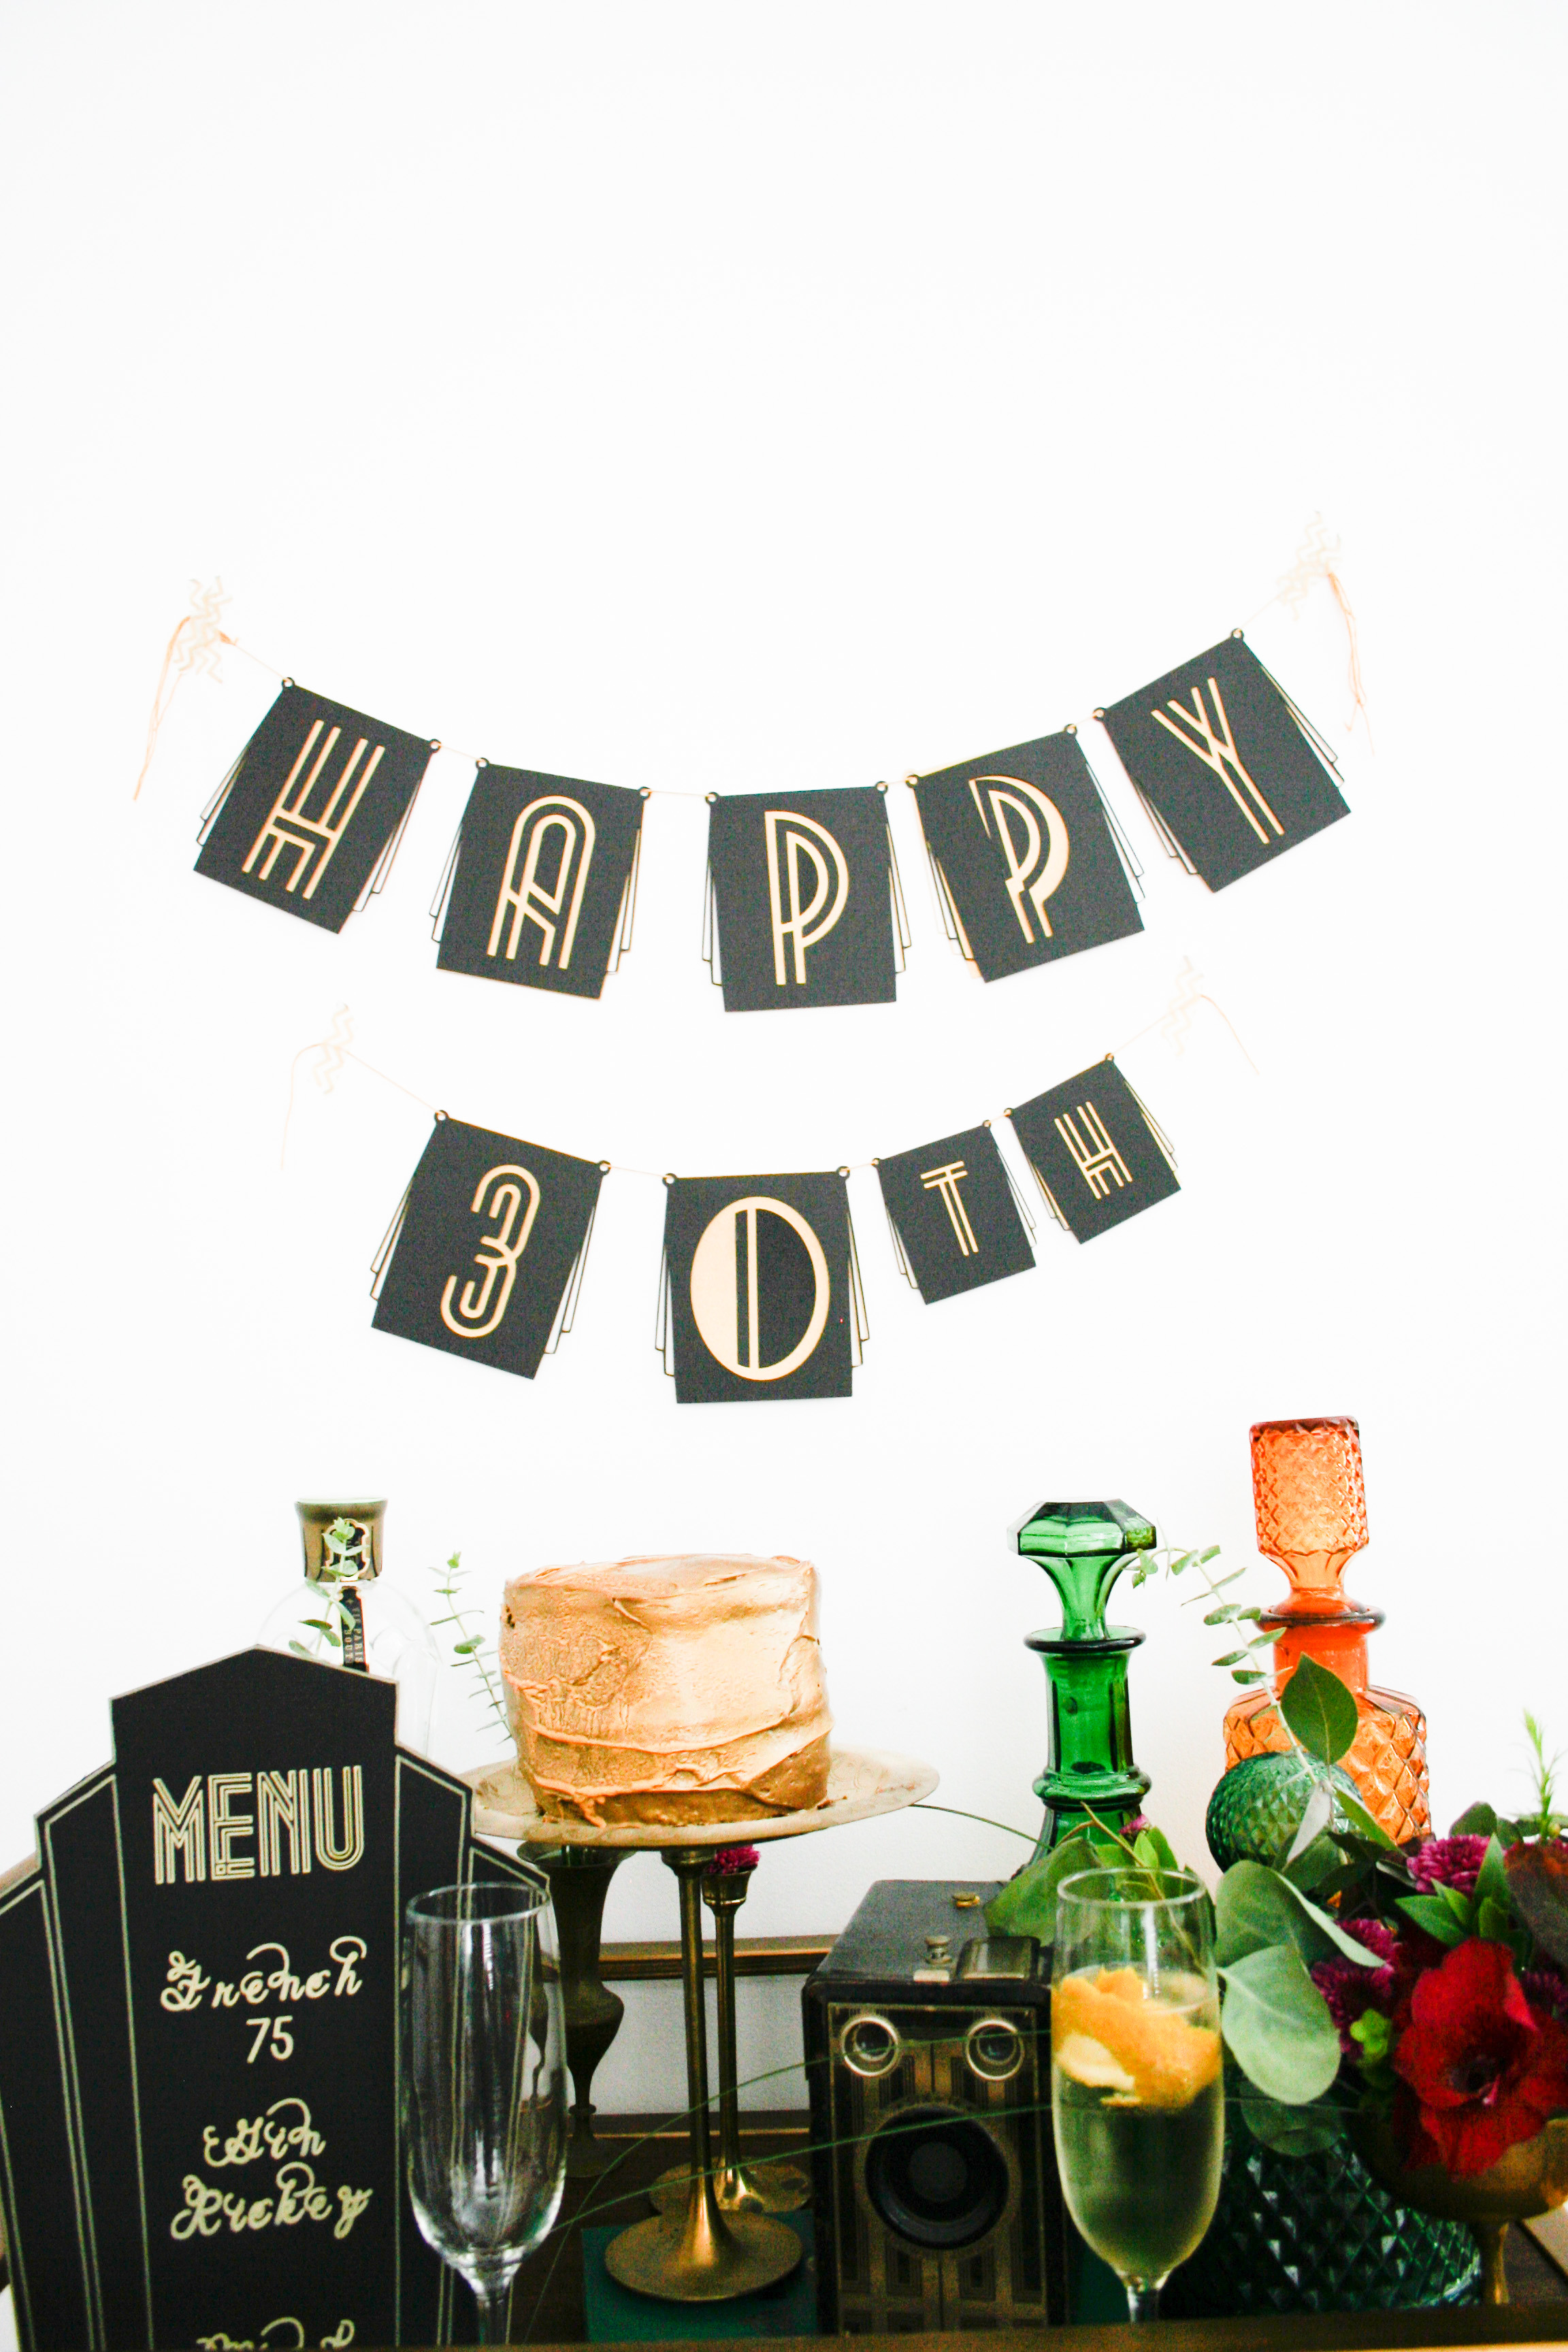
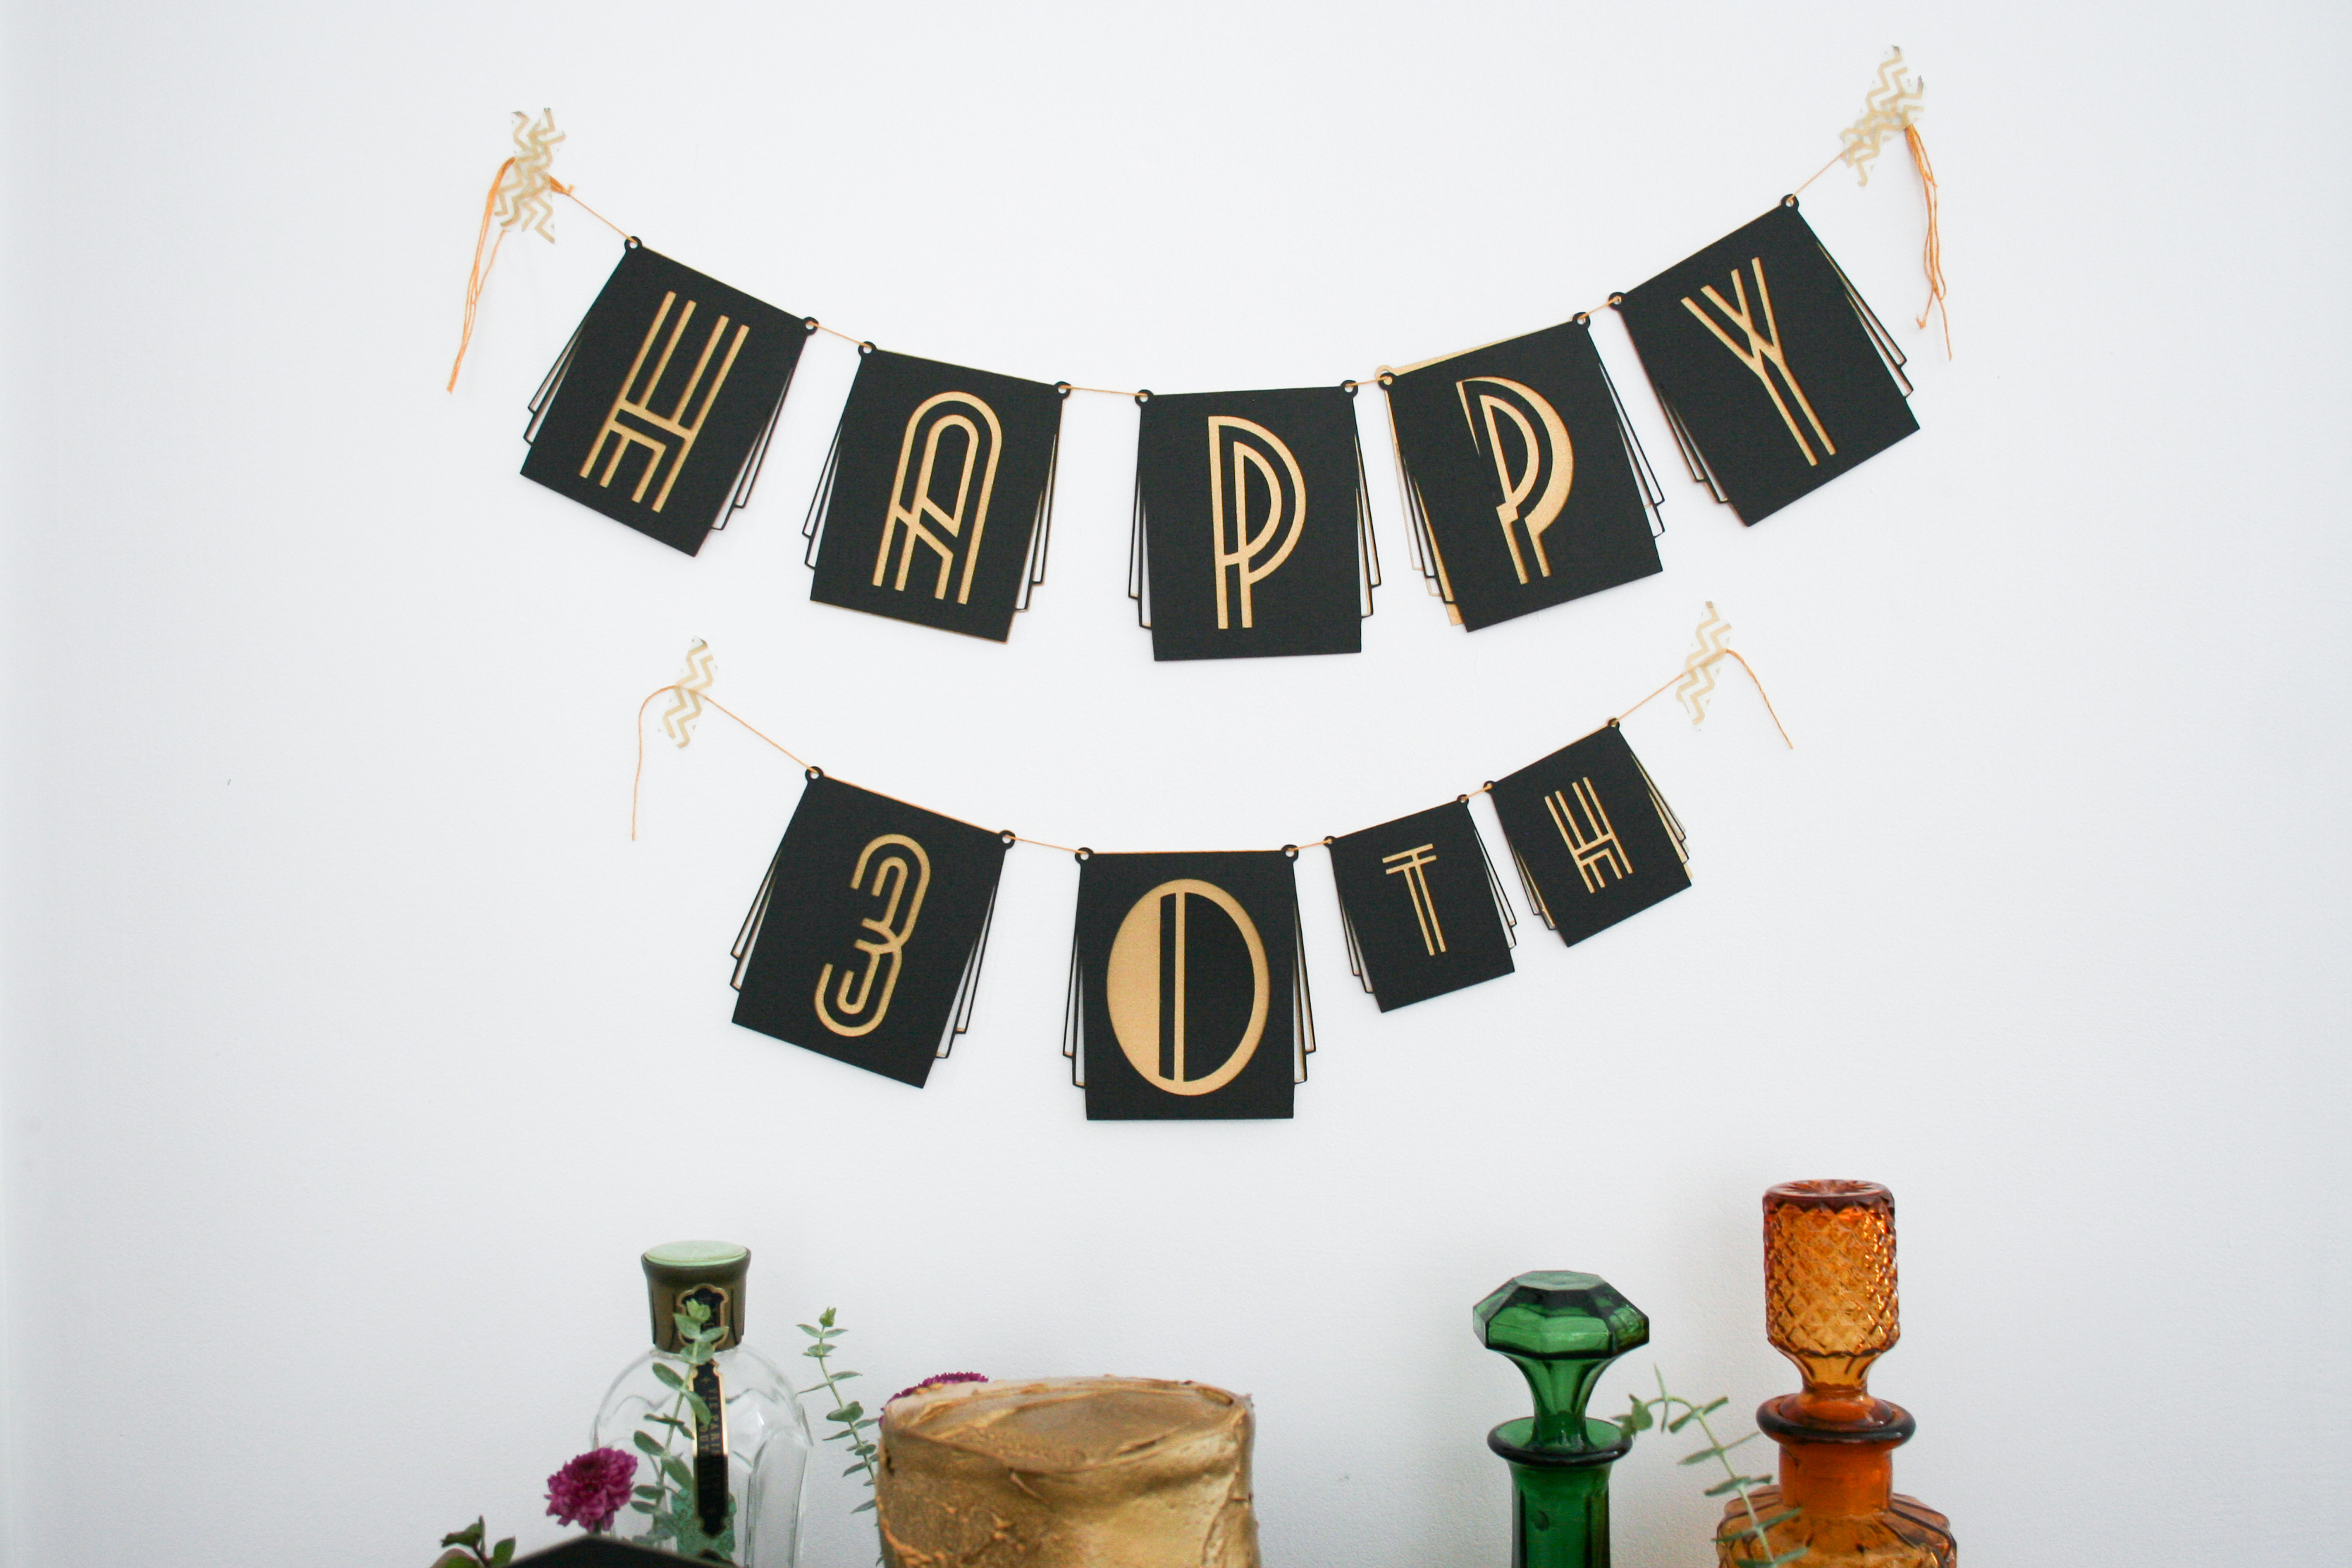
Make an Art Deco Happy Birthday banner! 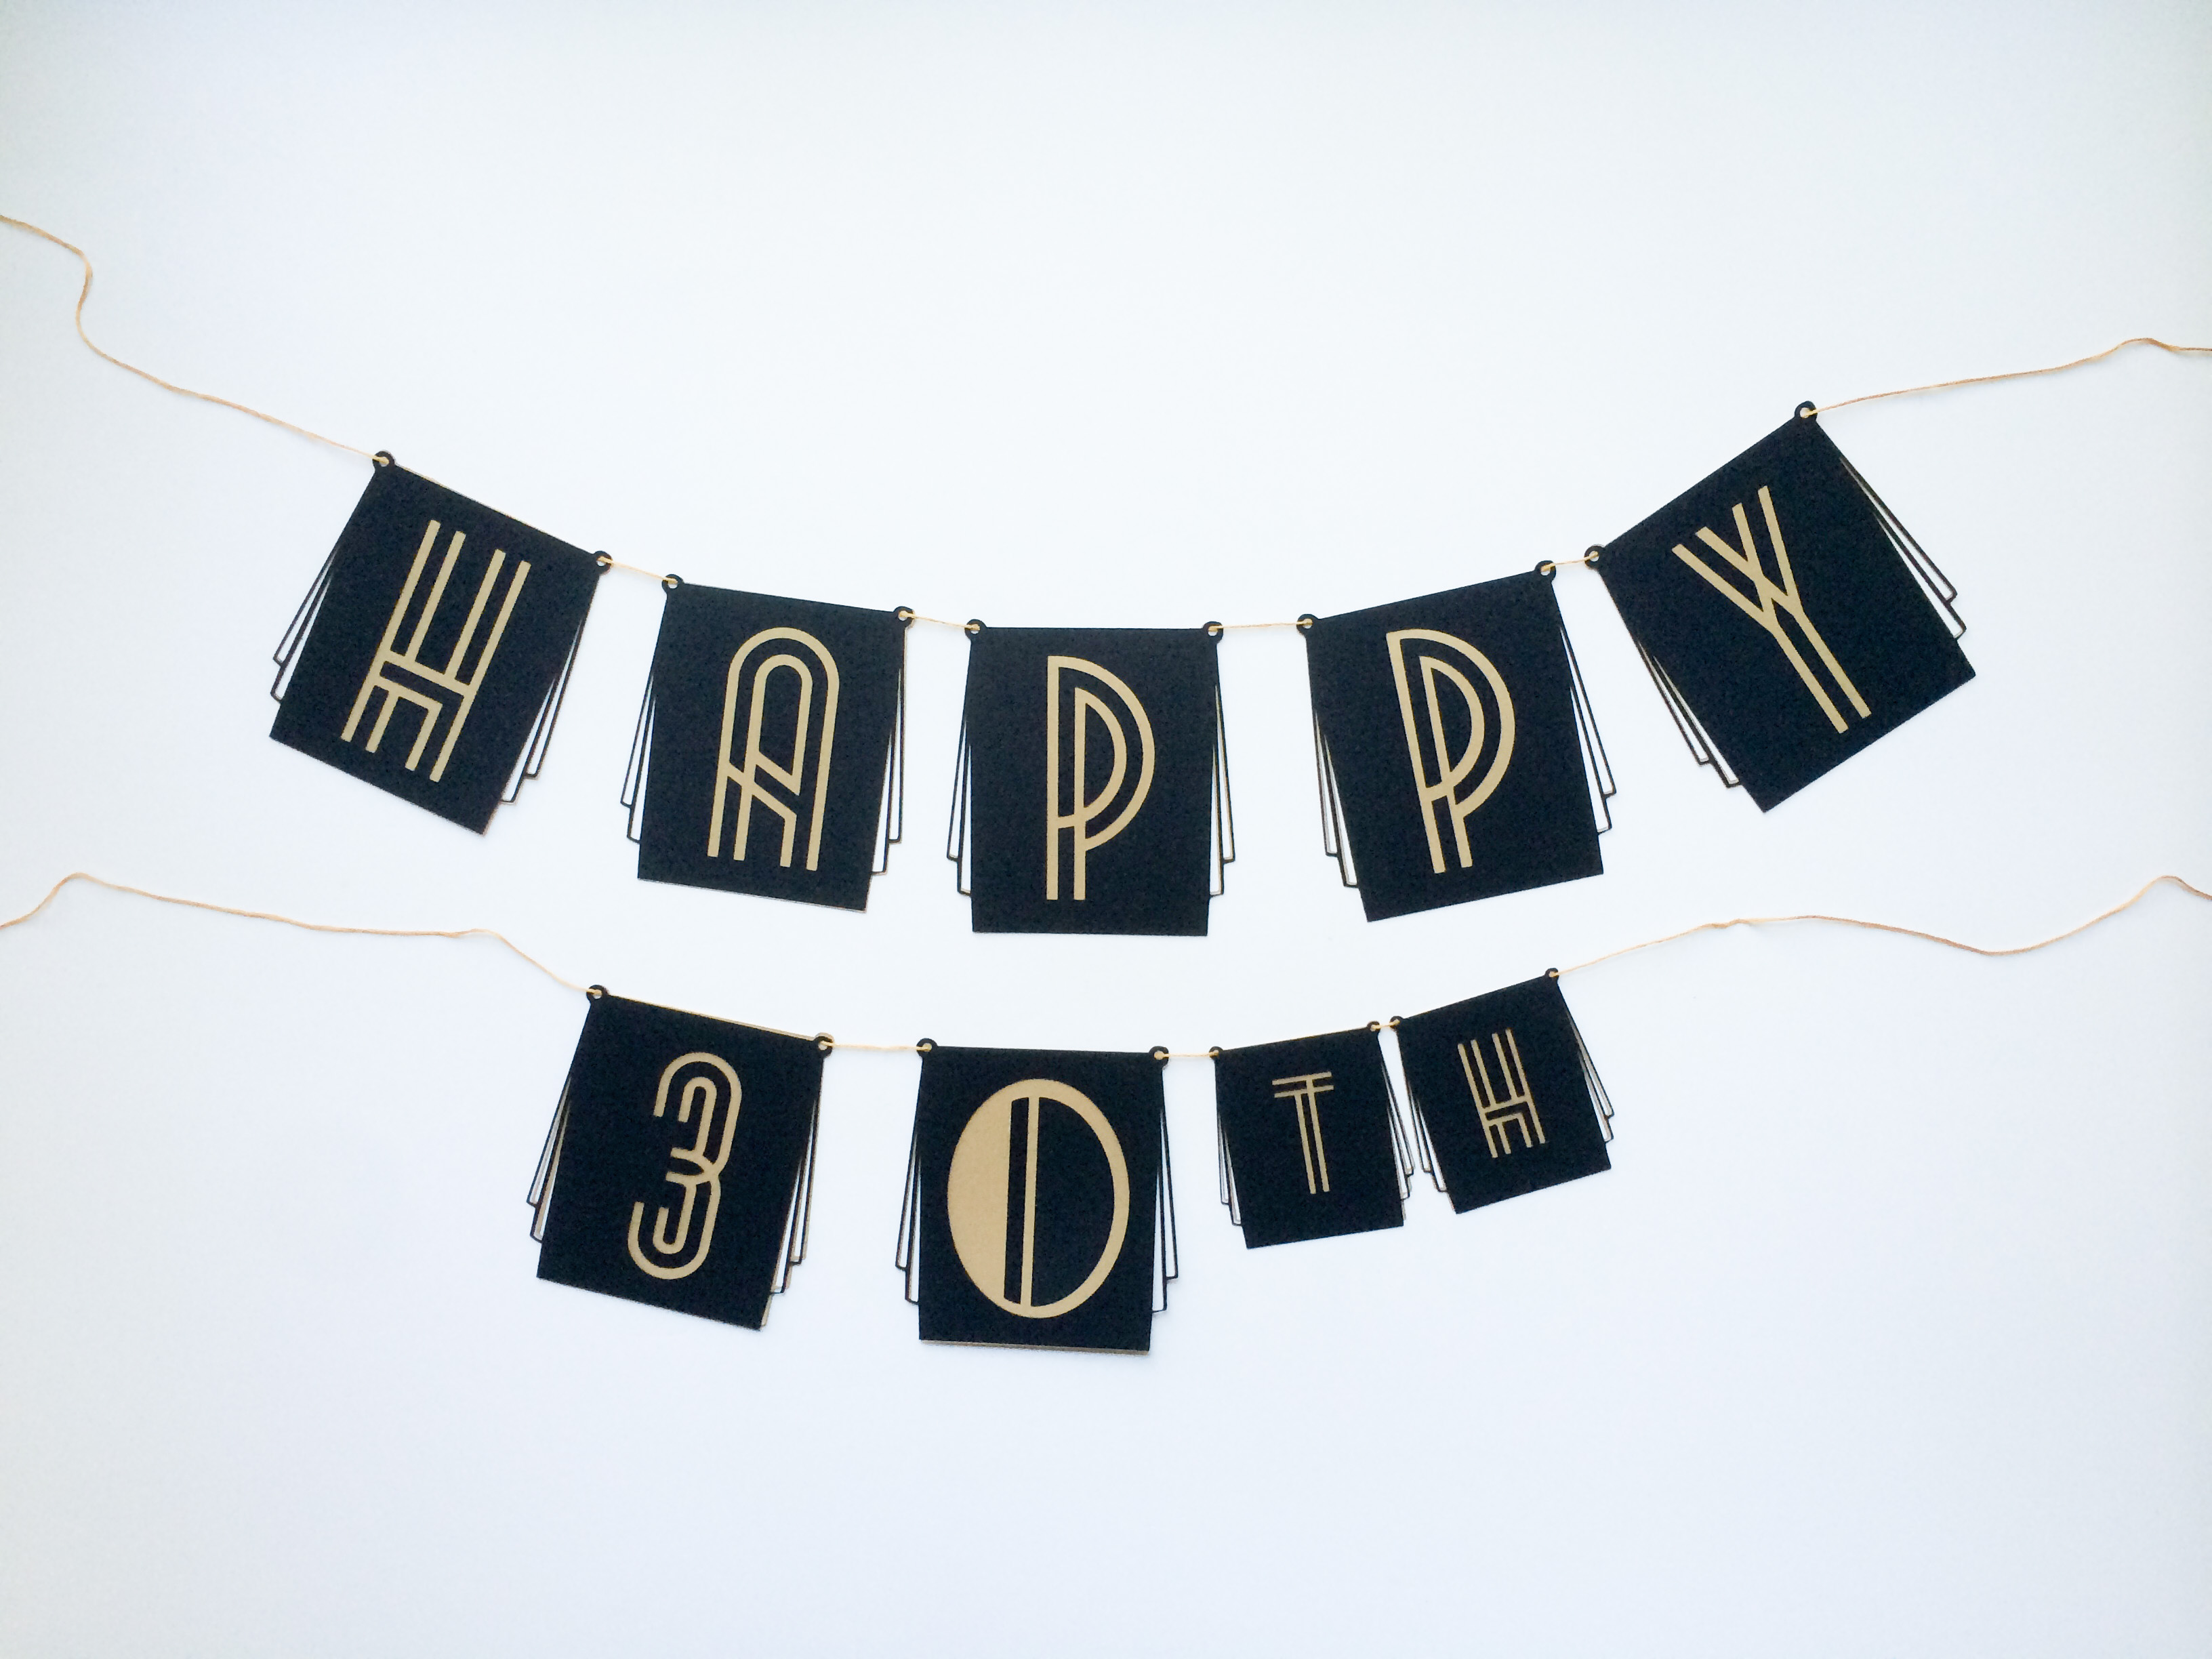 And dress your bar cart with a drink menu.
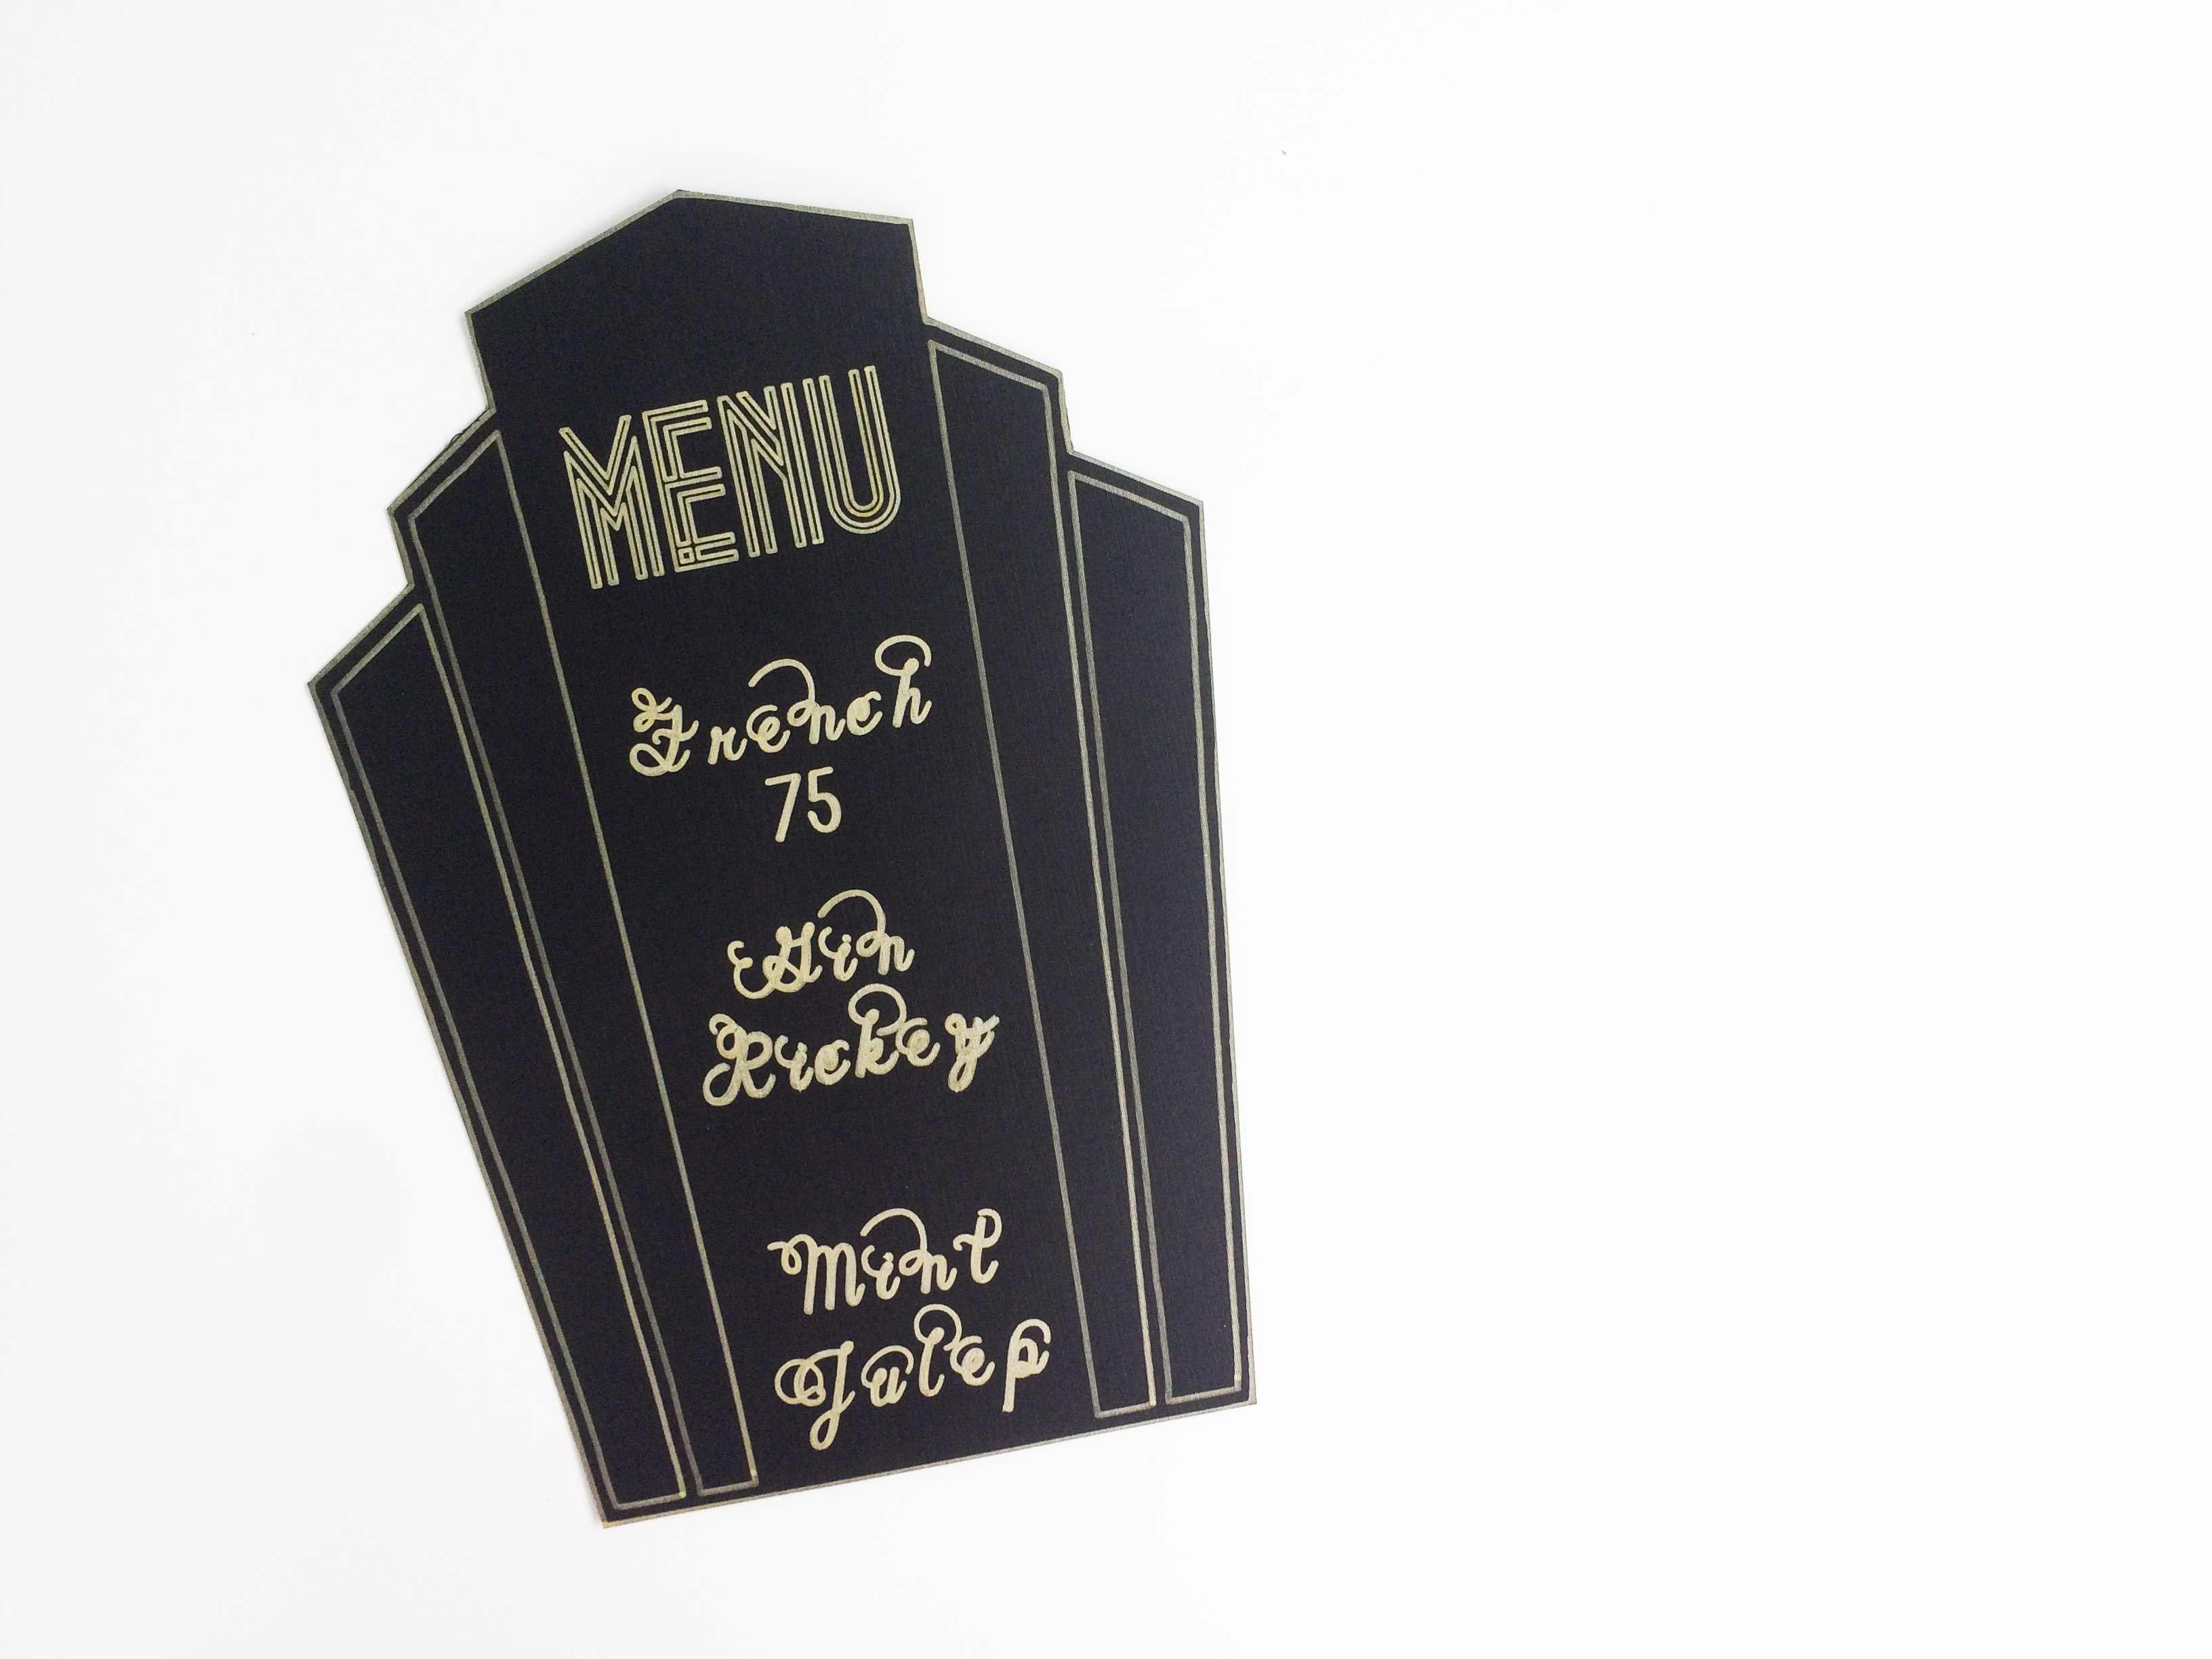 Want to make these for your own party? Let’s start with the Happy Birthday Banner! You’re going to need a few materials.
Materials: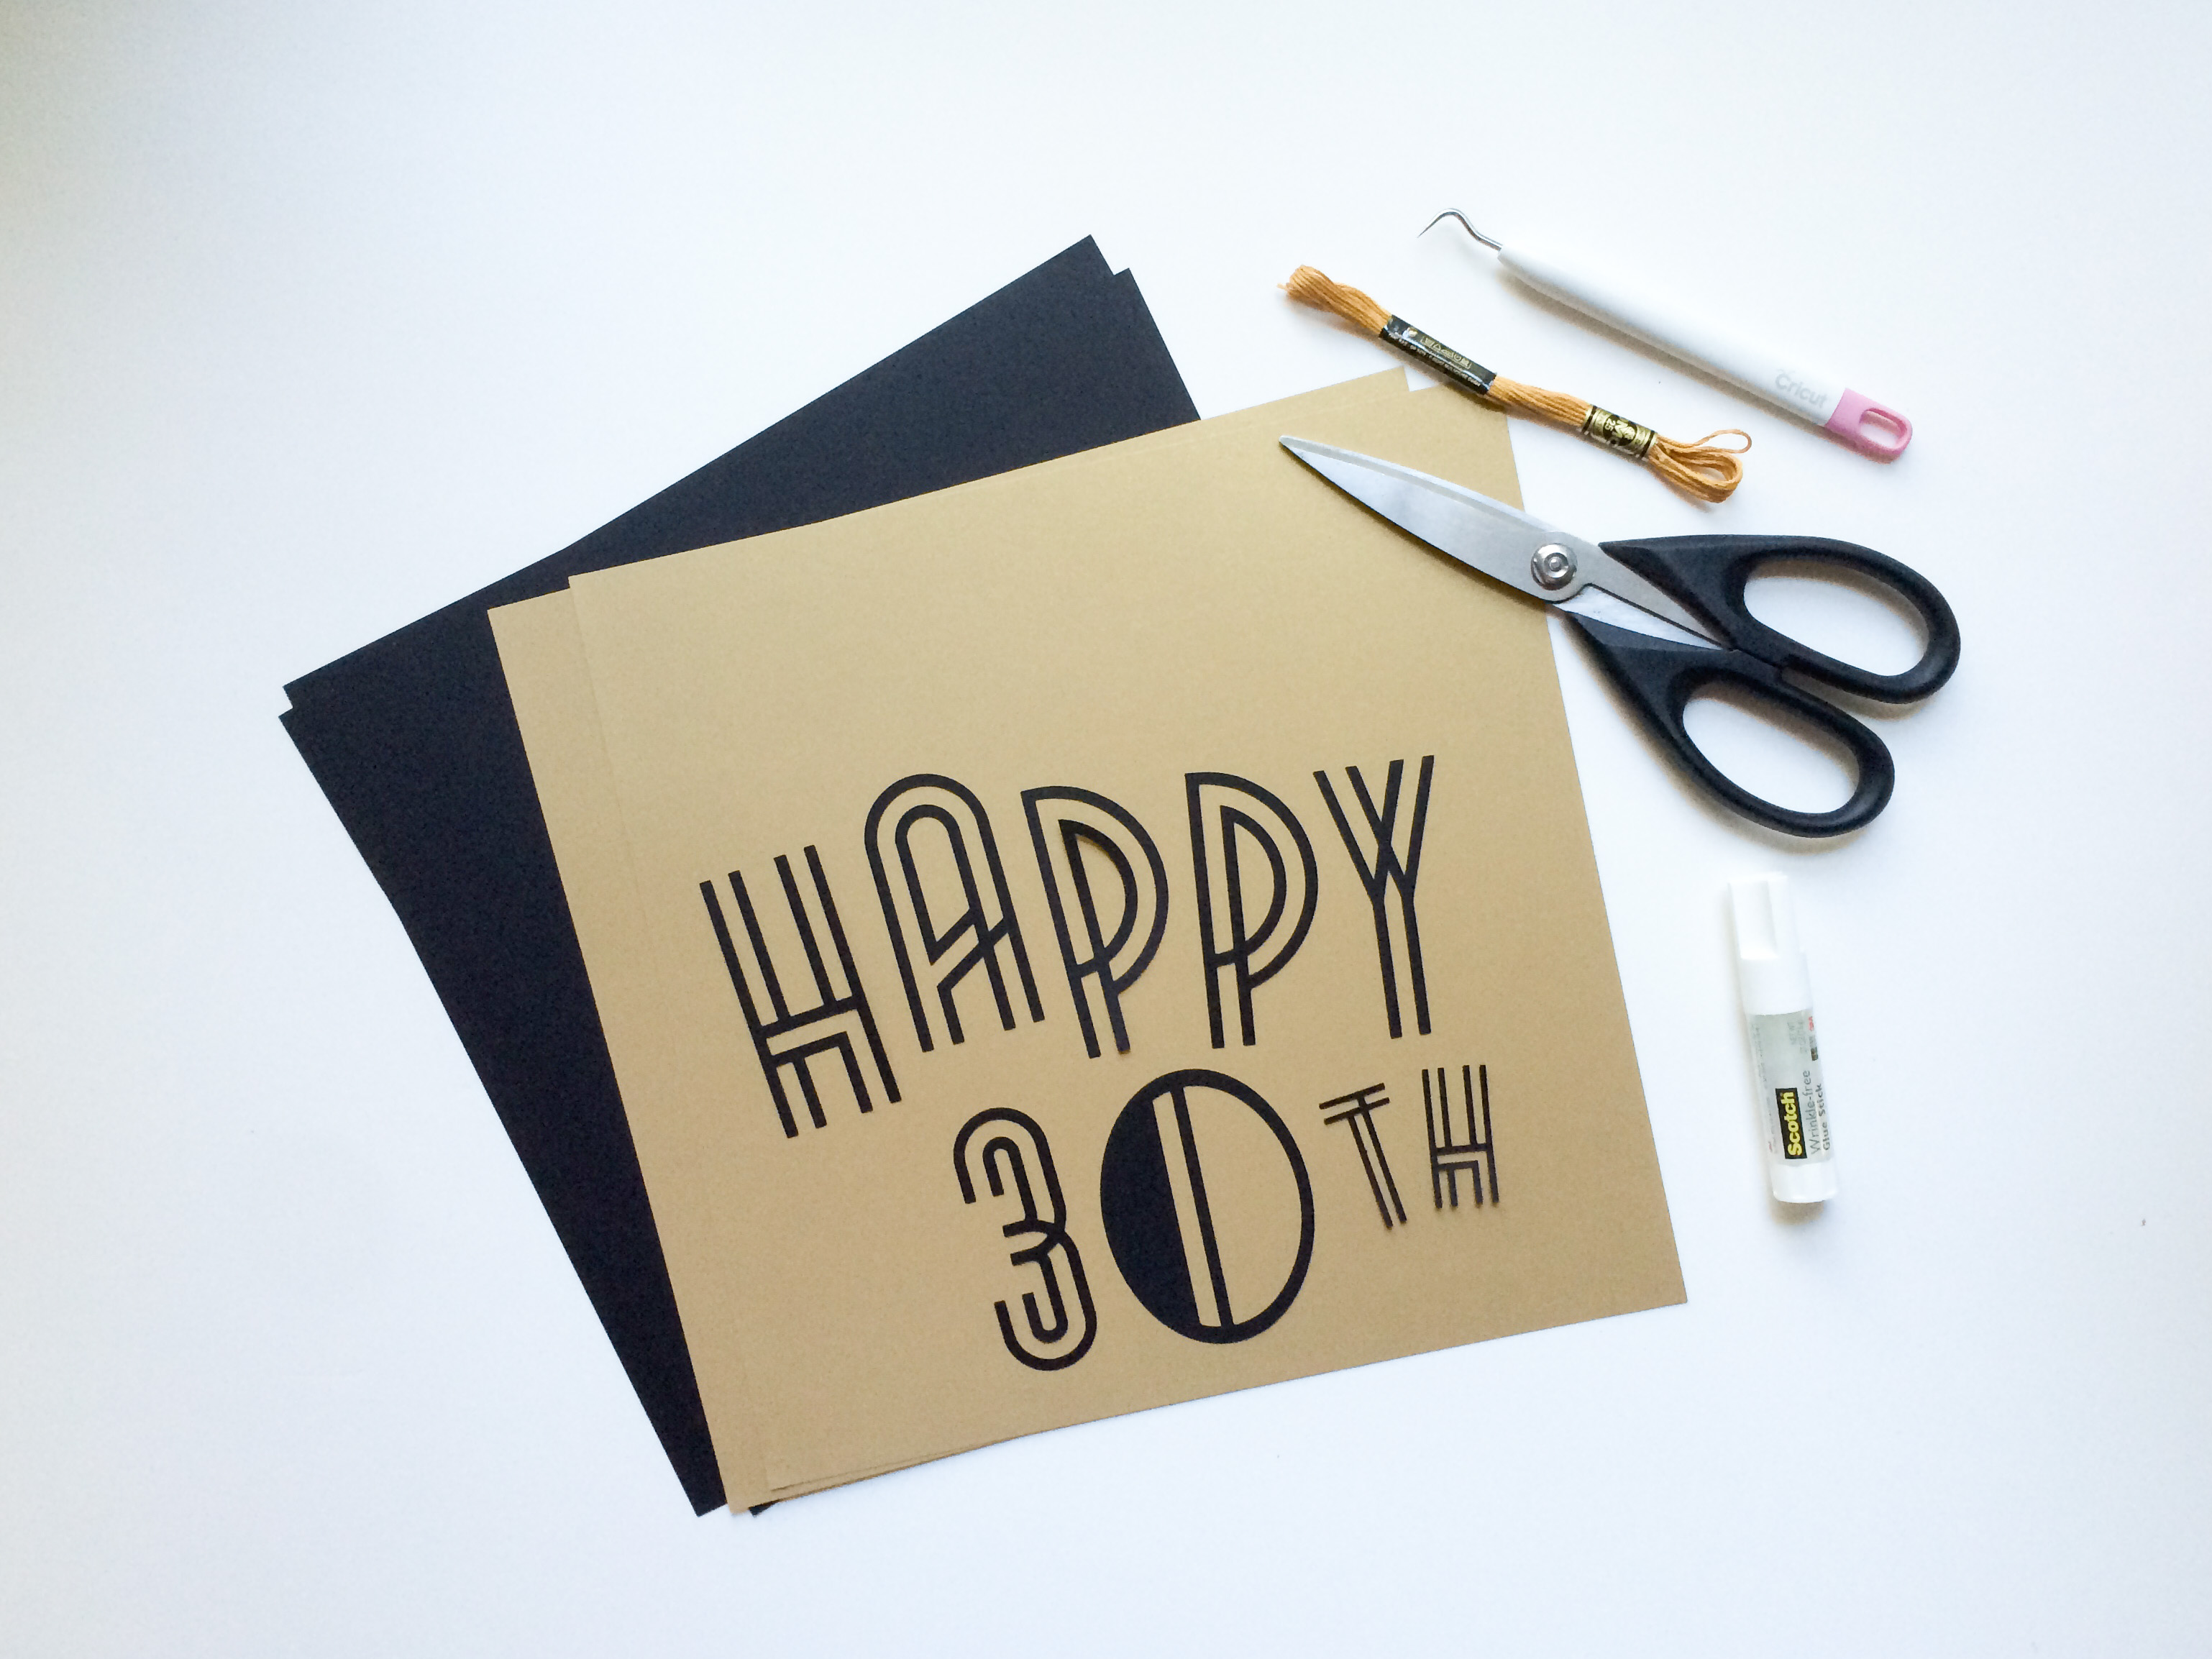
- Cricut Explore™
- 2 sheets of 12×12 black cardstock
- 2 sheets of 12×12 gold cardstock
- gold or black embroidery floss
- scissors
- glue stick
- Art Deco Banner – free
- Metropolis 1920s font – free
Optional materials:
- 1 extra sheet of 12×12 black card stock (for any mistakes)
- 1 extra sheet of 12×12 gold card stock (for any mistakes)
- Cricut Weeder tool
Instructions: I designed my project using Cricut Design Space™. No Illustrator or Photoshop needed! Just free fonts, free clip art, and Design Space.
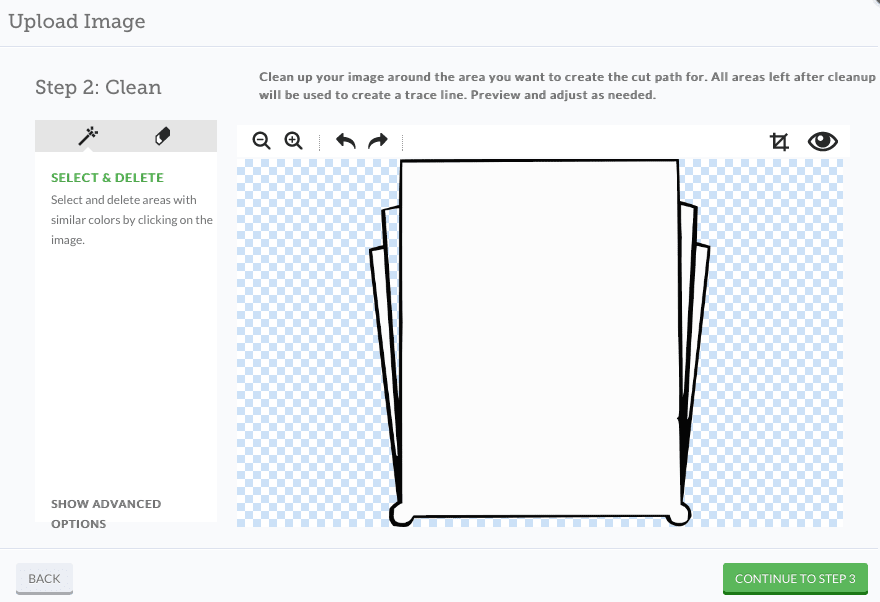
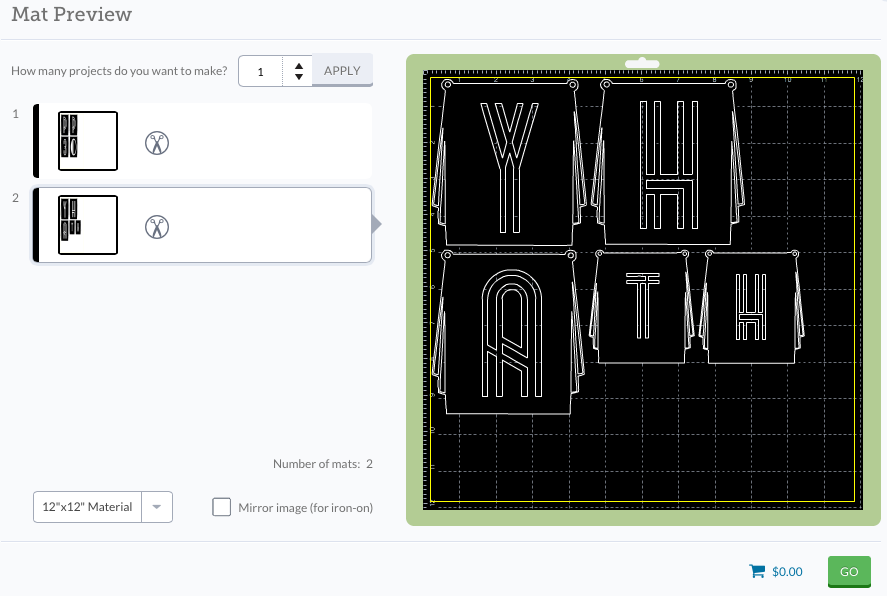
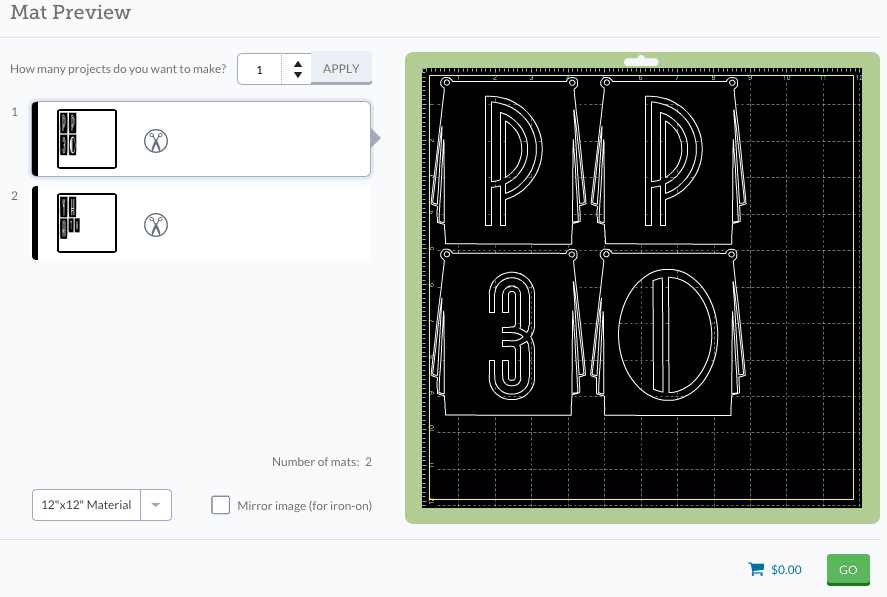
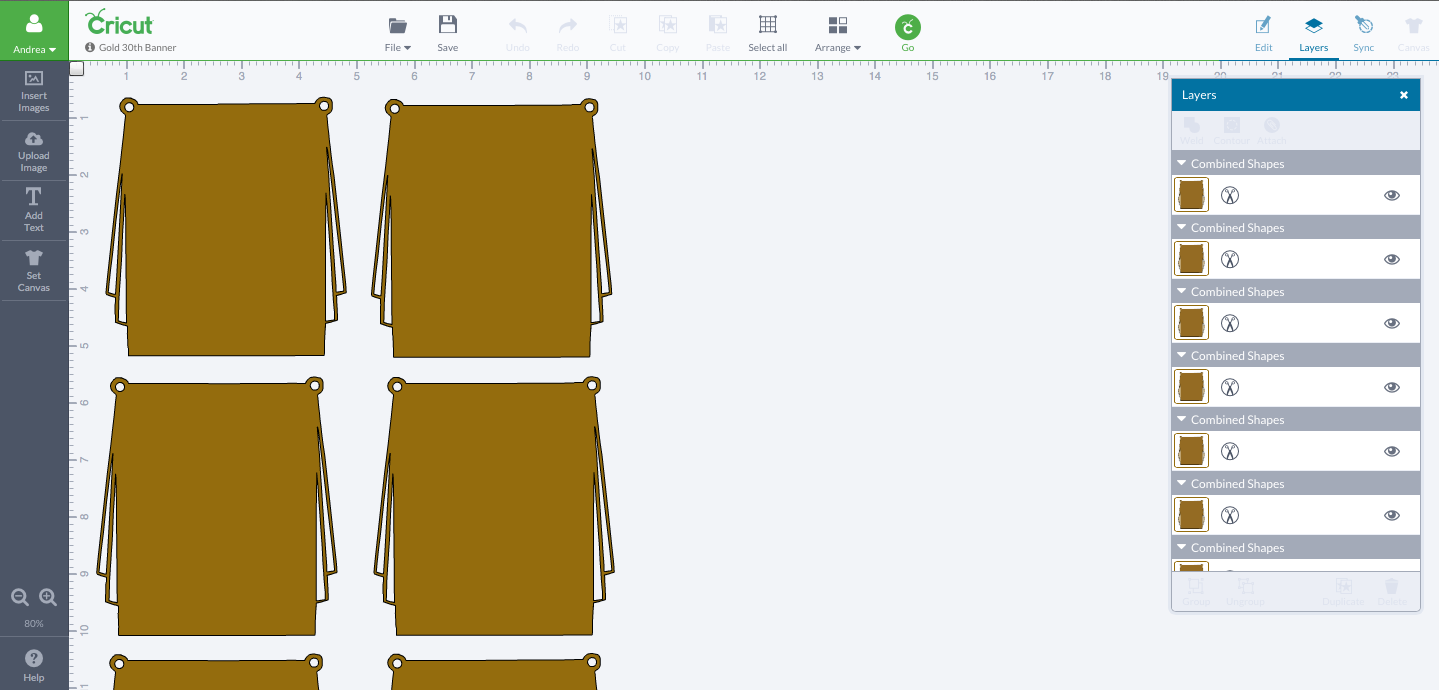
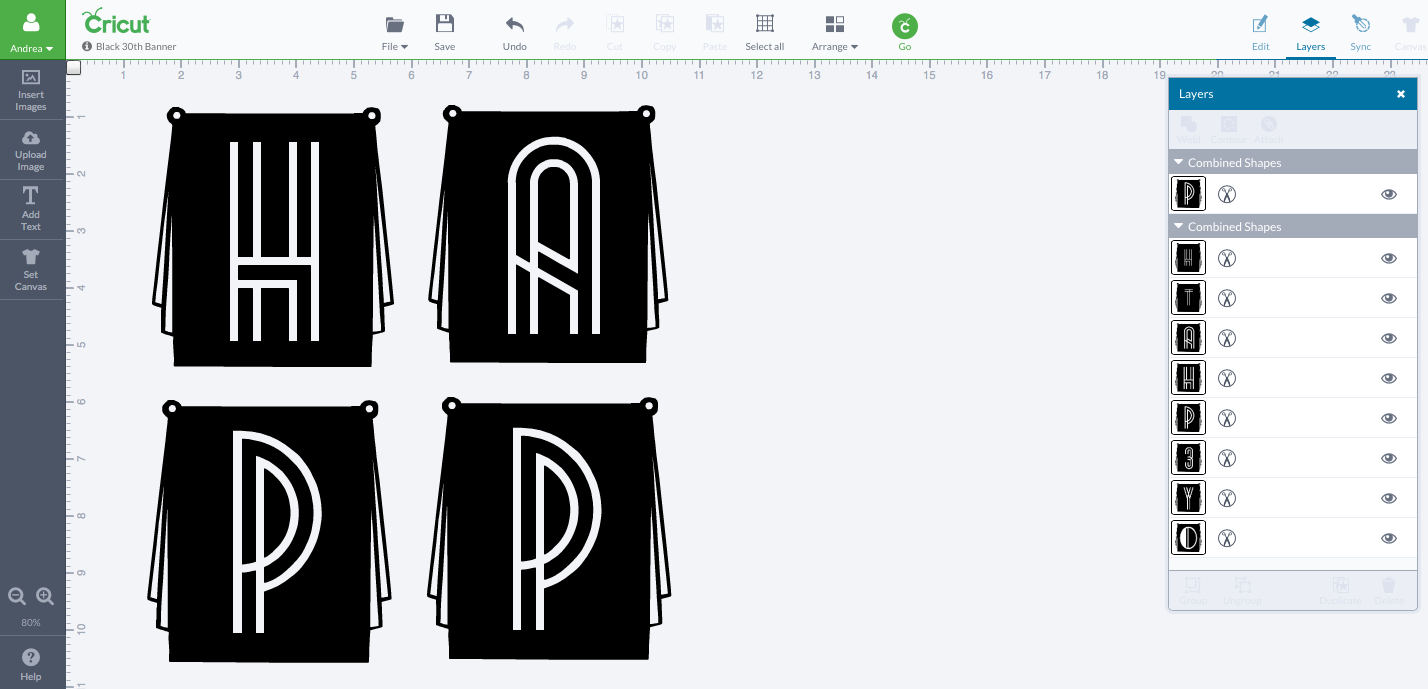
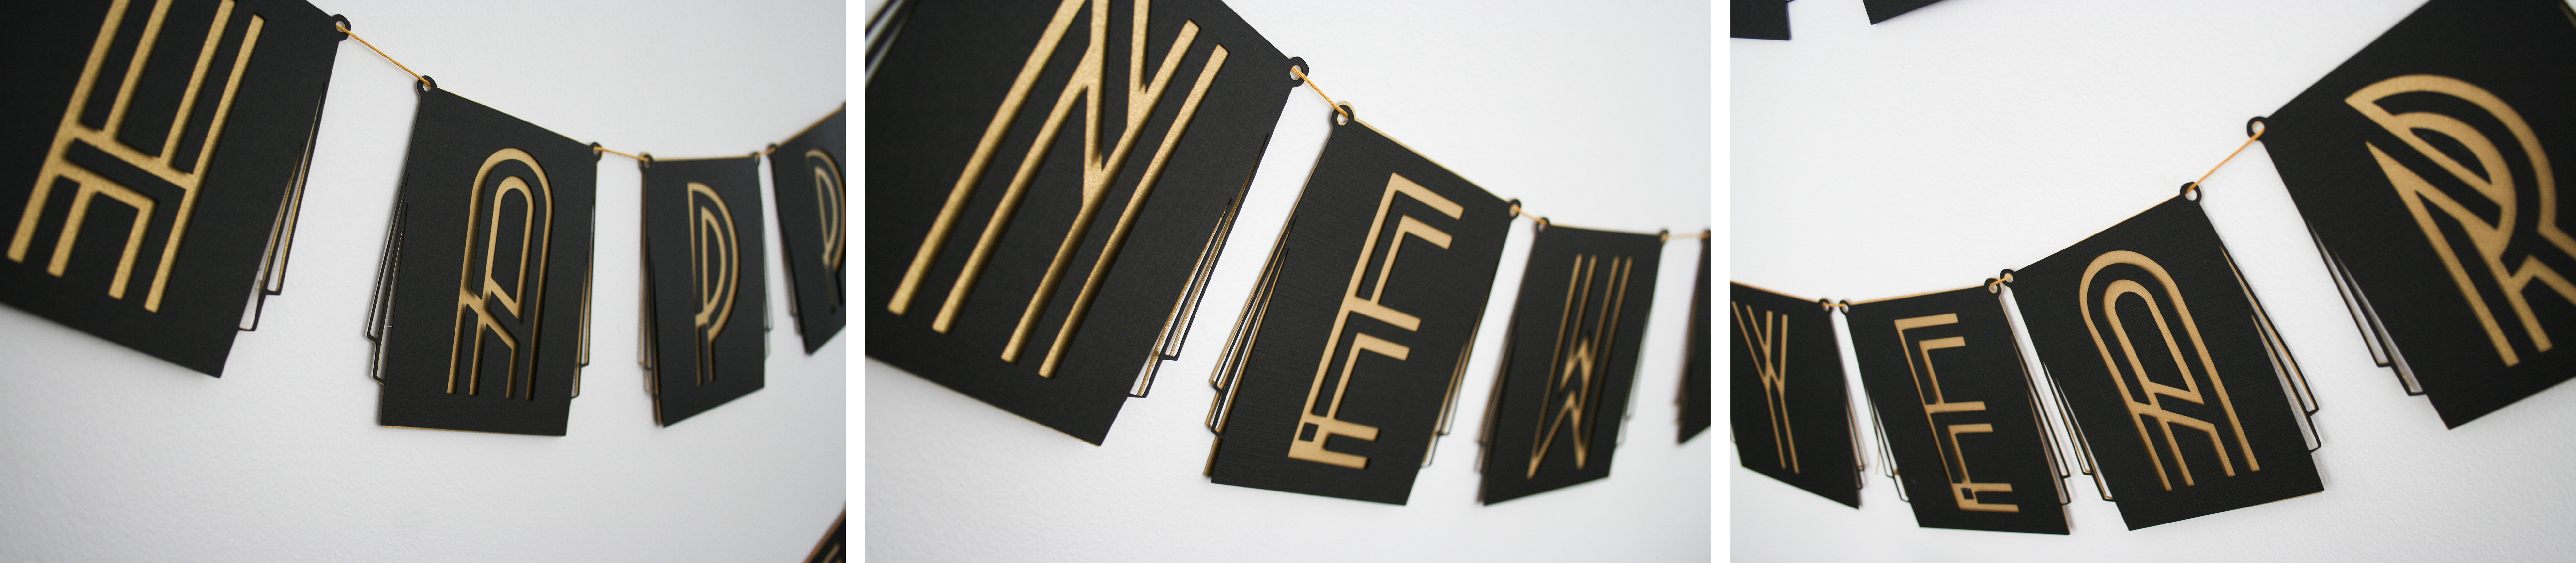
- Step 1: Upload the font to your computer and the art deco banner file to Cricut Design Space™. In order to get the side cutouts, you will have to clean up the art in Design Space by removing the white. See below photo. Then resize the banner to the size you want, mine were approximately 4 x 5. You will then need to add circle cut outs to the tops. Then copy and paste the banner for as many letters you will need for your banner. Then add the letters and weld* each letter to each banner. *This was my first project with the Cricut Explore and while there is a learning curve, I simply watched a couple of their instructional videos and figured it out.

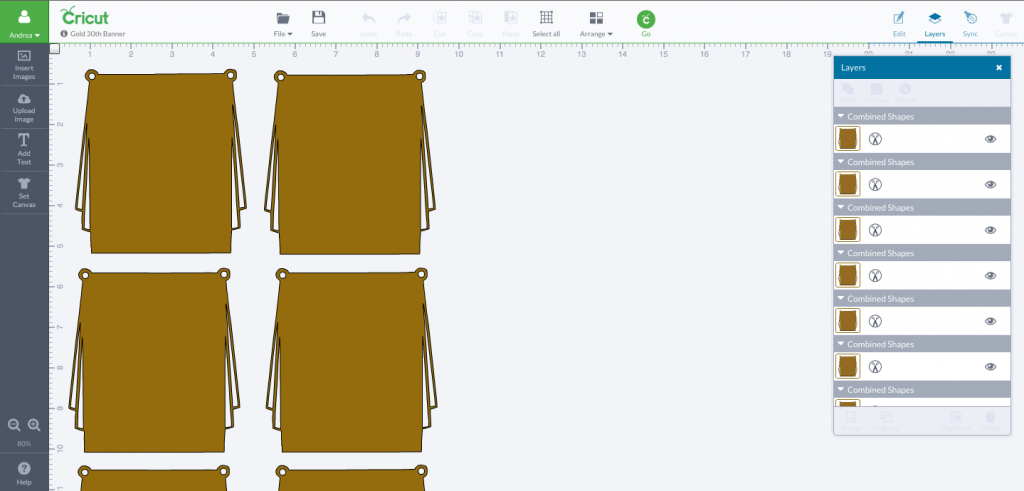

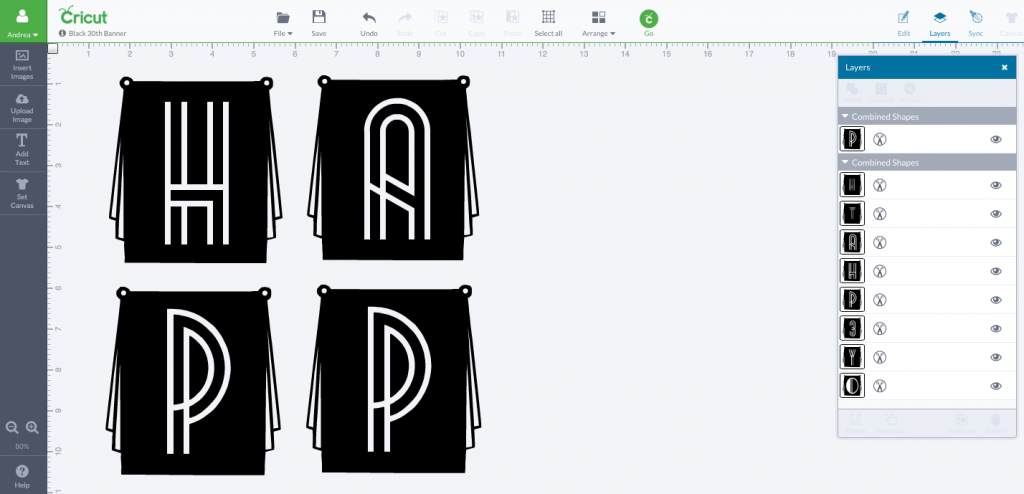
 Once the design is uploaded and looks good, you click GO, and the Cricut Design Space™ software does all the hard work for you and arranges the artwork on the mat for cutting.
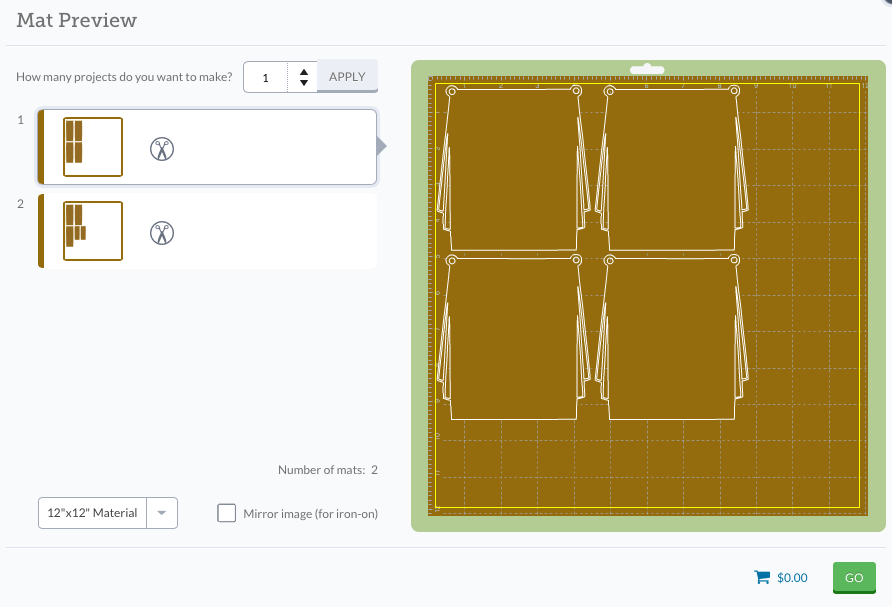

 The Cricut Explore™ does all the cutting for you. It’s a lean, mean, green cutting machine. Ok, it’s not mean. But like I said, it cuts a lot of different materials. So before I press the Go button, I simply set the cutting dial to Light Cardstock and let the Cricut Explore™ do the dirty work.


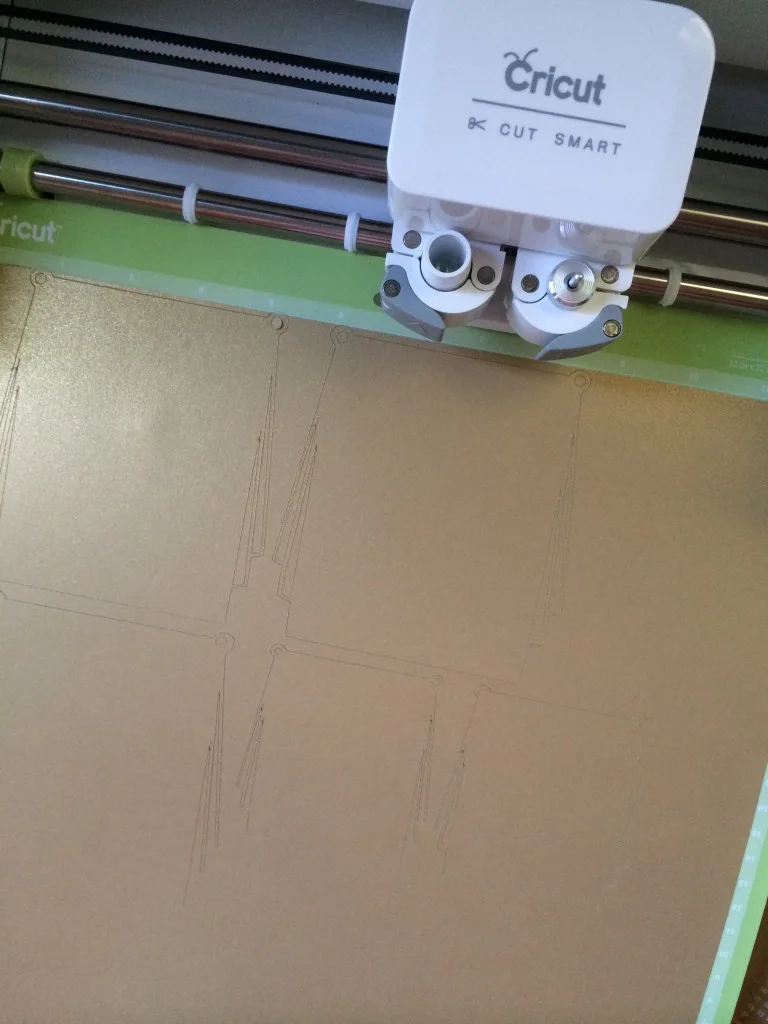
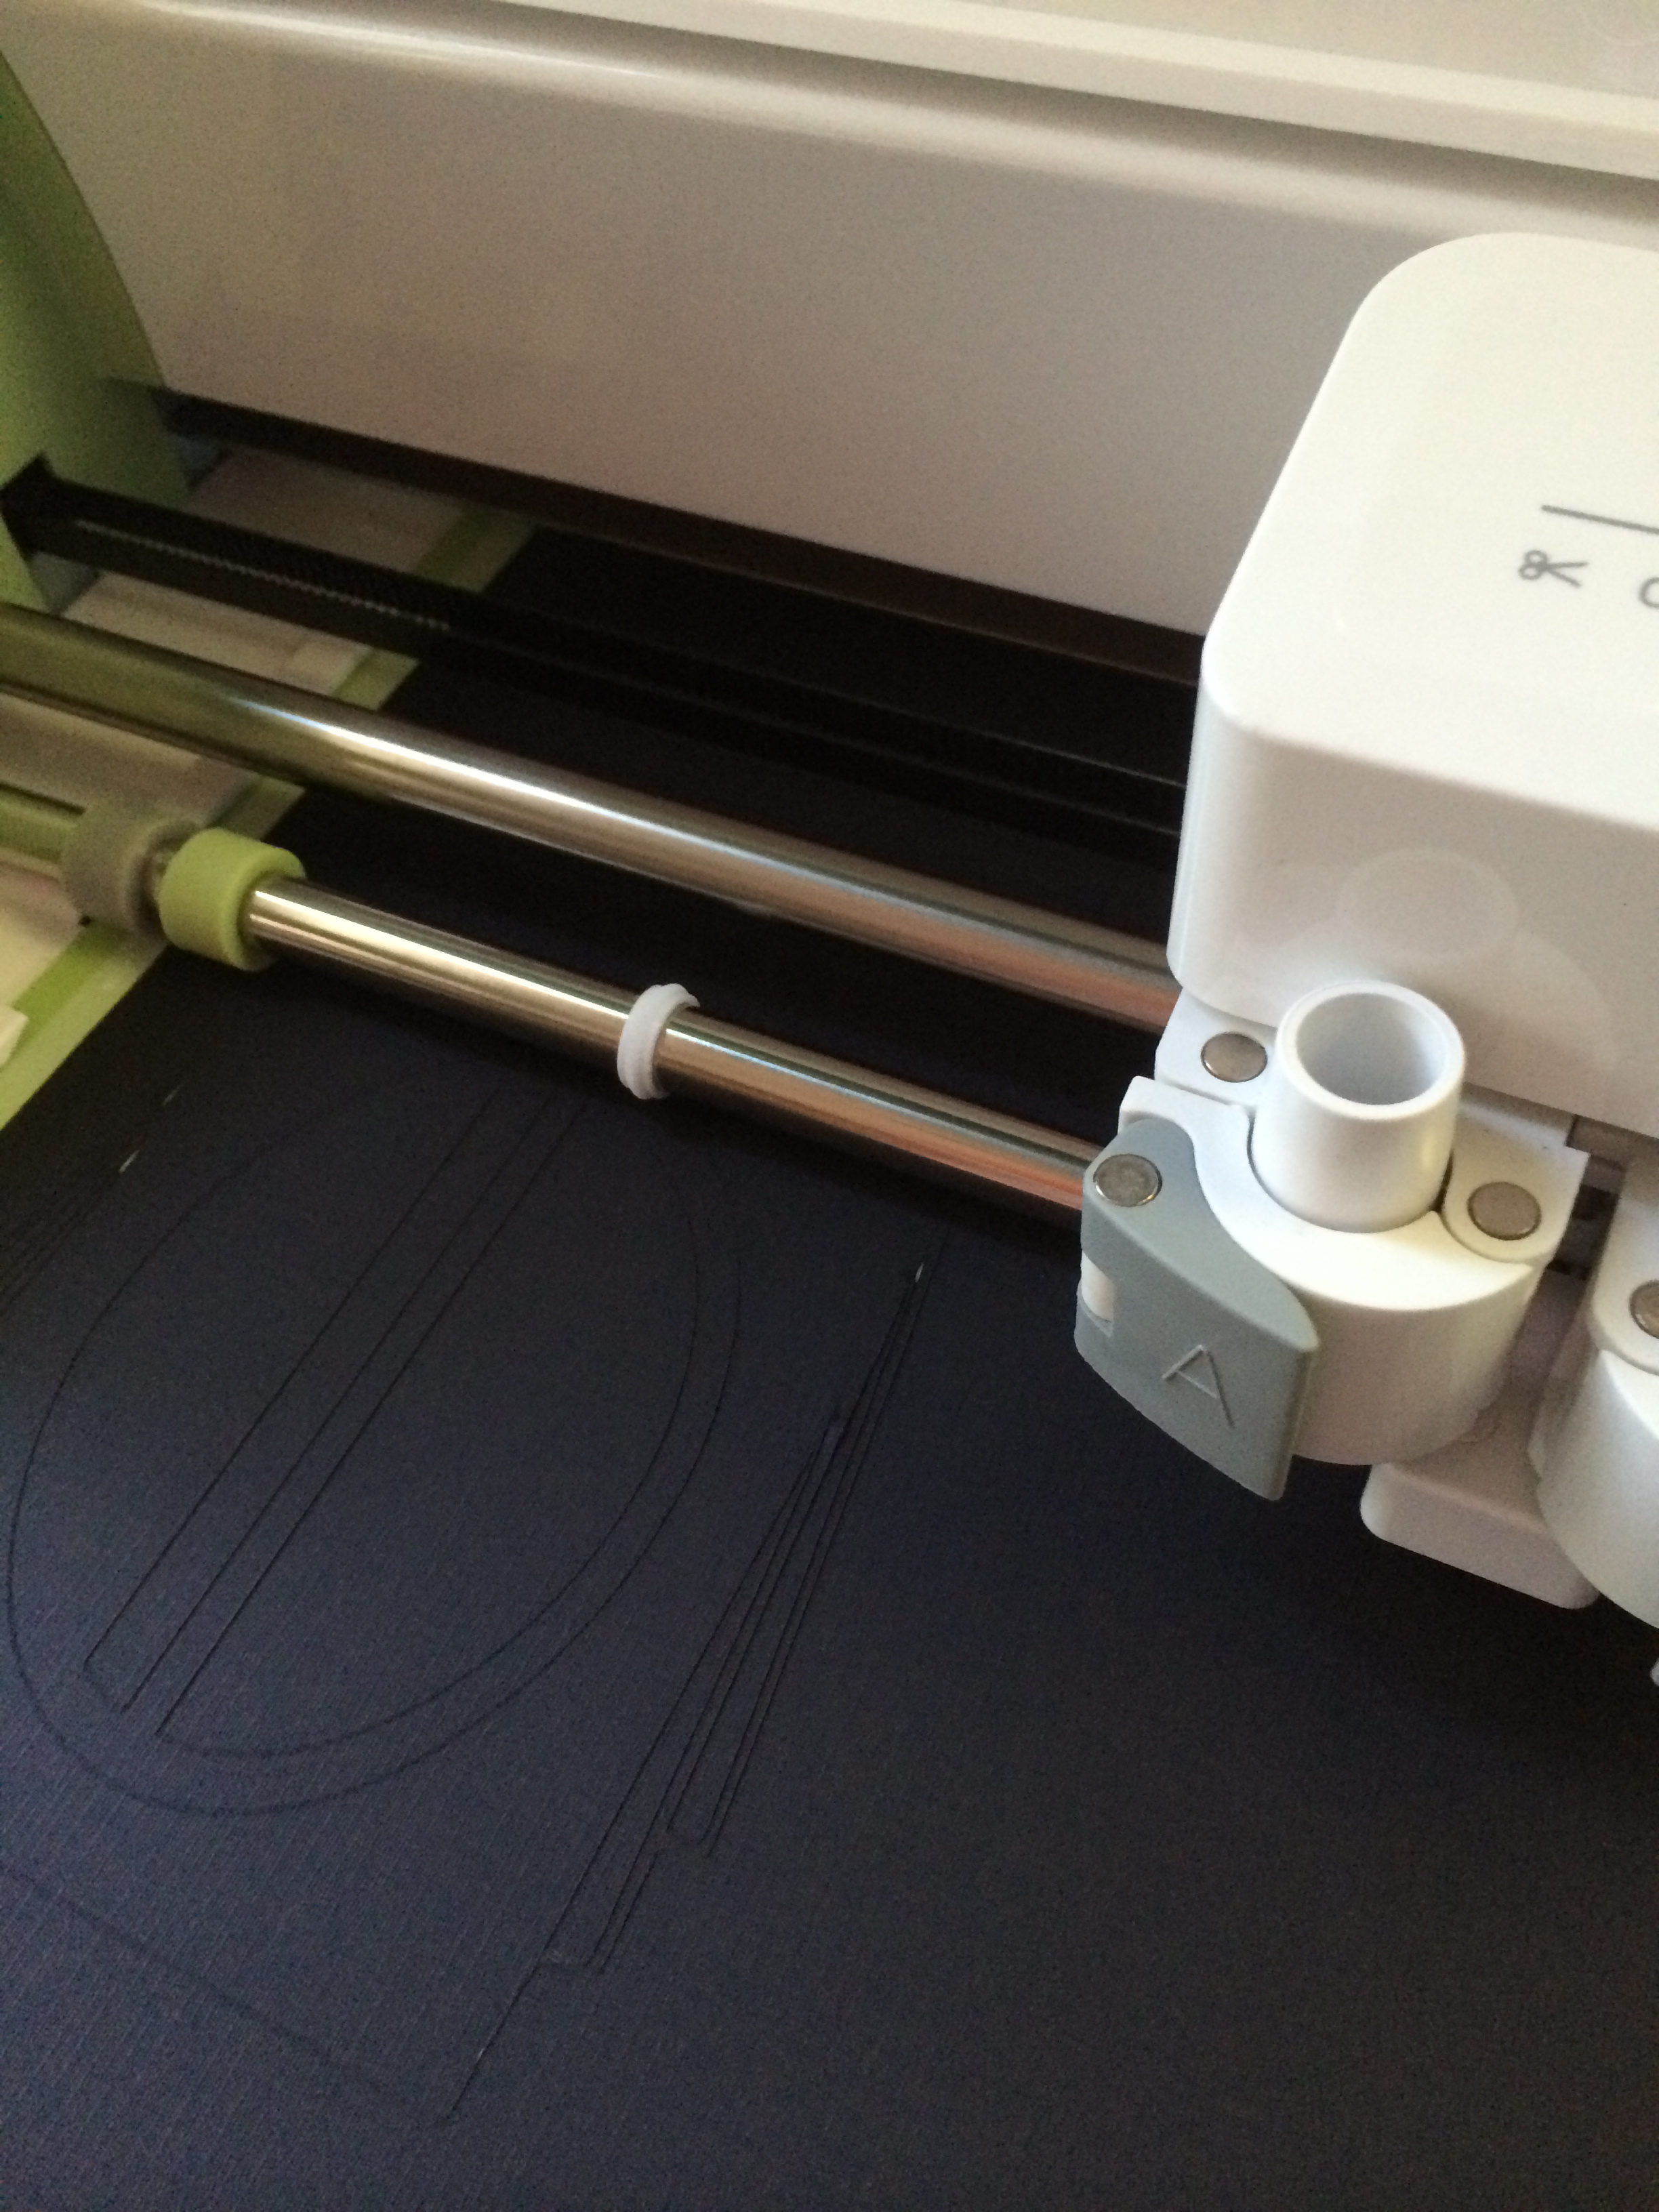

Note: Use caution when removing the banners from the Cricut Standard Grip Adhesive Cutting Mat. The tiny cut outs on the sides of the banners are delicate and prone to tearing if removed too quickly.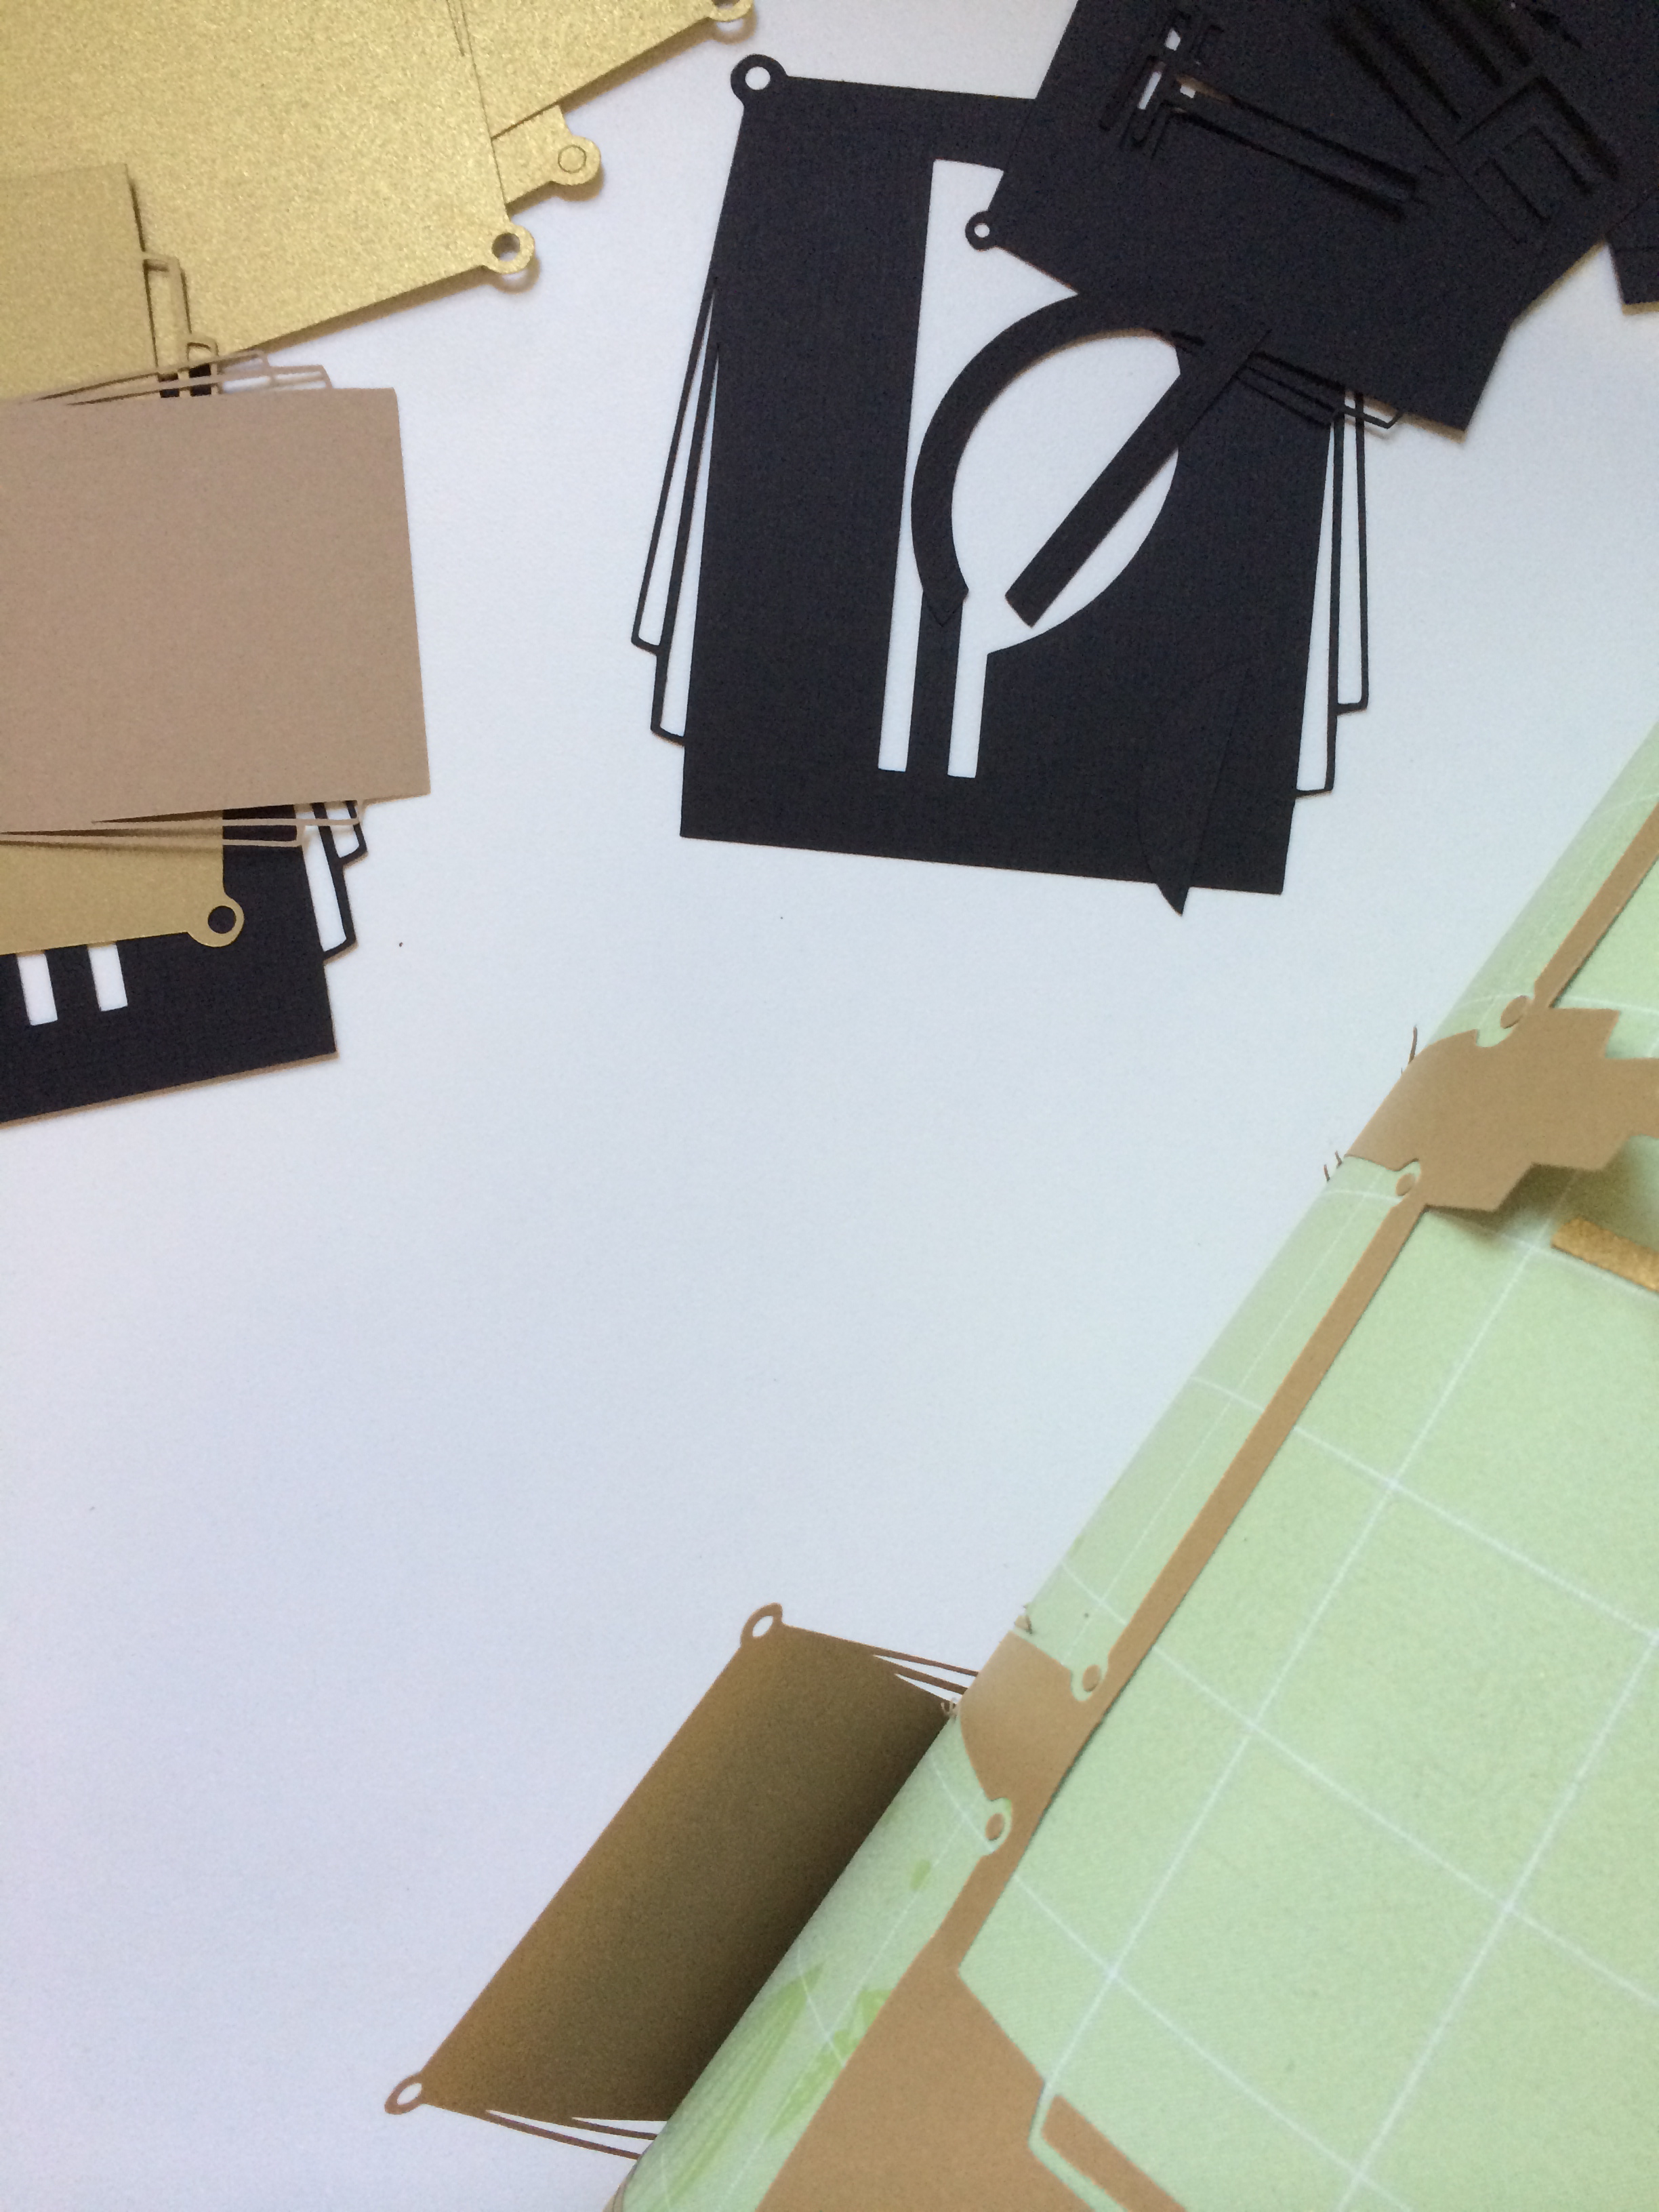
Note: Keep ALL the pieces, you will need to middles of the letters A, P, P and number 0 to glue back on in Step 3.
- Step 2: Match up the black letter/number banners and their gold banner backings.
- Step 3: Glue the inner letter pieces of A, P, P, and number 0 onto the gold banner backing.
- Step 4: Cut two strings of embroidery floss, remember to cut enough extra to tie or tape.
- Step 5: Thread the banner flags onto the embroidery floss.
- Step 6: Hang and enjoy!
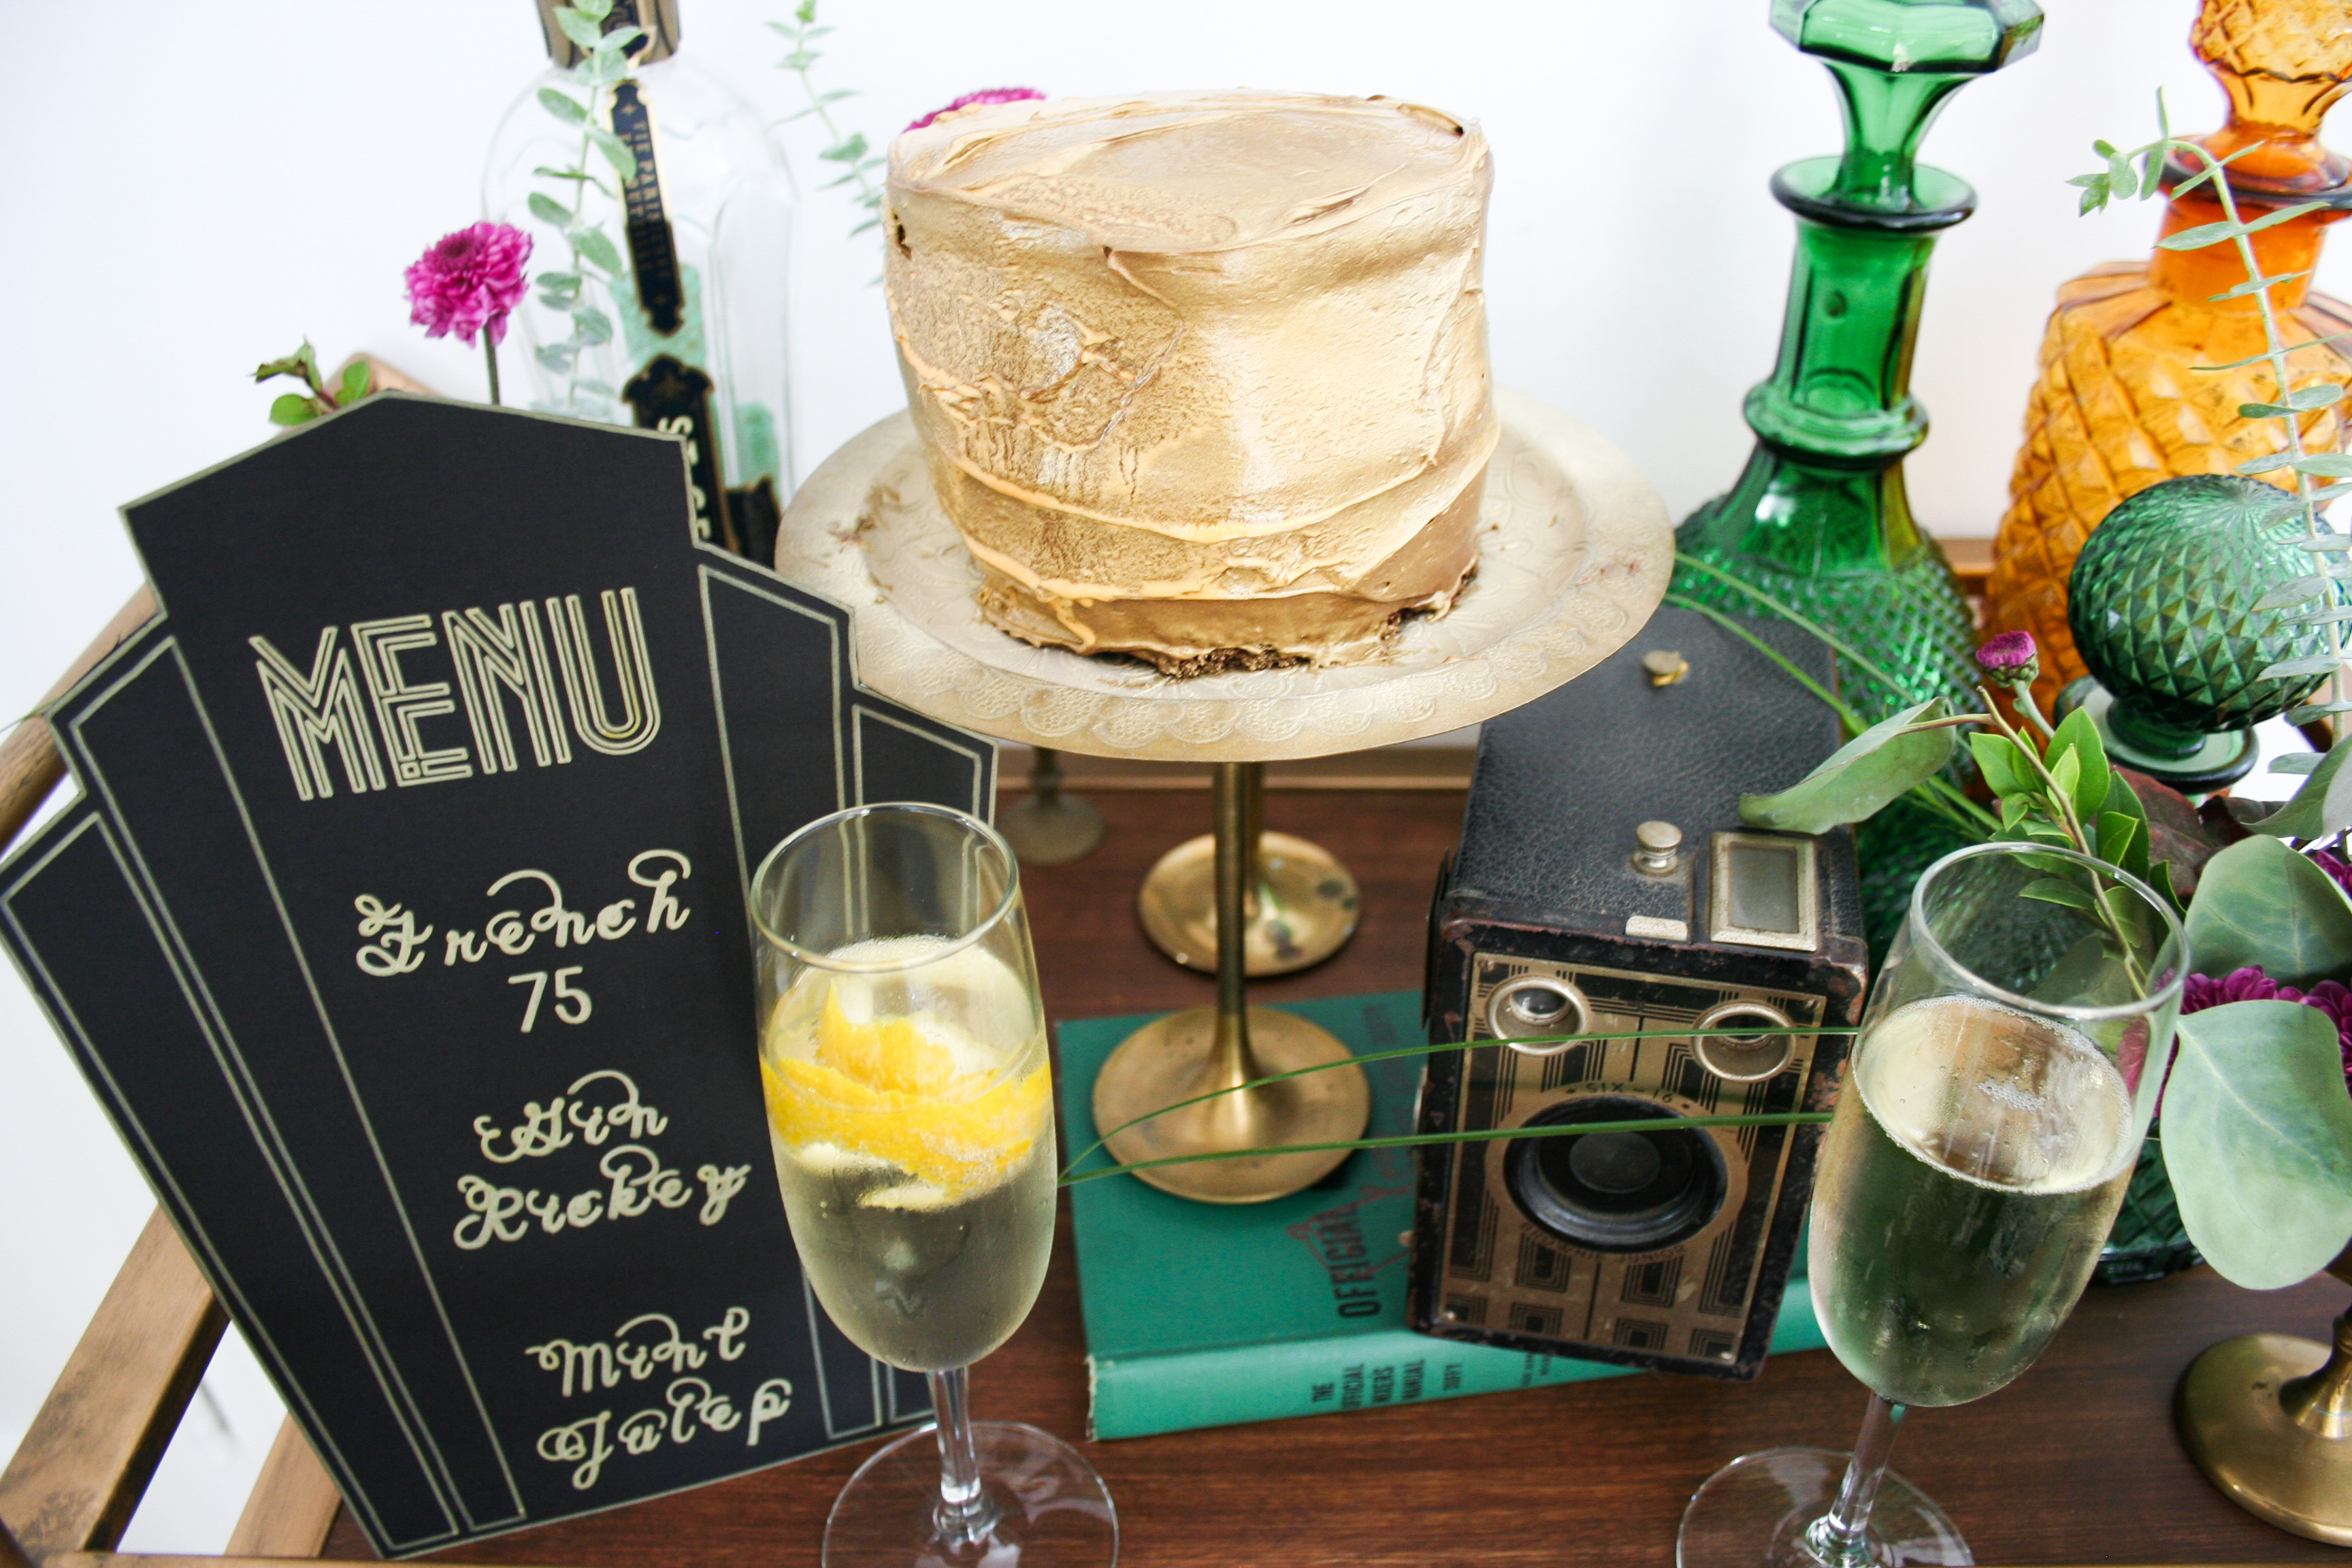
Next up, the Art Deco Menu card!
Materials:
- Cricut Explore
- 1 12×12 sheet of black cardstock
- 1 gold Cricut pen
- Art Deco banner – free download
- Metropolis 1920 font – free download
- Janda Celebration Script – free download
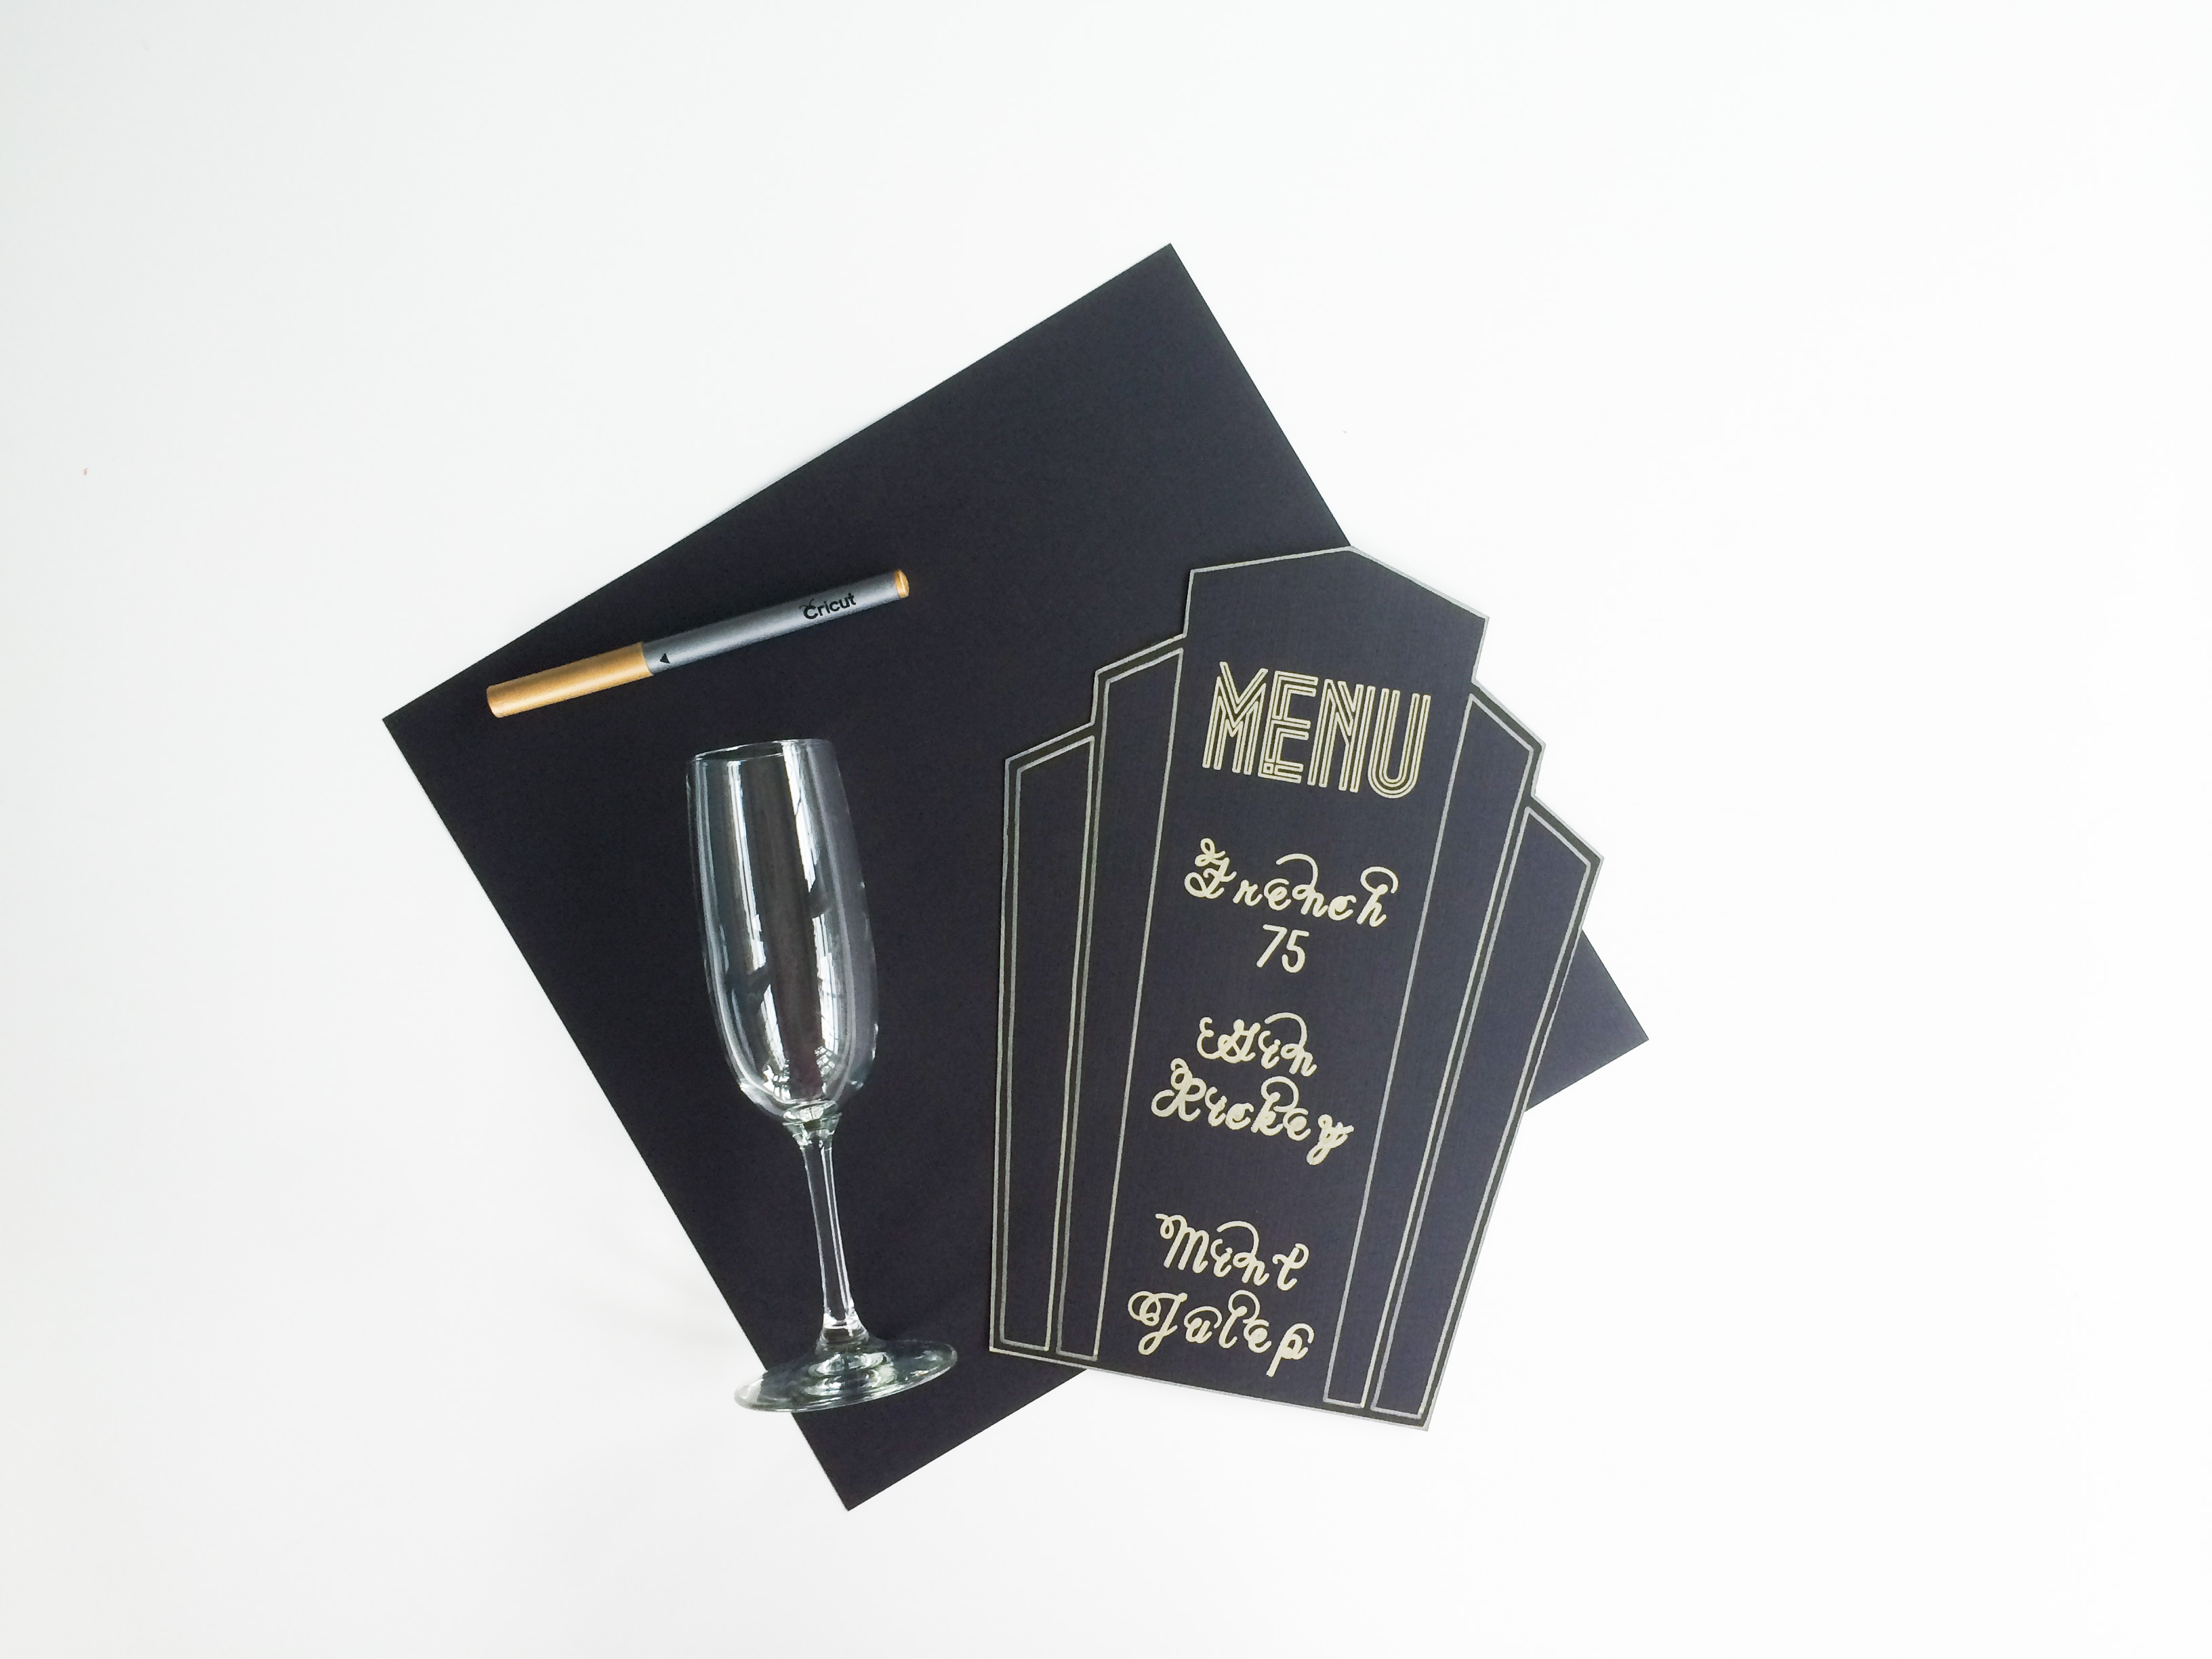
Instructions: This one is really simple. Pretty much the same deal as the banner. Download the fonts and border, and then use Cricut Design Space to lay it out and print and cut.
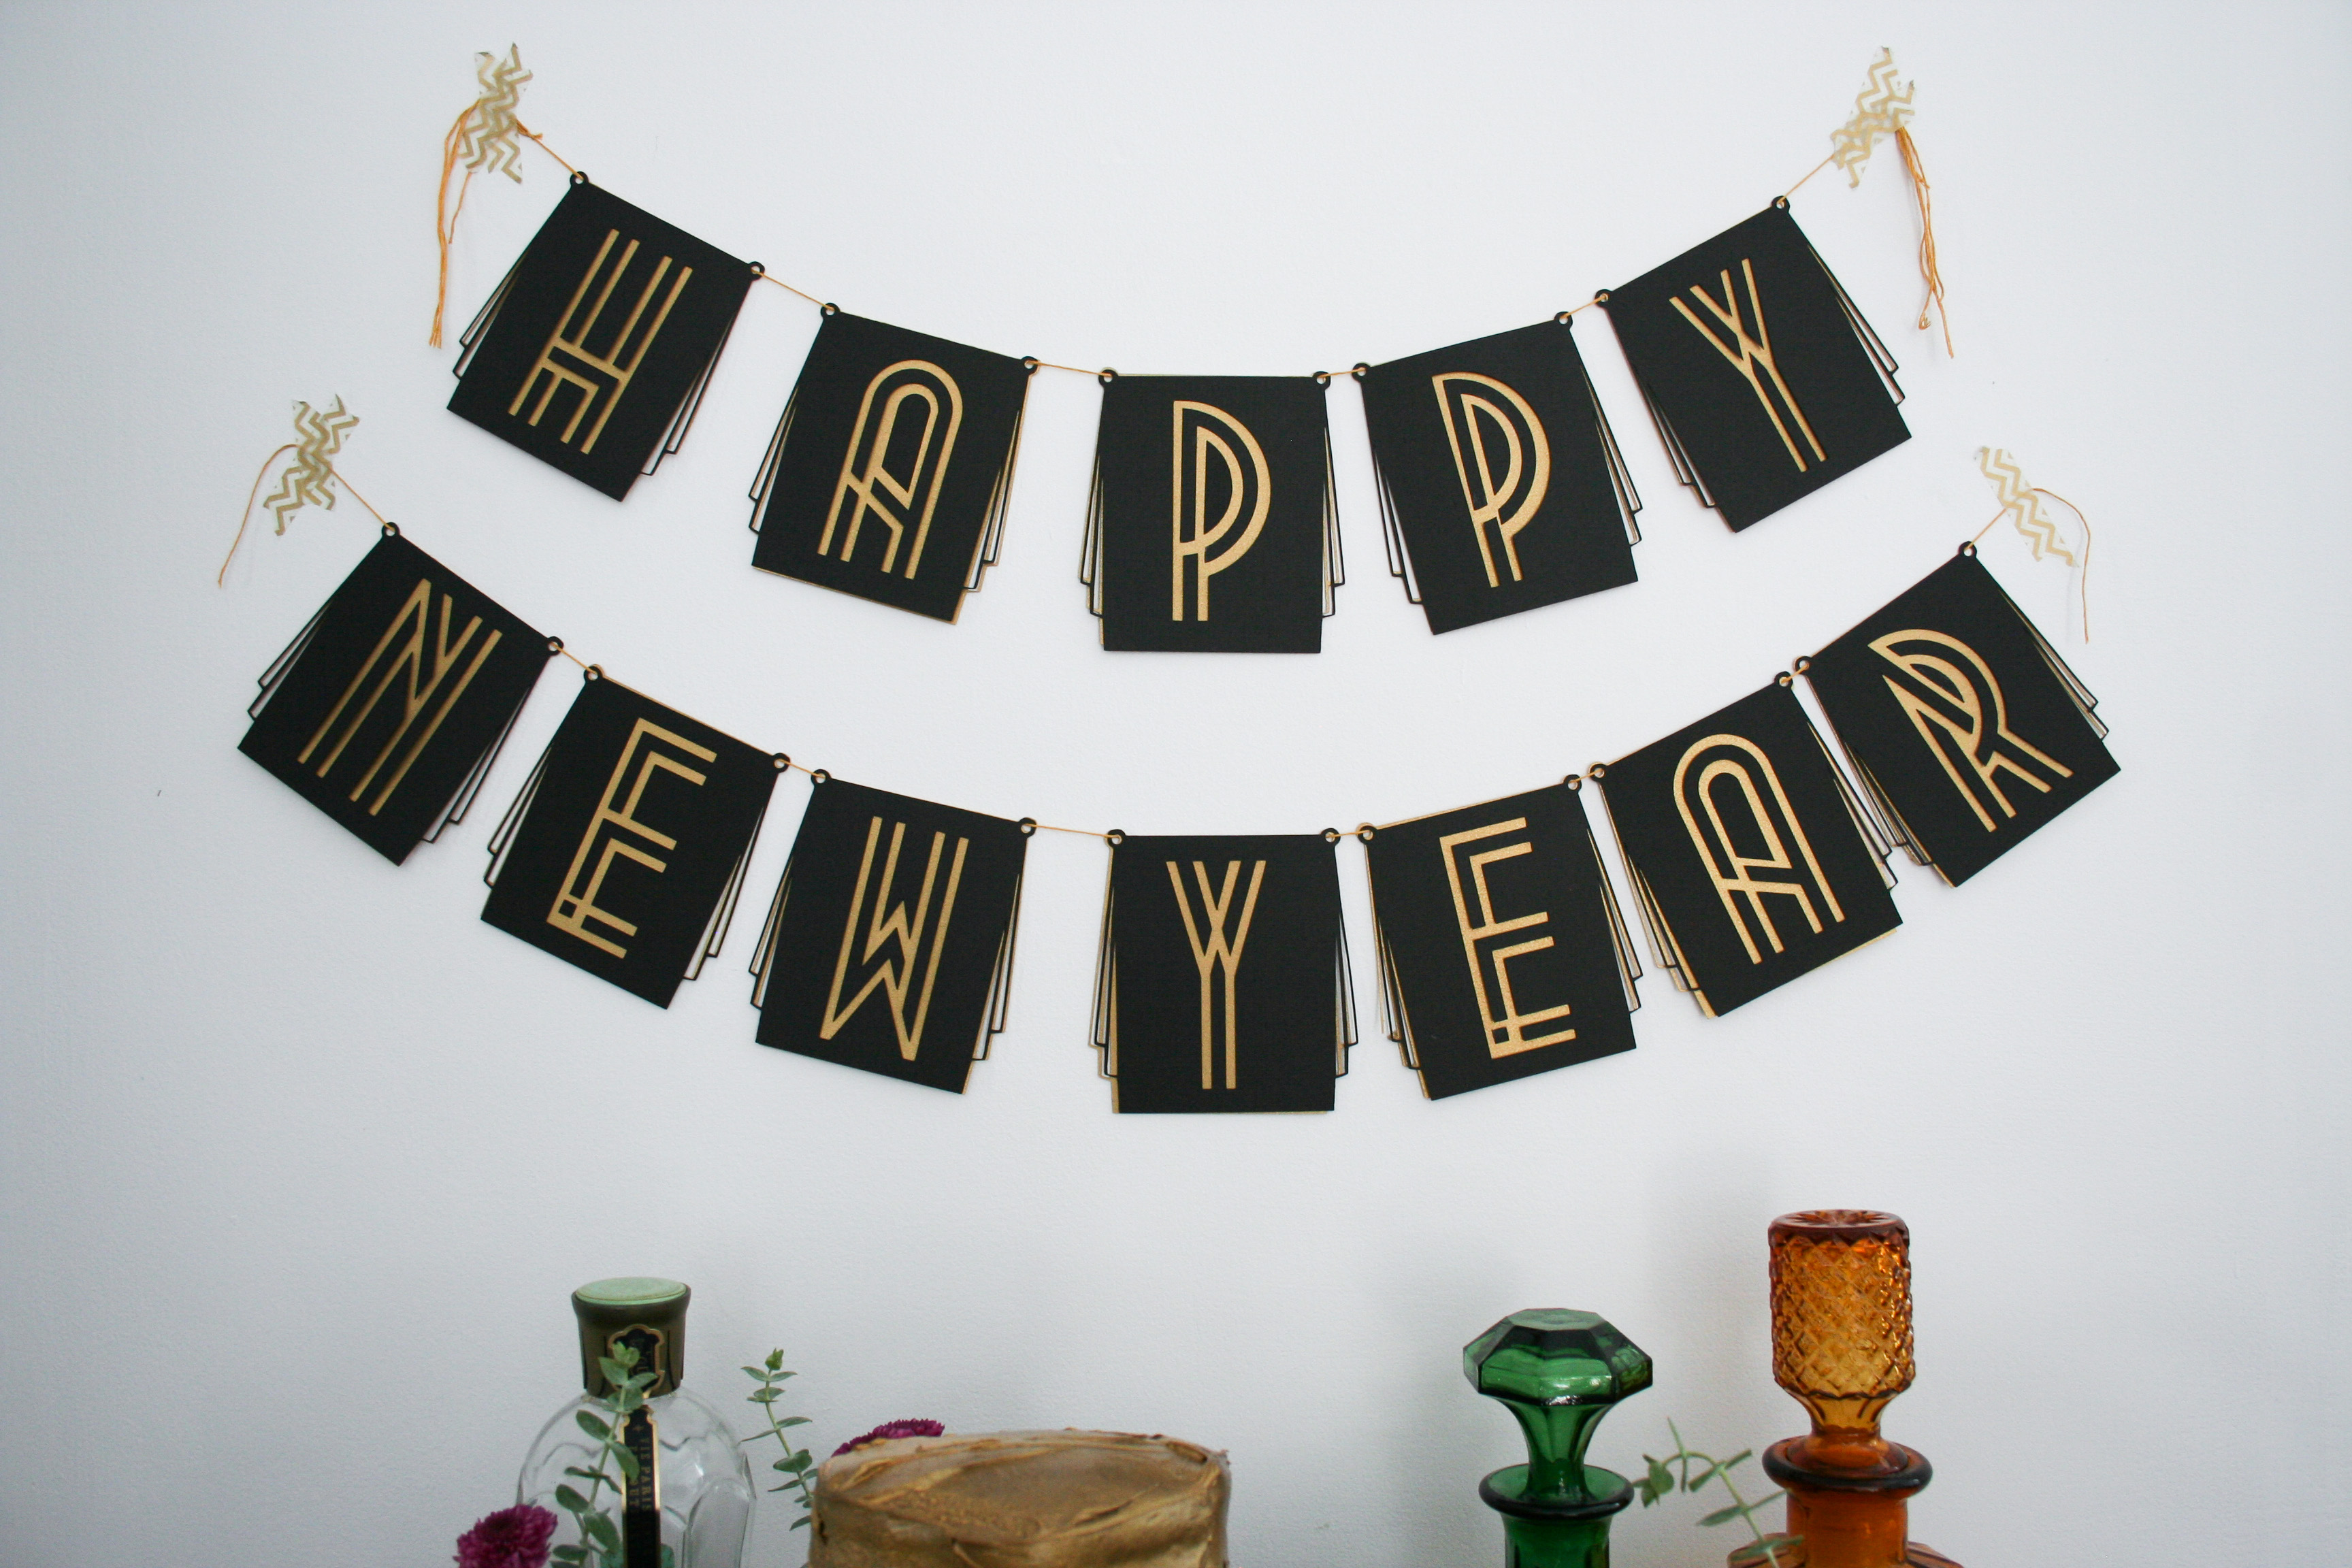
 This project could also be great for a New Years Eve Party or a Speakeasy themed party!
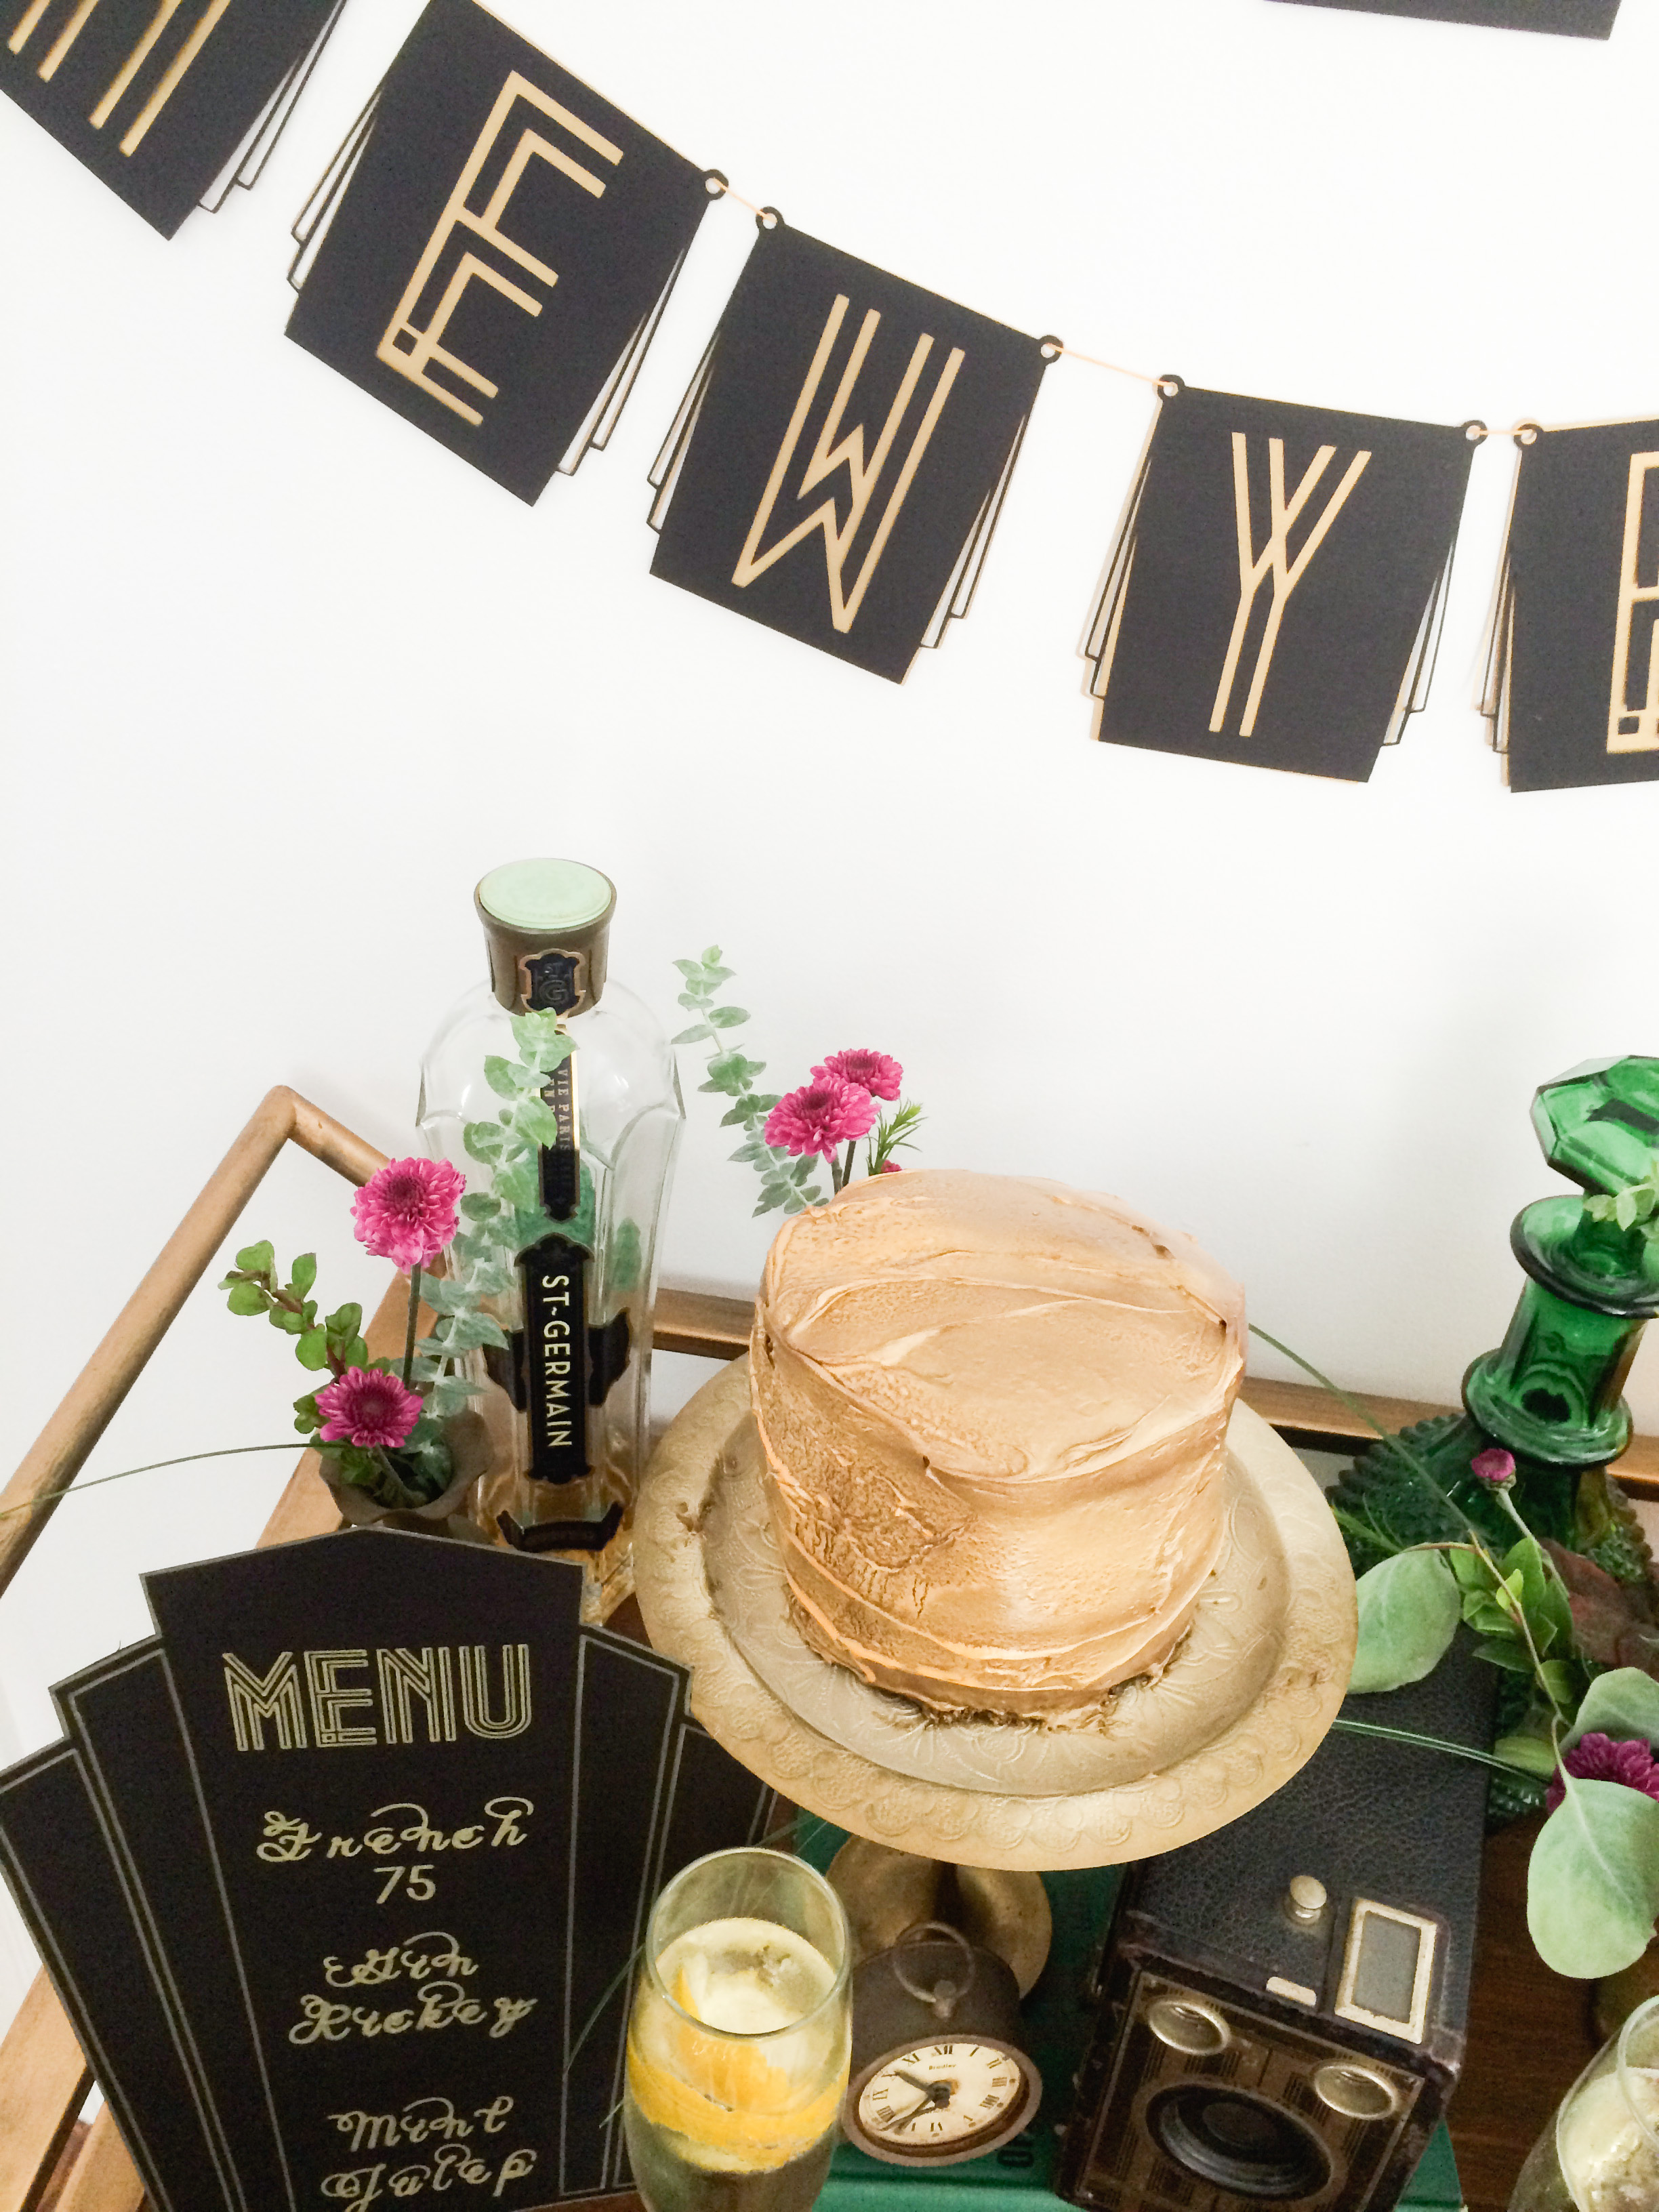
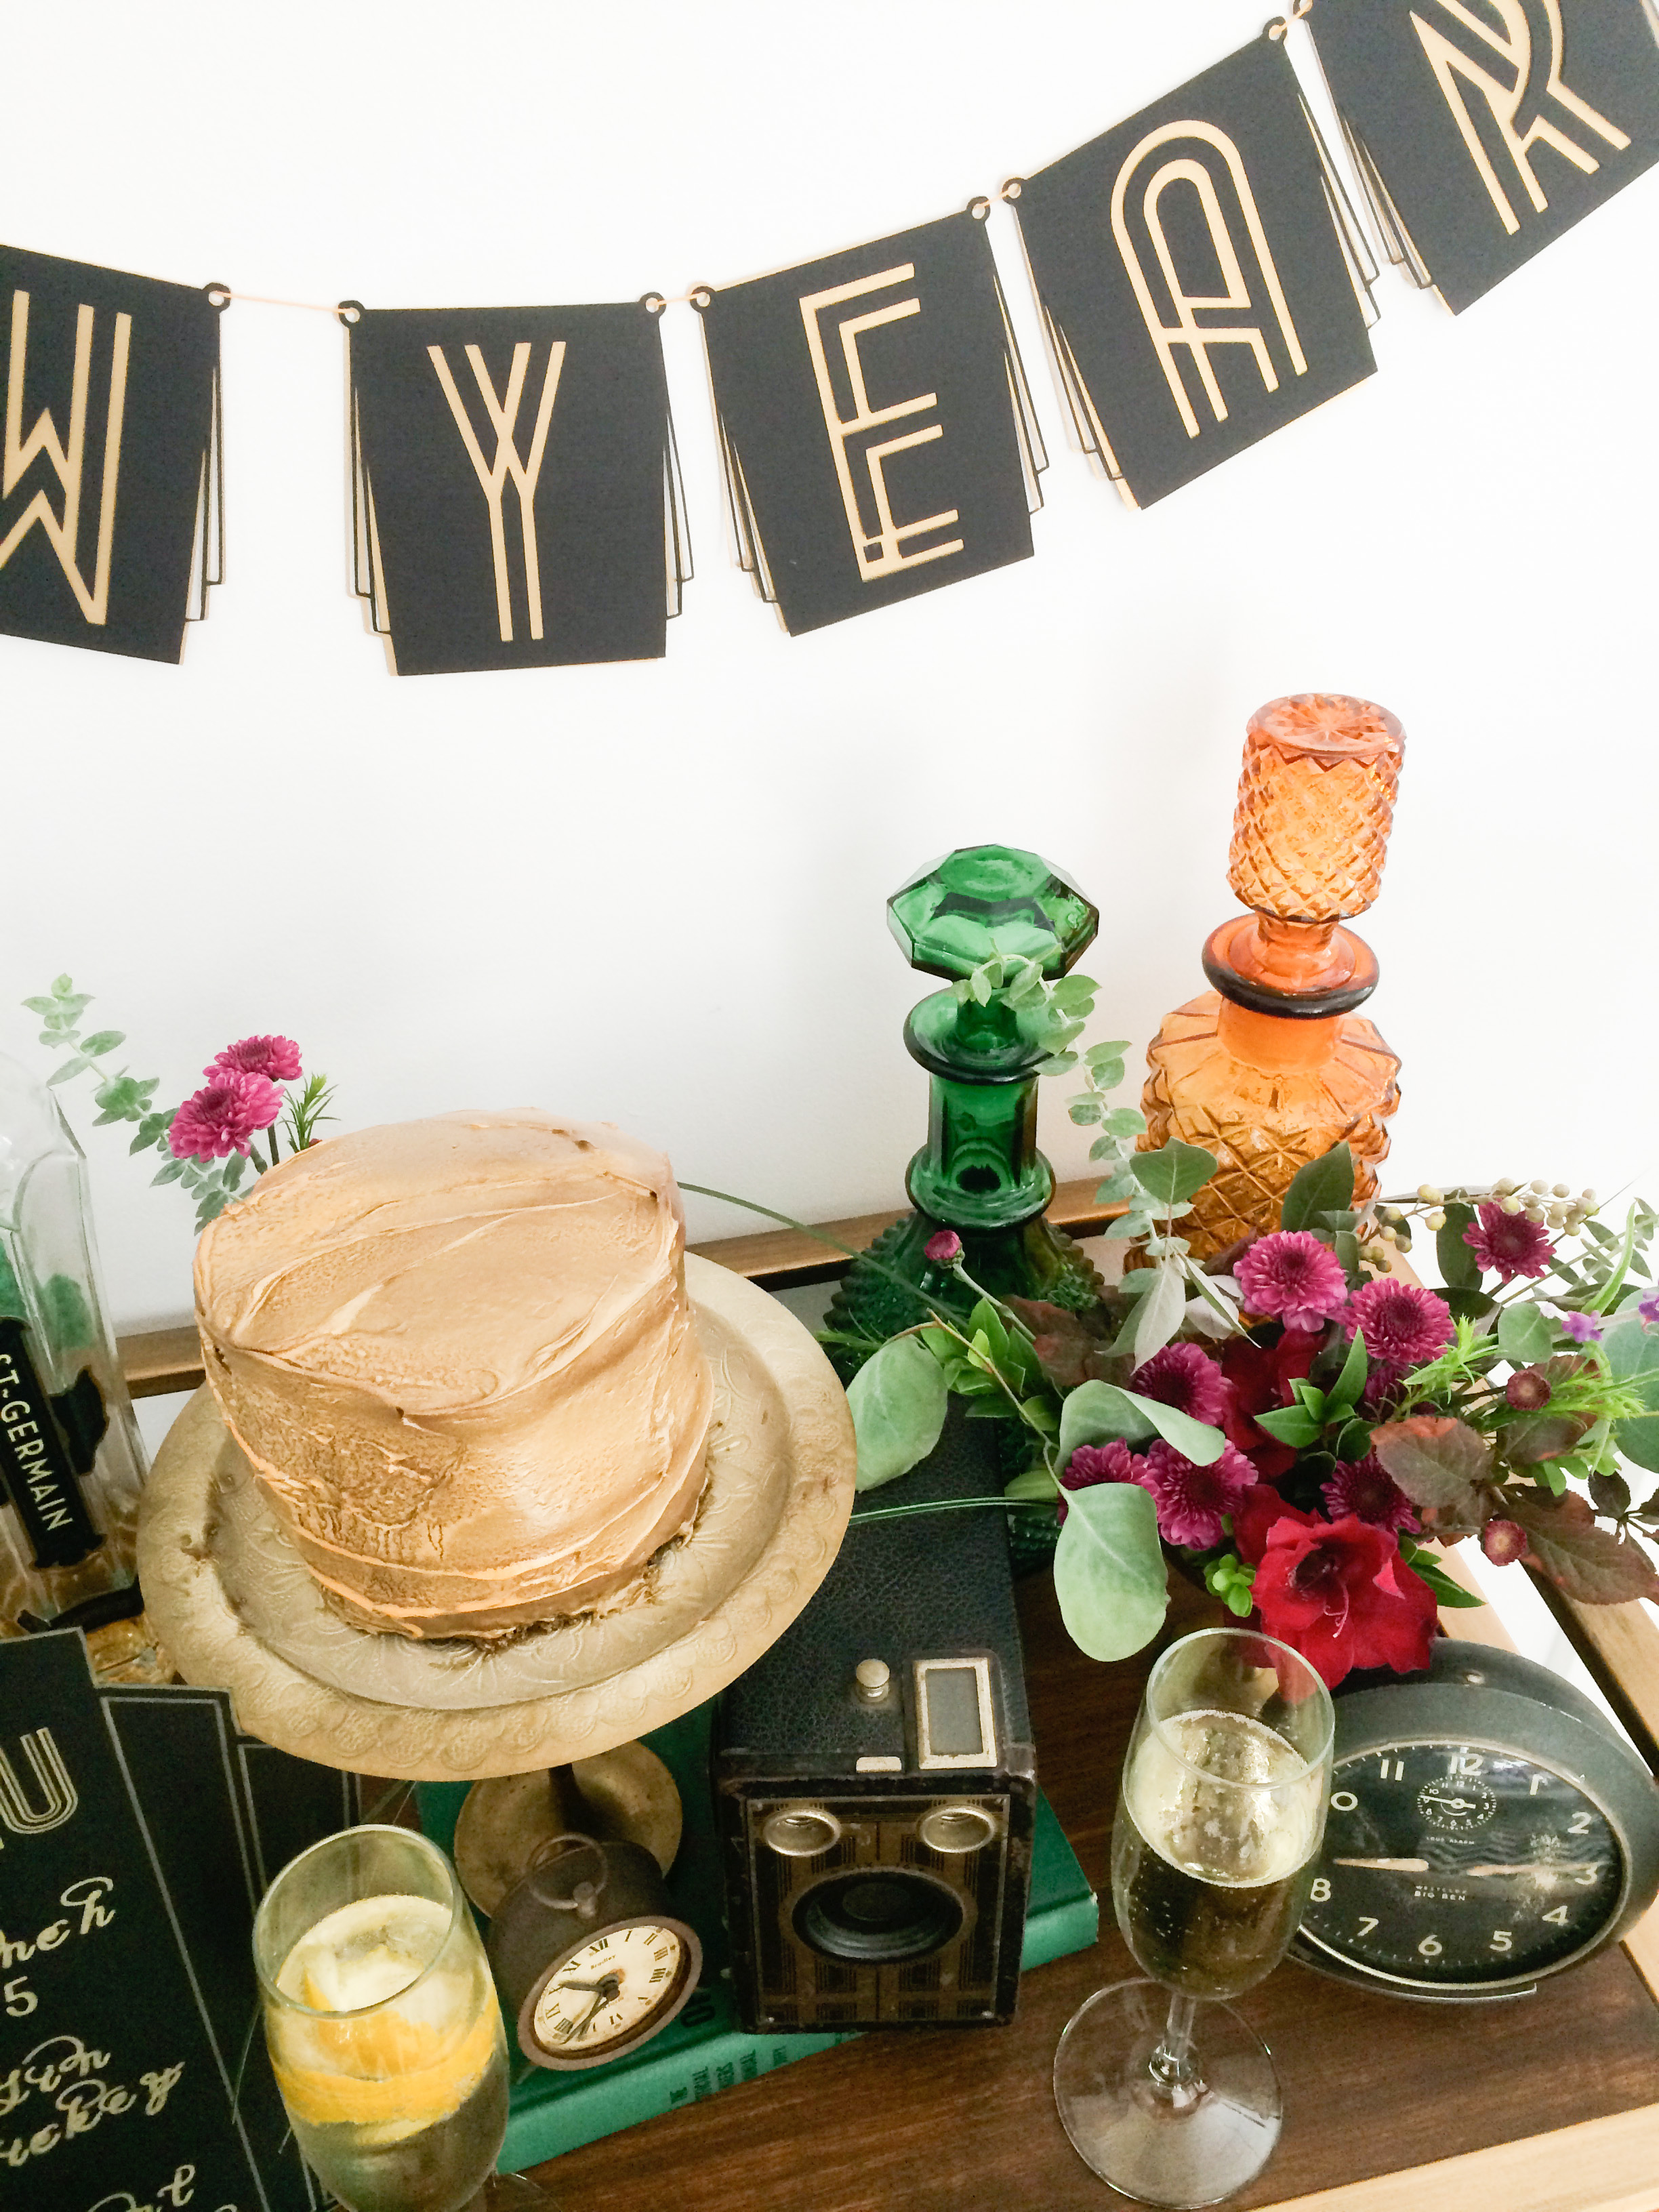
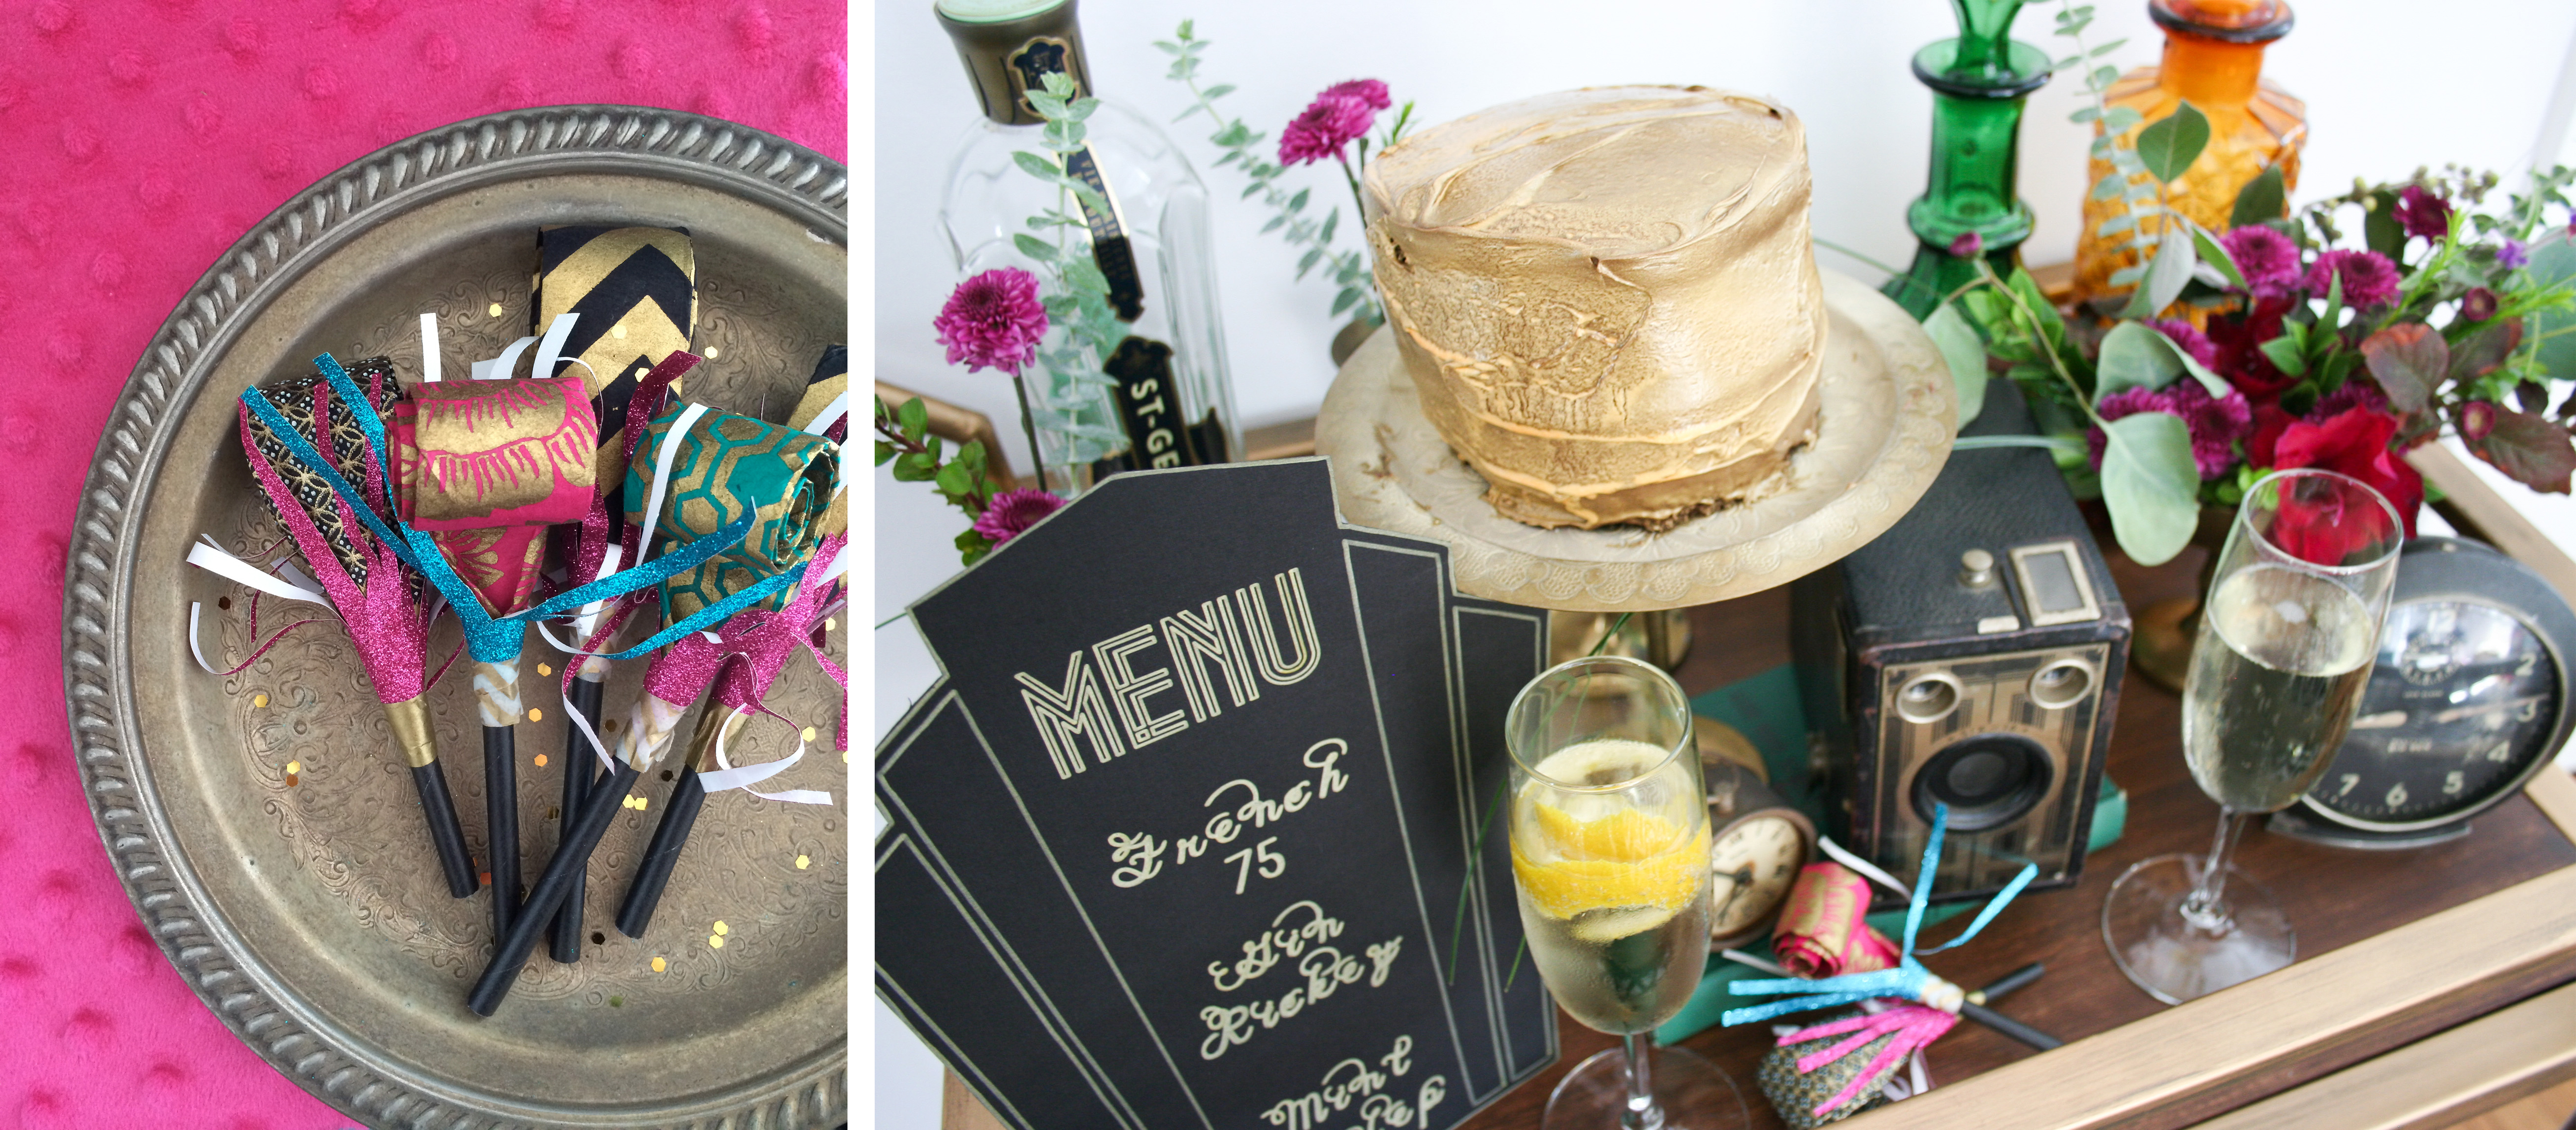
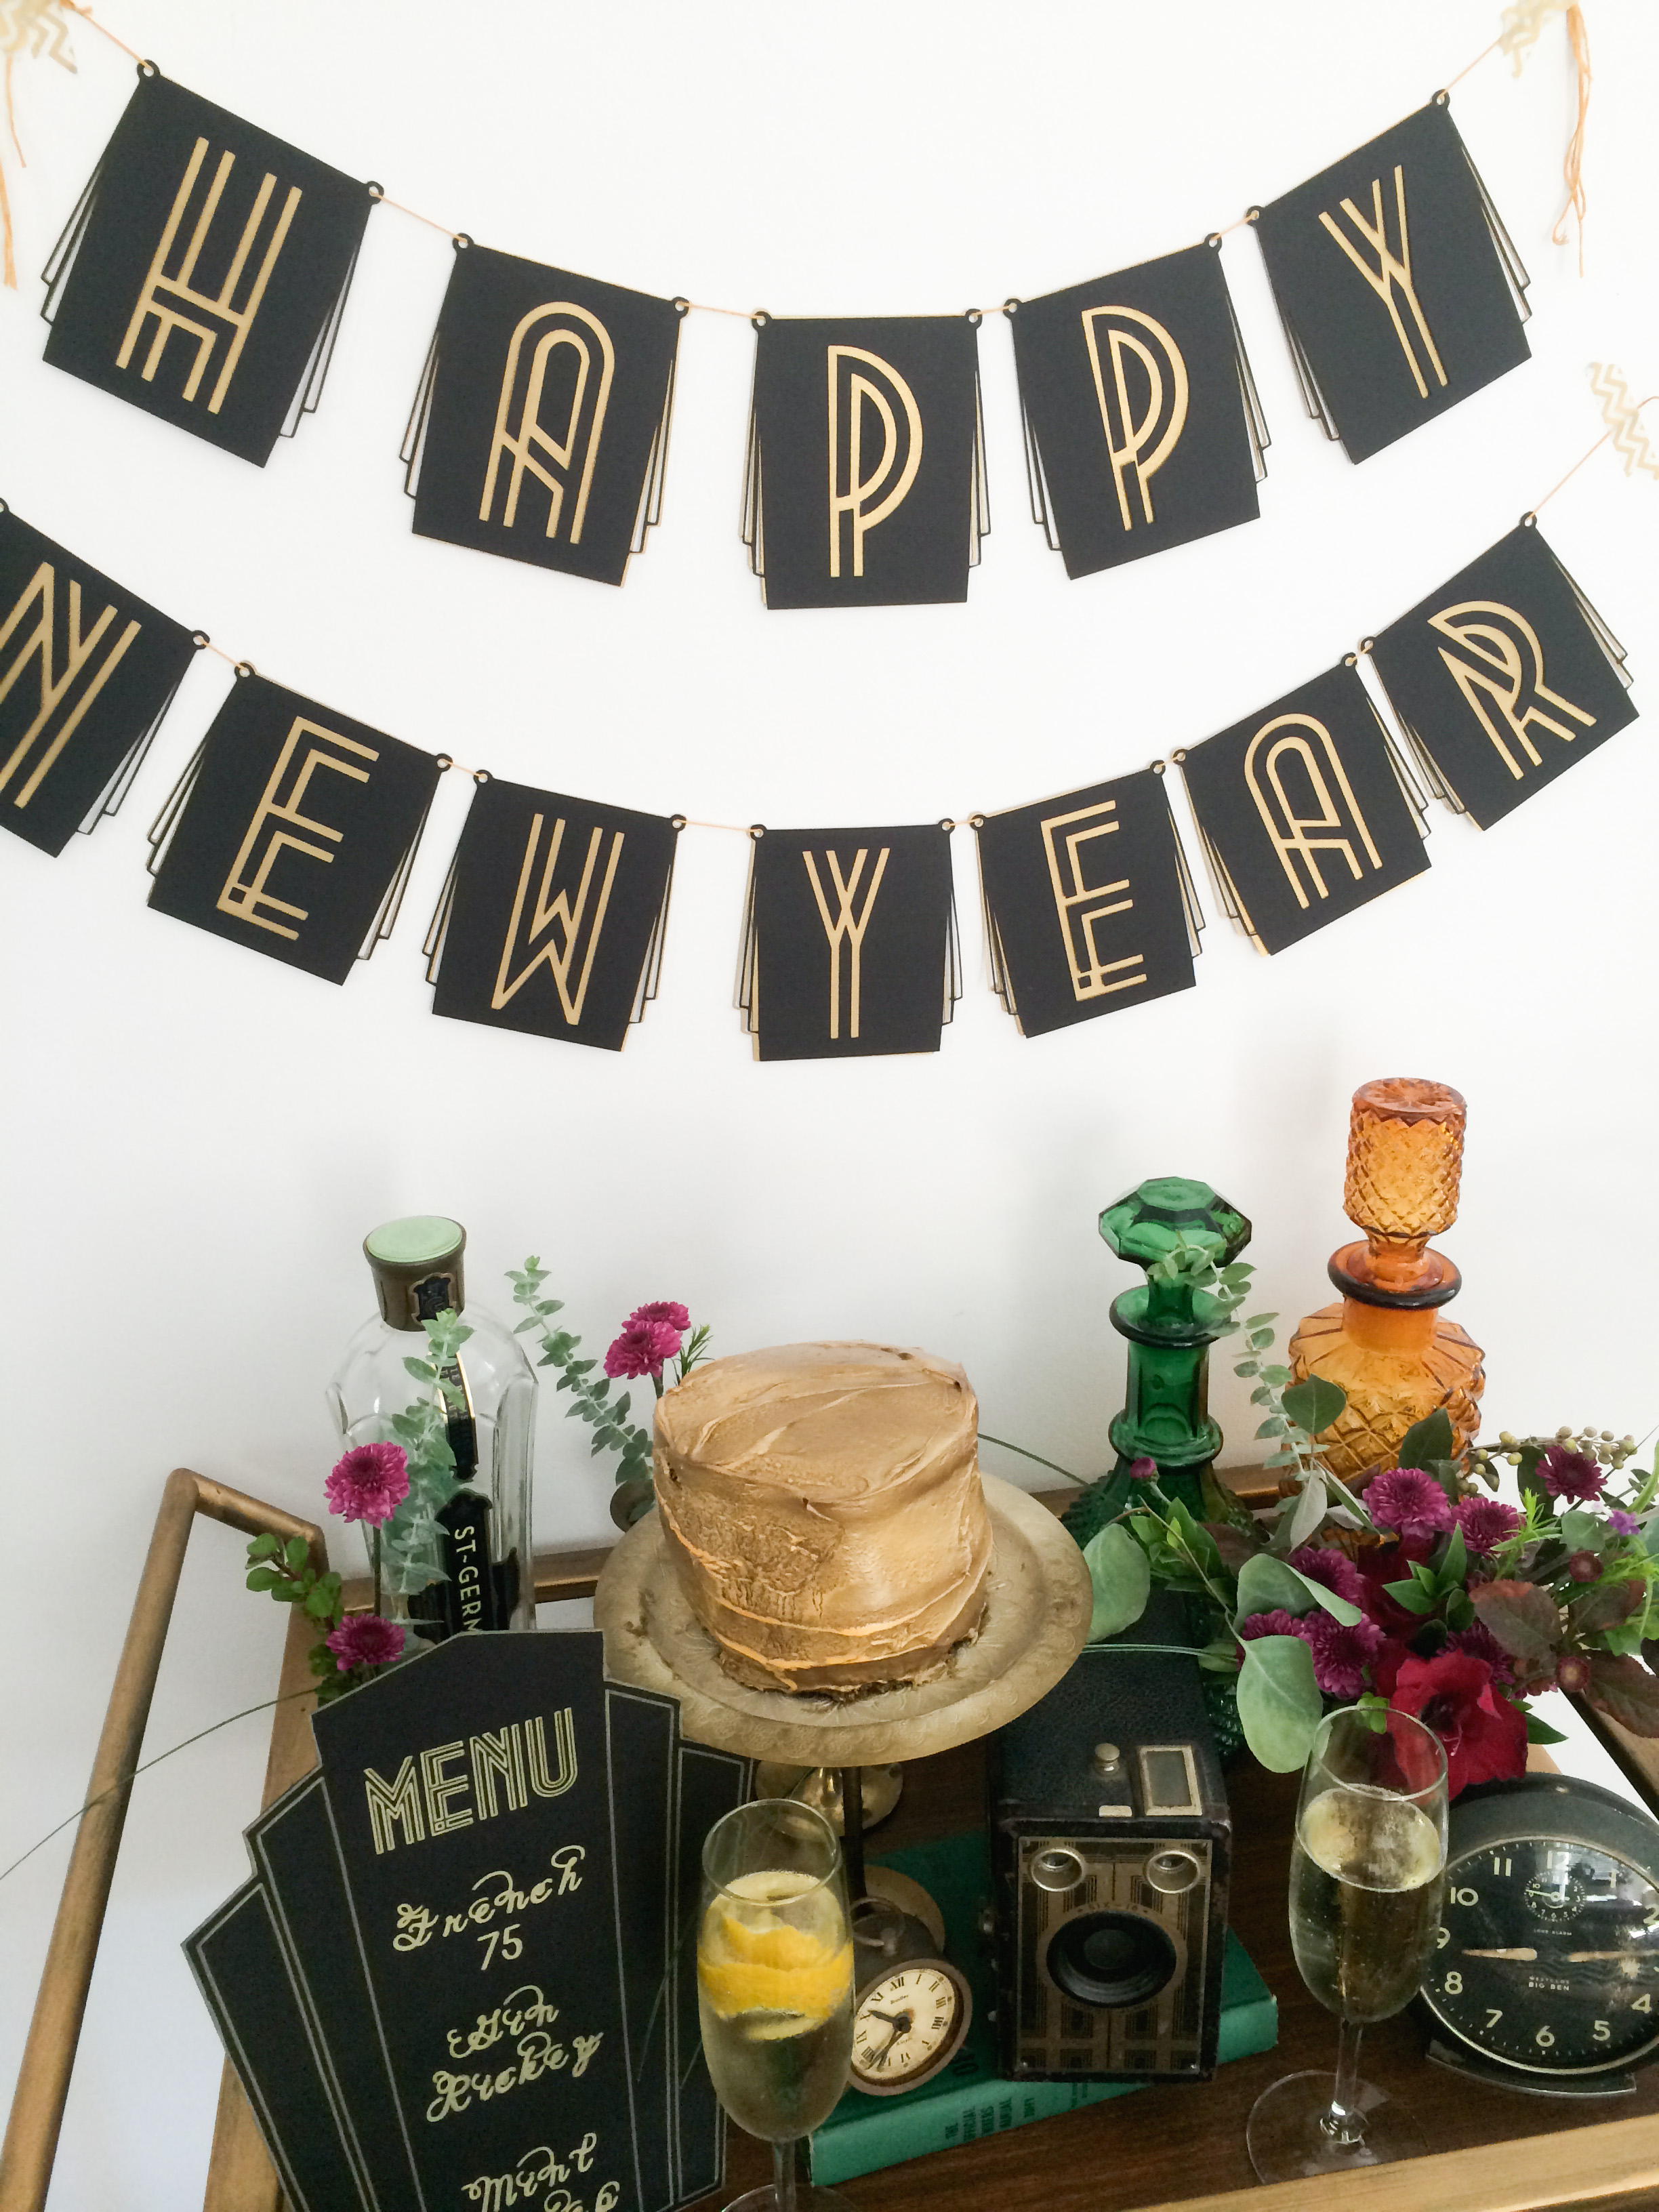
The Details: First, can we just discuss my gold cake for second? It’s a little lopsided and sad, but I am so proud of it! My first homemade (ok, I won’t lie, I used a box mix) layer cake! And it’s gold! GOLD! Here’s my secret. And yes, that is the blogger’s favorite Target Threshhold bar cart. The cart is styled with vintage decanters and clocks. You can find them at antique stores and flea markets for about $10-20 each. The vintage candlesticks can typically be found in thrift stores and they are overpriced if they are more than $0.50-1.00. The camera was my grandparents. And I made the cake stand using a brass tray, a candlestick, and epoxy. And most importantly, here is the recipe for a French 75.
French 75 recipe:
- .05 ounce Fresh Lemon Juice
- .05 ounce Simple Syrup
- 1 ounce Gin
- 3 ounces Champagne
- Garnish with a lemon twist
Disclaimer: I’ve been invited to work with Cricut. For my participation in Cricut’s Design Space Star competition, Provo Craft & Novelty, Inc. gave me a Cricut Explore. The Cricut Explore and access to Cricut’s Design Space featured in this post has been provided by them, but the ideas and opinions here are all my own. I am a member of the Cricut Blogger Network. I may receive prizes in exchange for my winning projects. (Fingers crossed!) Even though I am not being directly compensated for these posts, I am under consideration for a prize with Cricut Design Space Star™.
Cricut Design Space Star: Top Ten! - Legal Miss Sunshine
Monday 29th of September 2014
[…] Woohoo! I am so excited to share that my Roaring ’20s banner has been chosen for the Cricut Design Space Star Challenge’s Top Ten!!My team chose a Roaring ’20s theme and I created a “Say Goodbye to Your 20’s” Happy 30th Birthday banner, bar cart menu, and doormat. But I also made a Happy New Years banner, because it’s never too early to start planning for the new year, right? I mean, Christmas isn’t even here yet, but I’m ready to pop that champagne! I shared the DIY how-to on the blog a couple of weeks ago and you can find it here. […]
DIY Personalized Wine Glass and Wine Bottle Embellishments | Little Retreats
Friday 19th of September 2014
[…] Legal Miss Sunshine: Roaring 20’s Birthday Banner […]
Brooke
Friday 19th of September 2014
Eeeeeek! Andrea, I in LOVE with everything...EVERYTHING! Brilliant! Absolutely brilliant!