
(Sponsored Post)
It’s a double header today on the blog, quite literally! Did you see my Skeleton Silhouette Wall Art and my Skeleton Flamingo Cake Toppers? Well, I combined the two! Skeleton Silhouette Cake Toppers!
Ok, so let’s get started making these silhouette cake toppers. You’re going to need a few materials.
Materials Needed:
- Cricut Explore™
- Cricut Weeding Tool
- 1 12×12 sheet of card stock – black, gold, your choice!
- Adhesive dots
- Toothpicks
- Frameless Skeleton Lady Silhouette SVG file (Free Download!)
- Frameless Skeleton Man Silhouette SVG file (Free Download!)
Optional Materials:
- 1 12×12 sheet of card stock (in case of any mistakes)
- Cricut Tools Scraper – This would totally have helped me clean up and save time! Wish I had one!
Instructions: I designed my silhouettes in Photoshop, exported them to Illustrator and made SVG files, meaning they are vectorized files and you can make them as big or as small as you want (but not too small, those little teeth are pretty itty bitty, and yes, the Cricut can cut that small. So detailed it blows you away, right?)
Step 1: In Cricut Design Space, simply start a new project, then click “Upload Image”, click “Vector Upload”, browse and choose the downloaded skeleton silhouette files, and click “Save Image”. Repeat the steps to upload the second silhouette. The two silhouettes will then be at the bottom of your screen, click on both of them, giving both a green checkmark, and click “Insert Images.”
Step 2: Remember how I said these are SVG files? Well, you can make them any size you would like. 4×6? Done. 5×7? Boom! 10×12? Okay! The only limitation is your Cricut mat. So go ahead and scale the silhouettes to the size you want them to be. Since I was making them as cake toppers, they are about 4″ tall.
Step 3: Once you have the images at the sizes you want, click the green GO button, follow the instructions to load the mat and then let the Cricut do all your dirty work cutting!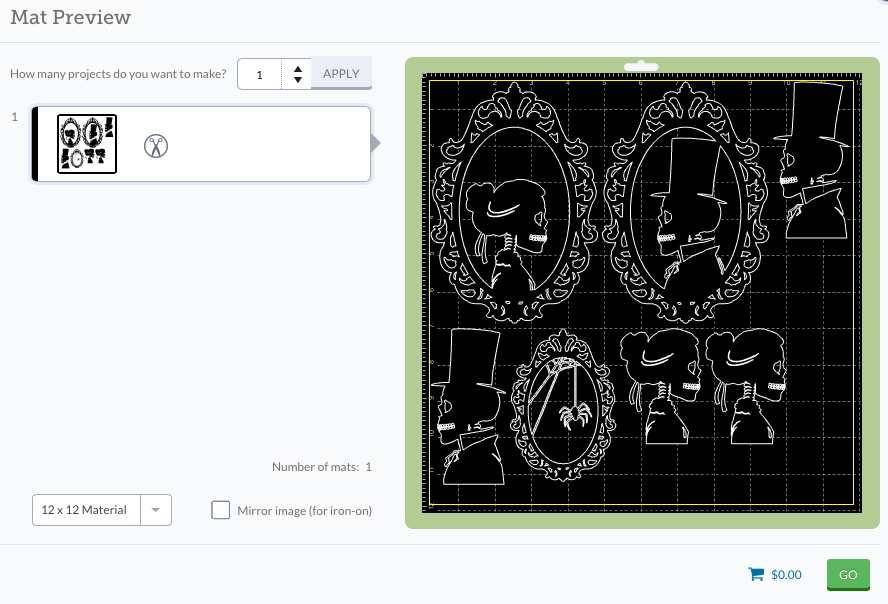 Step 4: Once the Cricut is done, remove the mat from the machine and CAREFULLY remove the paper from the mat. Be VERY careful around the neck areas, and her hair ribbons as the paper get a little thin there. Use the Cricut Weeder tool if you need to in order to get under the paper and help it off the mat.
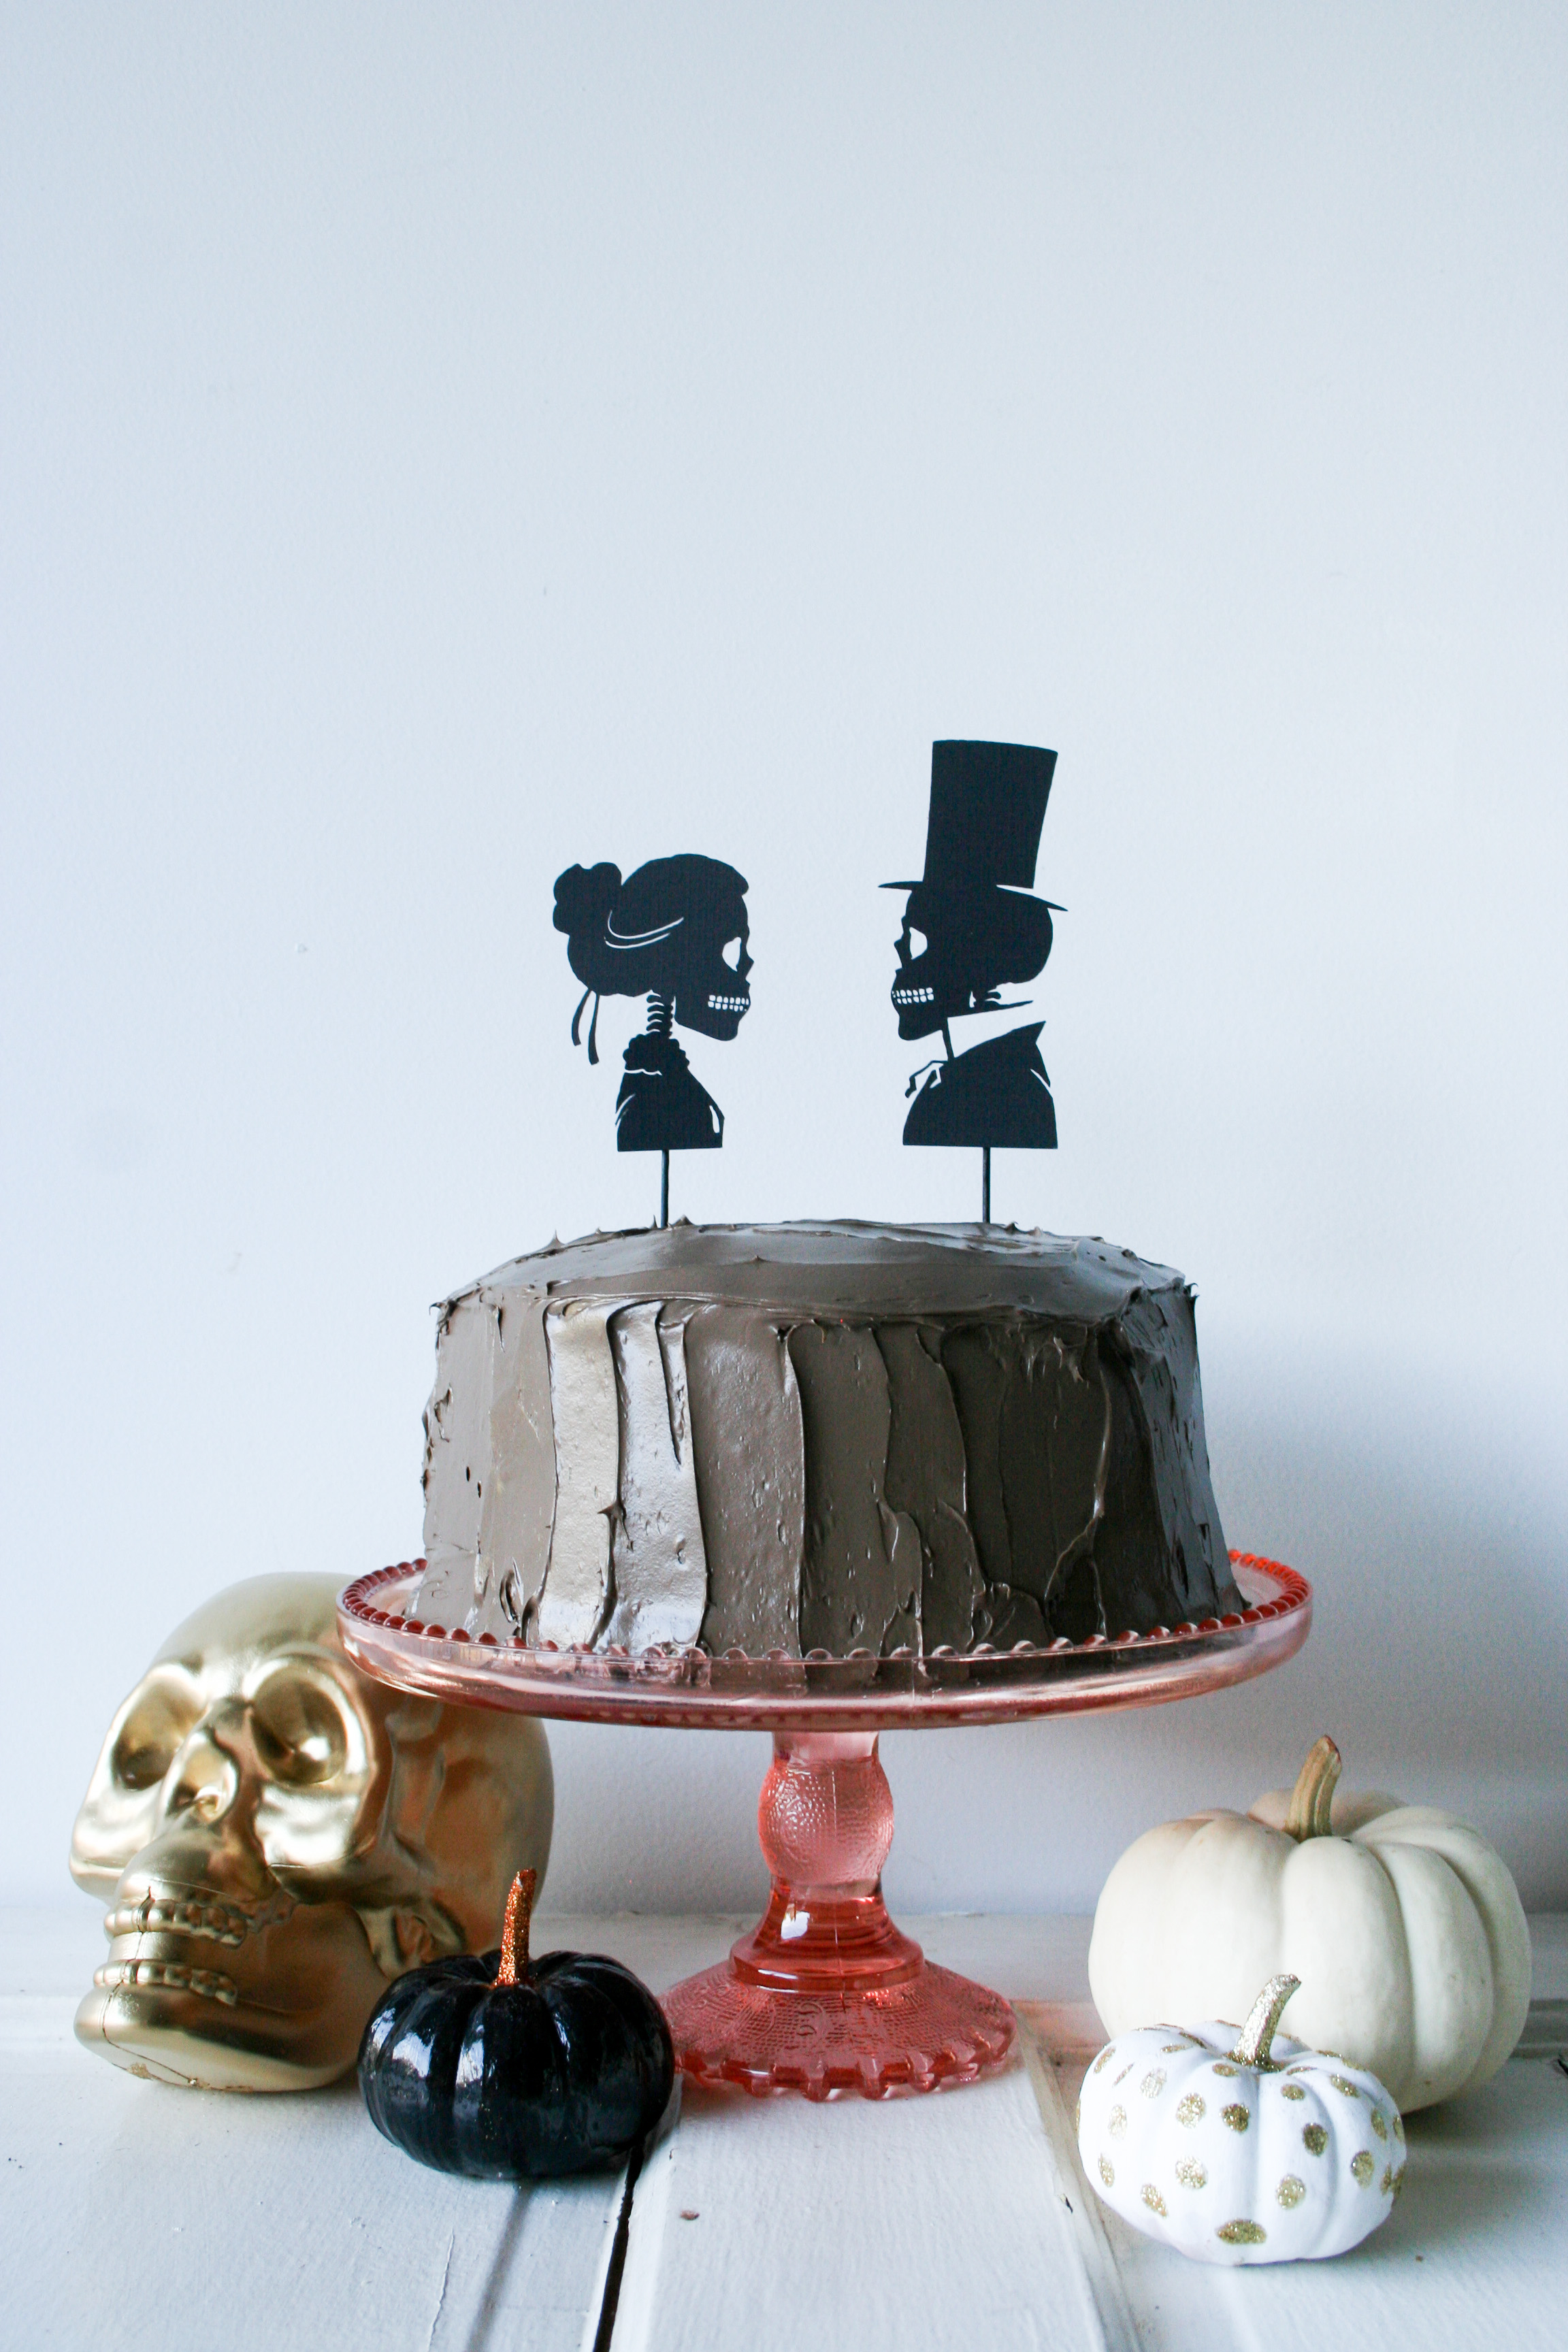
Step 5: Use the Cricut Weeder Tool to remove any of the paper that you do not want. You will probably have some cuts in the teeth that need to be helped out. And with that weeder tool, it’s just like your silhouettes are going to the dentist!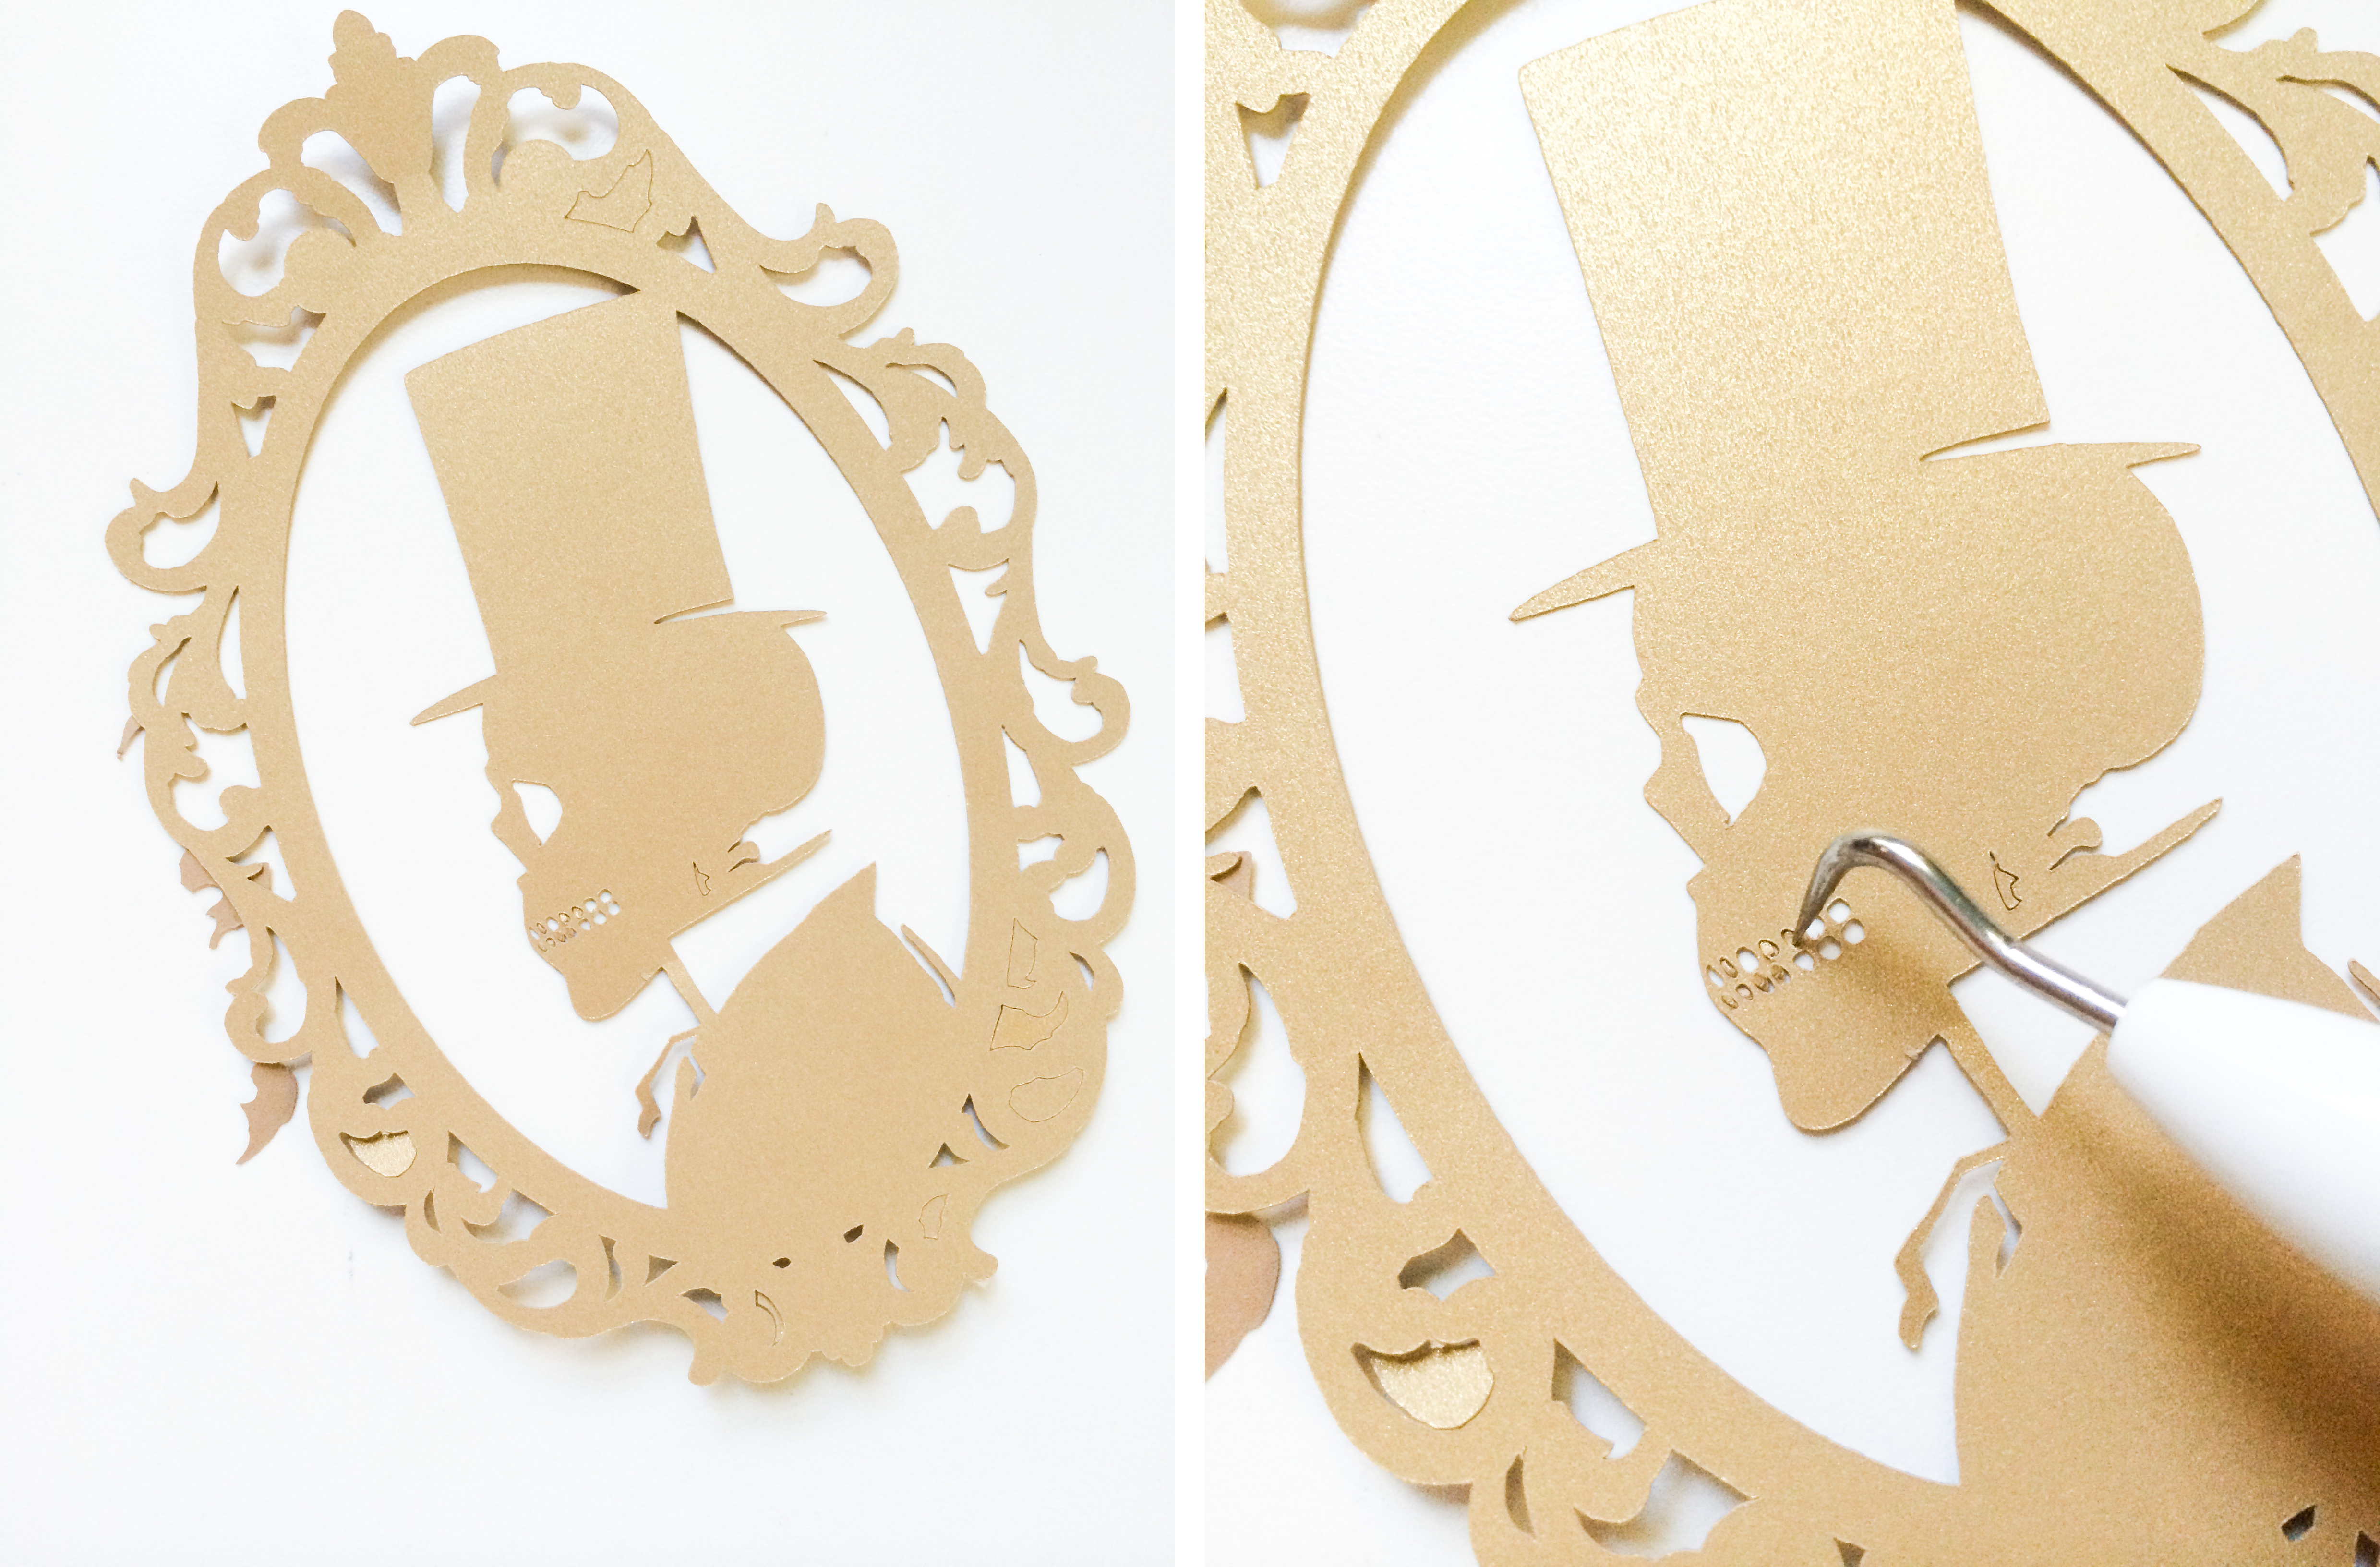 Step 6: Admire the detail. Aren’t they just like old-timey, hand-cut silhouettes?!? Perfect for a ghoulish, victorian-themed Halloween party!
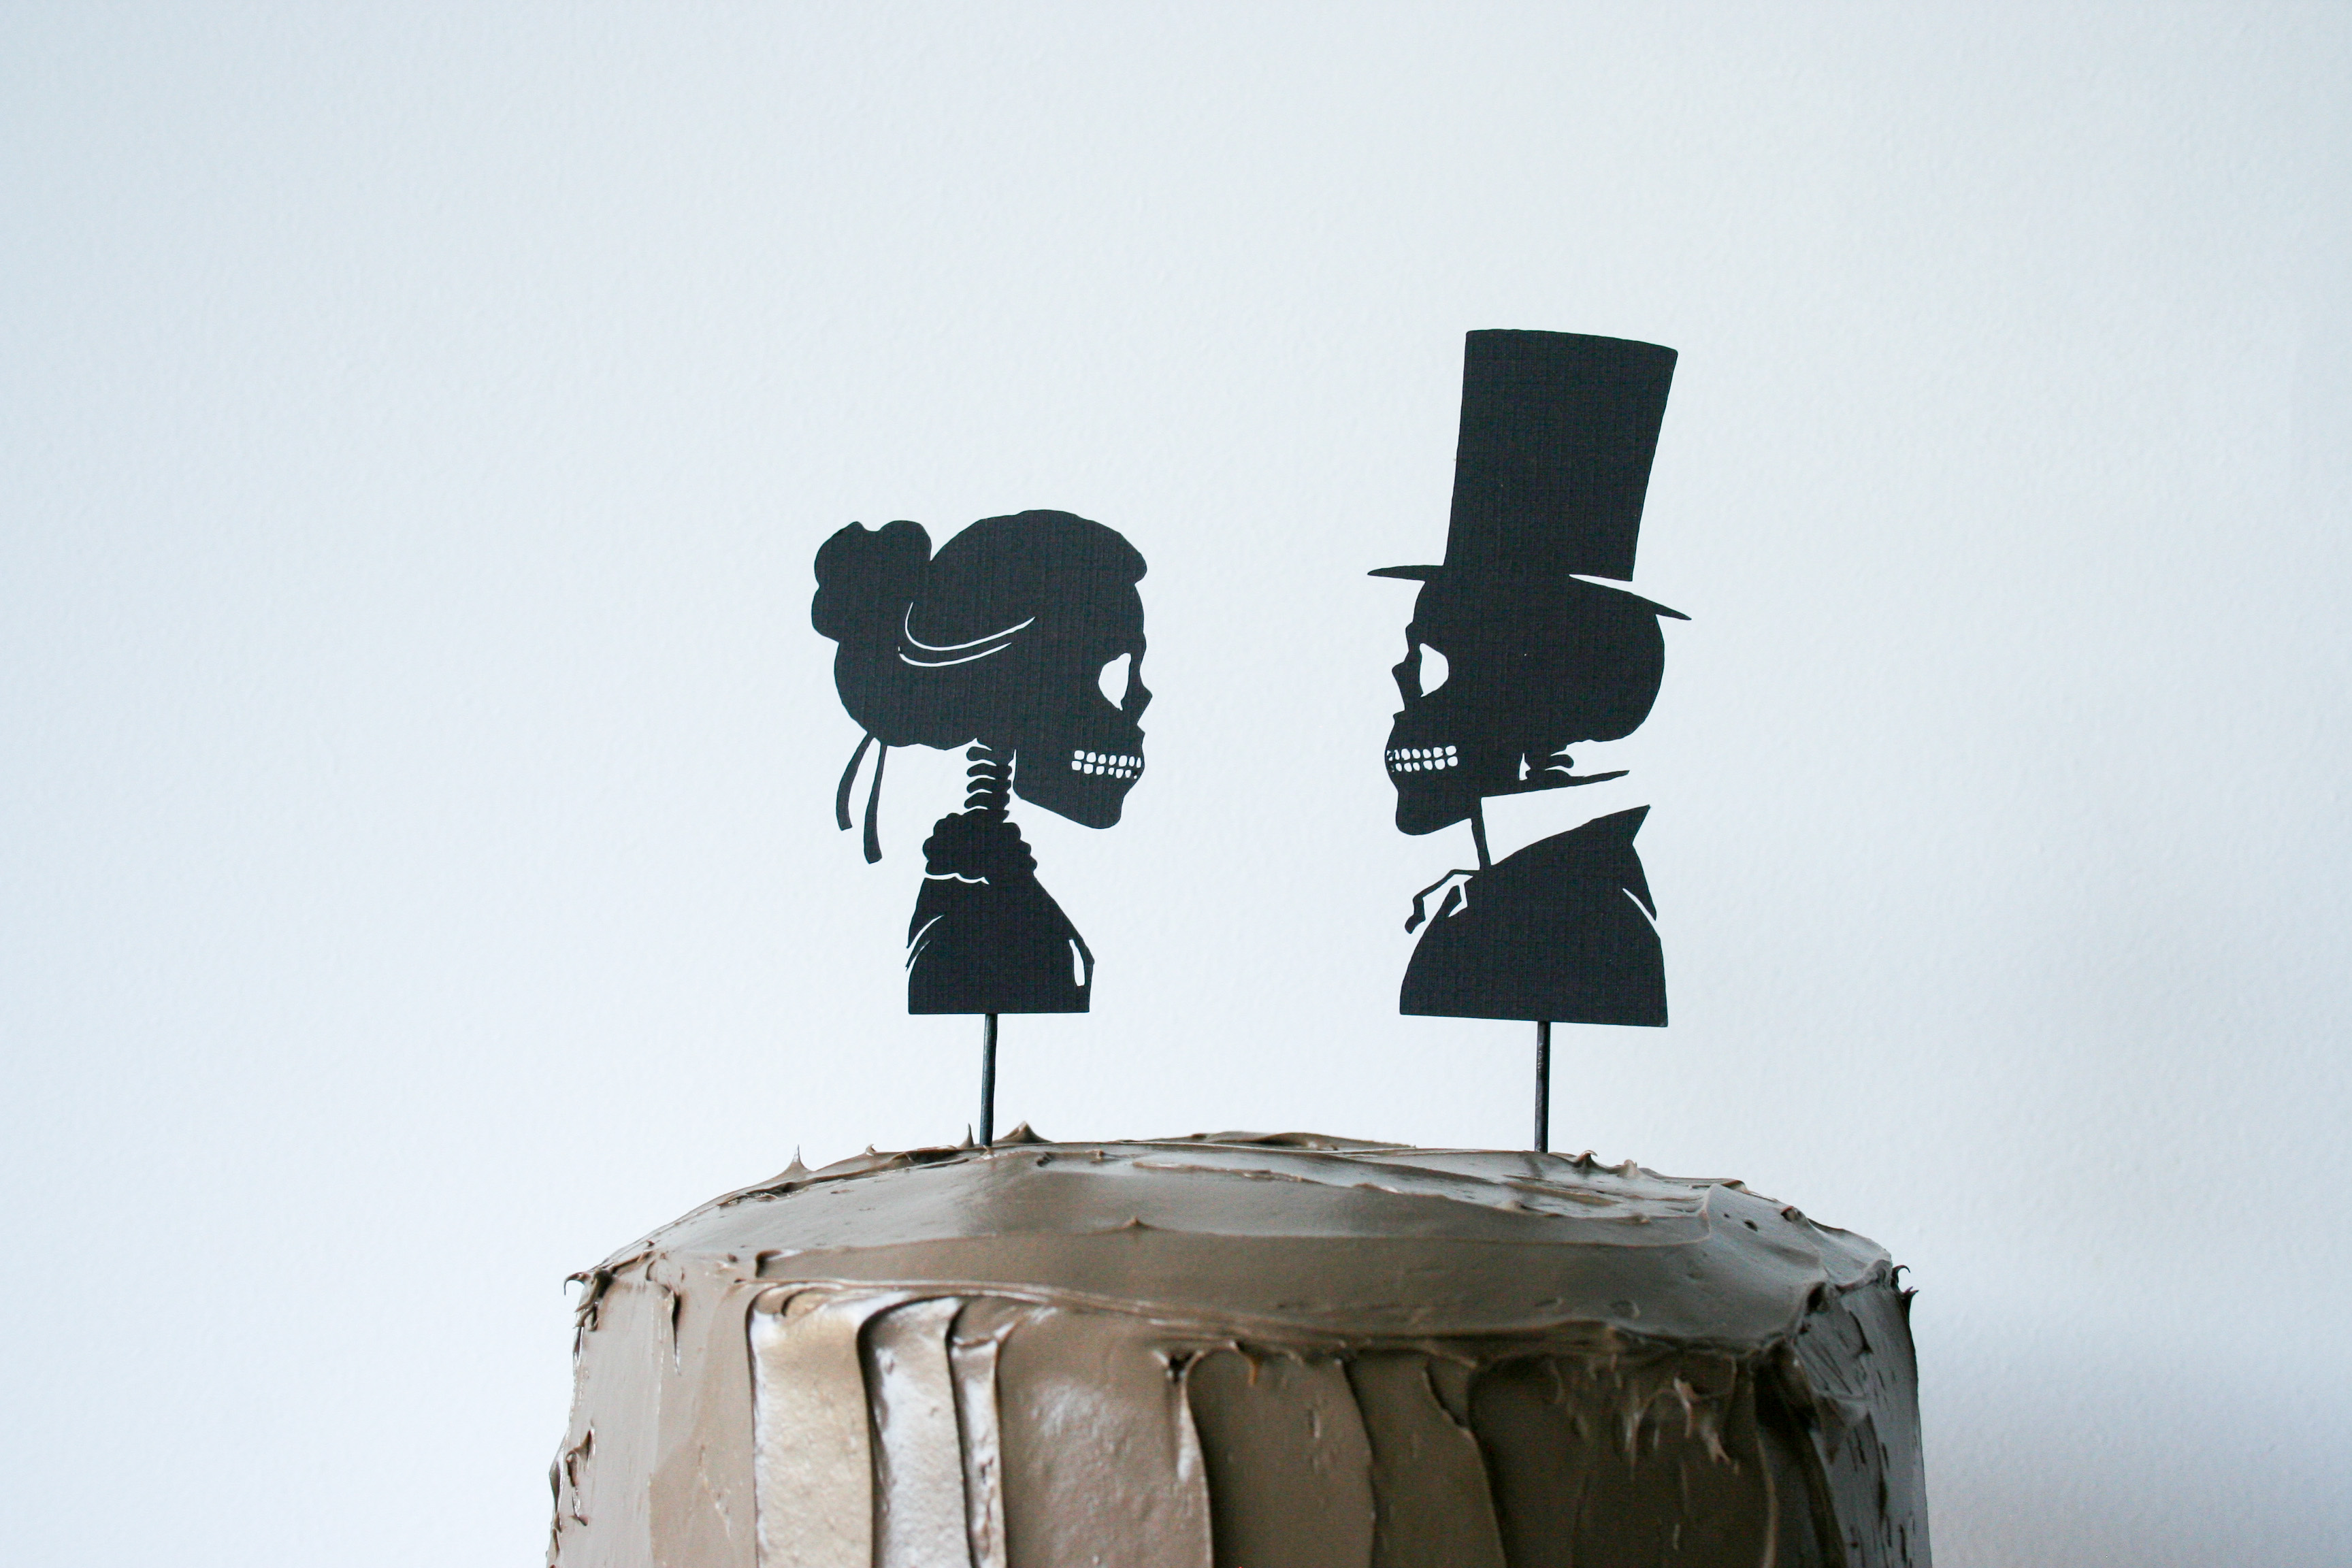
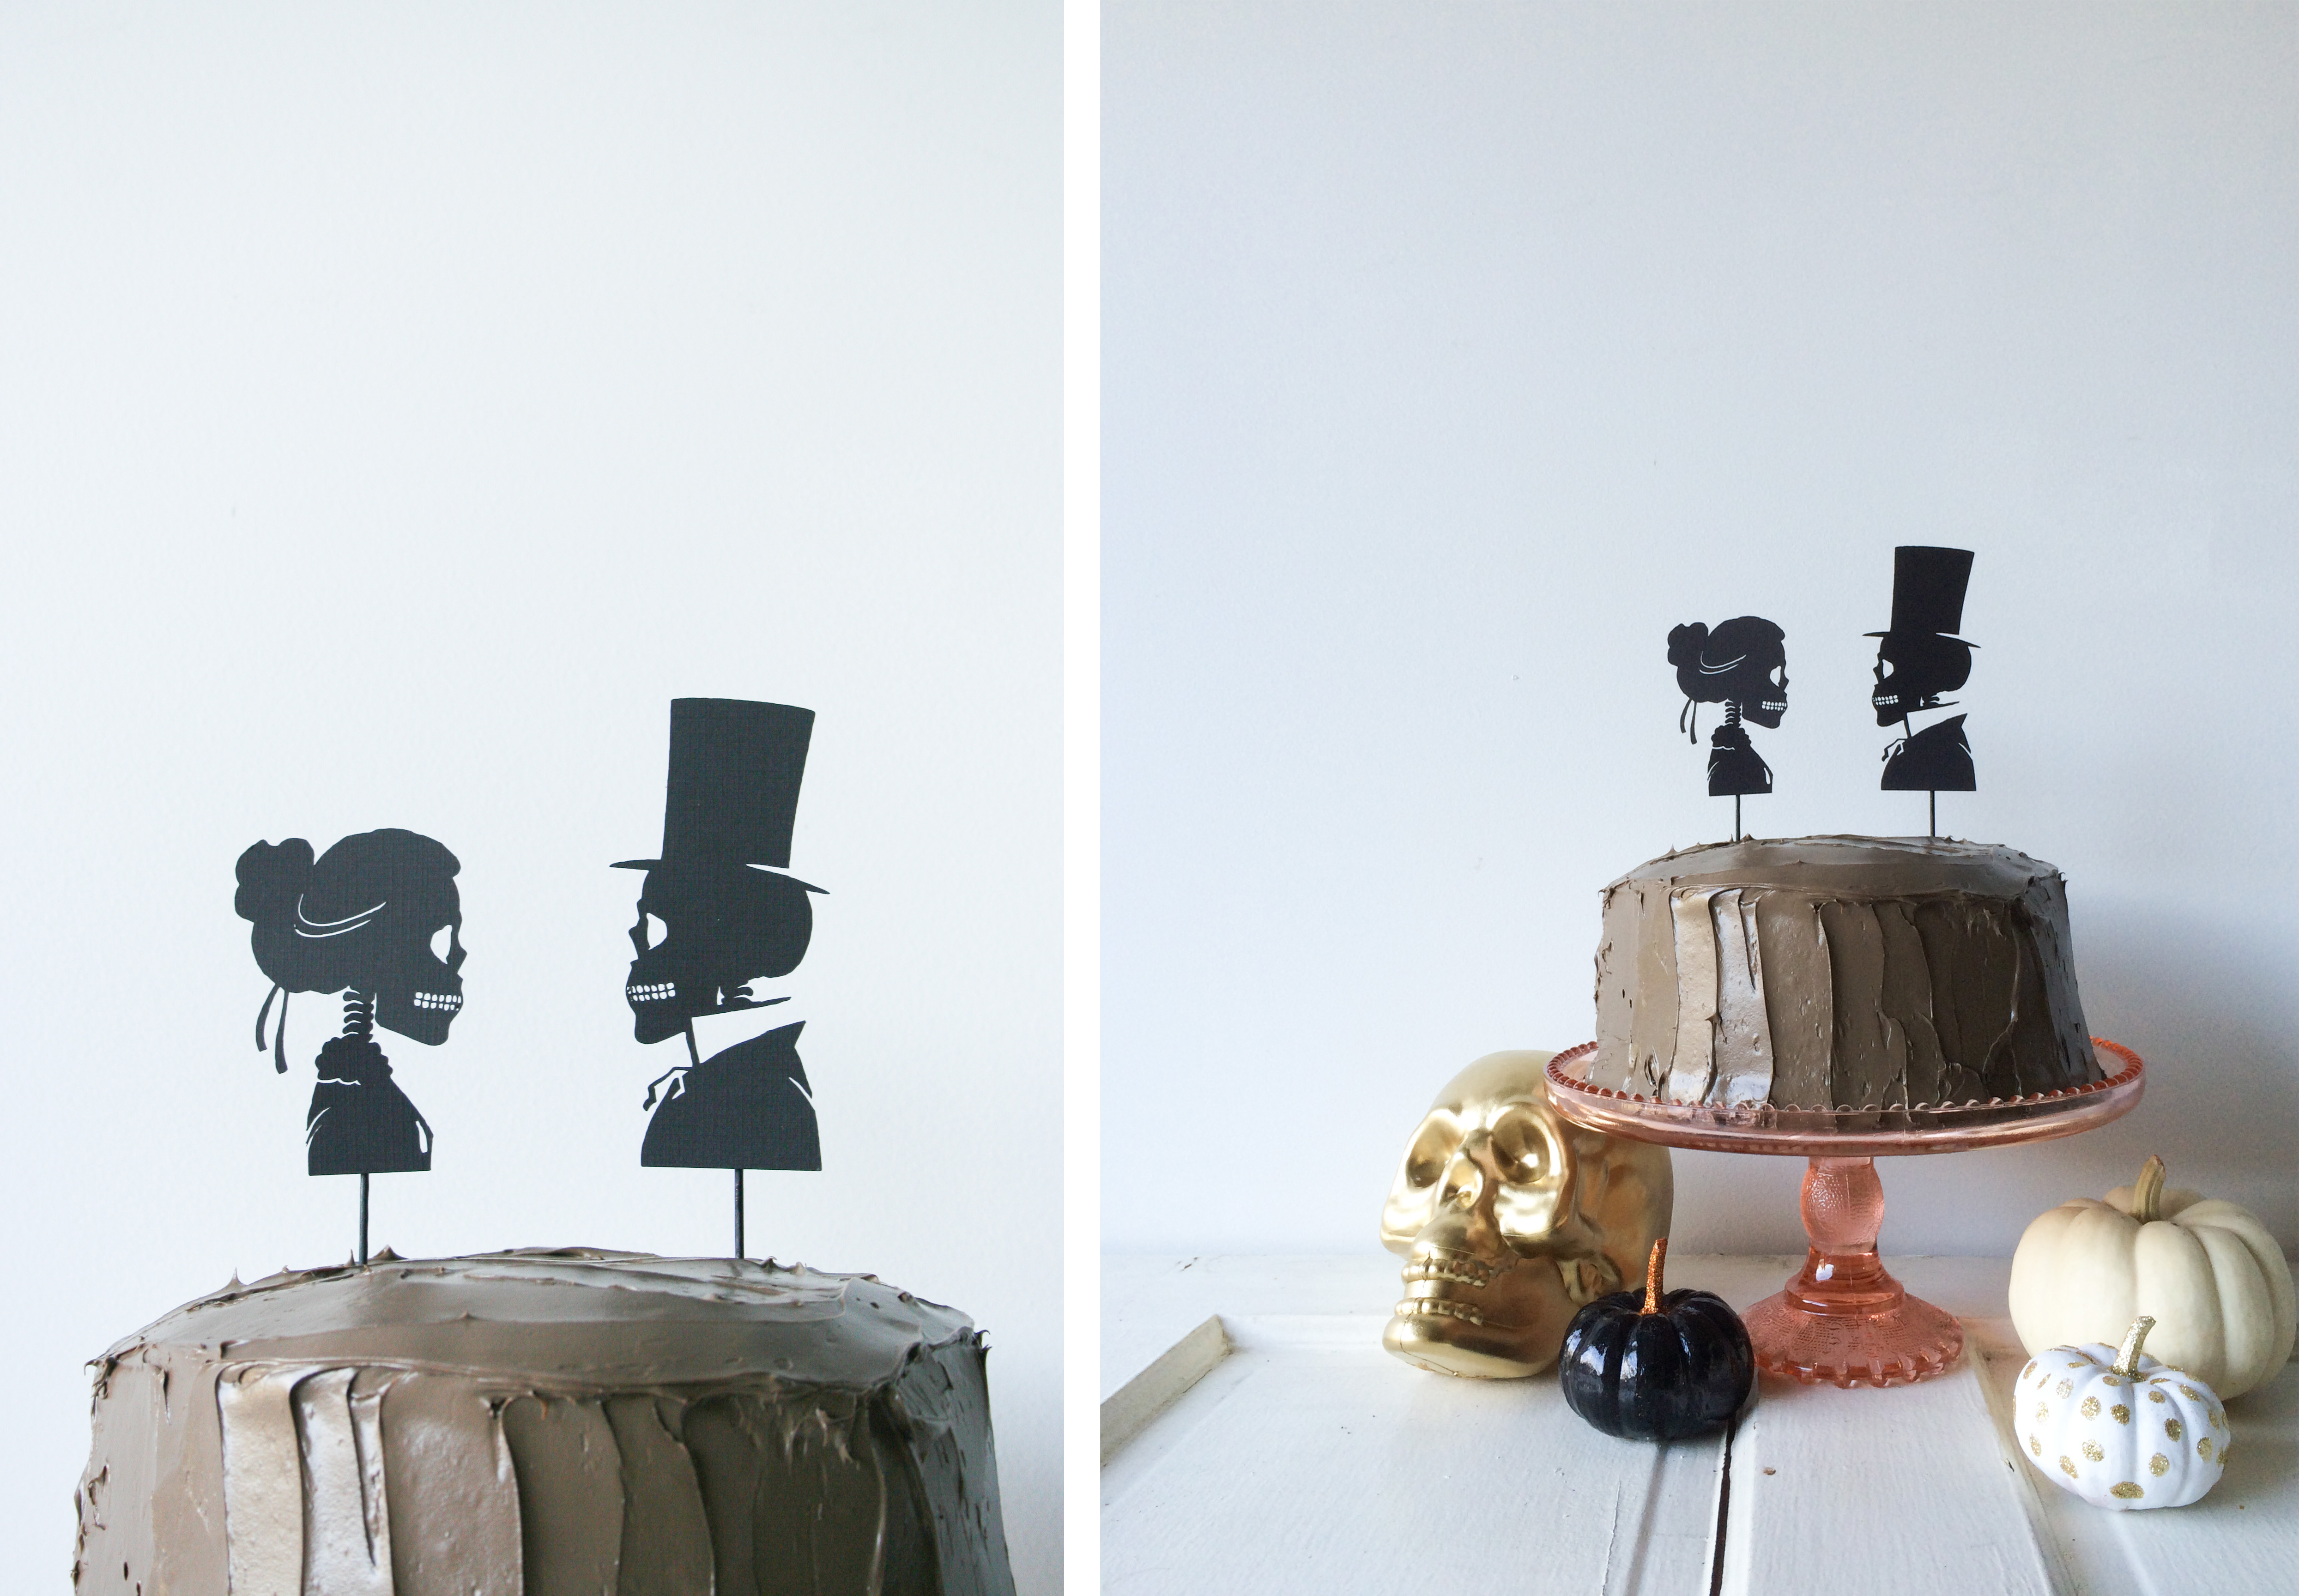
Step 7: Attach self-adhesive glue dots to the back and attach to toothpicks.
Step 8: Bake a cake! Stick them in! Party!
Optional Step 9: Want to frame them and put them out as wall decor? Cut them out slightly bigger and put them into vintage/thrifted frames!
Or if you don’t yet have a Cricut Explore (go get one already!), I’ve got a PDF here for you, but don’t blame me when you cut your fingers cutting!
- Frameless Skeleton Silhouettes PDF (Free Download!)
And if you haven’t yet purchased a Cricut Explore (and really, why haven’t you?) don’t forget to use coupon code HALLOWEEN31 for FREE SHIPPING on orders of $31+.
Disclaimer: I’ve been invited to work with Cricut. For my participation in Cricut’s Design Space Star competition, Provo Craft & Novelty, Inc. gave me a Cricut Explore. The Cricut Explore and access to Cricut’s Design Space featured in this post has been provided by them, but the ideas and opinions here are all my own. I am a member of the Cricut Blogger Network. I may receive prizes in exchange for my winning projects. (Fingers crossed!) Even though I am not being directly compensated for these posts, I am under consideration for a prize with Cricut Design Space Star™.
Creepy Crow Garland
Tuesday 20th of October 2015
[…] this Crow Garland doesn’t fit that theme. I know. I made Skeleton Silhouette Wall Art and Skeleton Silhouette Cake Toppers and Flamingo Skeleton Cake Toppers, but my creativity just couldn’t stop and the flamingos […]
Cricut Design Space Star: Turkey Shoot Thanksgiving Tablescape
Thursday 20th of November 2014
[…] with your Cricut Explore™ to decorate for Thanksgiving dinner! Carrying on with my bird themed Halloween cake topper and garland, I thought I would design a beautiful, vintage-inspired Turkey Shoot tablescape! Using […]
Help Me Be the Next Cricut Design Space Star!
Monday 27th of October 2014
[…] you haven’t made these for yourself to decorate your house for Halloween, then check out my original post with a tutorial and downloadable files so you can print them out, frame them, and be ready for […]
Lisa
Sunday 26th of October 2014
Wow, how does that little thin neck piece on the guy skeleton hold the head up so straight? It looks like it should fall right over! What card stock did you use? Very cute design!
LegalMissSunshine
Sunday 26th of October 2014
Thank you, Lisa! He's kind of cantilevered on there. That and magic hold his head up.
The card stock is just 59 cent black "linen" style 12x12 paper from Michael's, nothing fancy or hard to find. But I did find that when I printed them out on a little bit thicker card stock, they stayed up straighter and cut out better.
If you make them, please take a photo of them and tag me on Instagram! I would love to see!