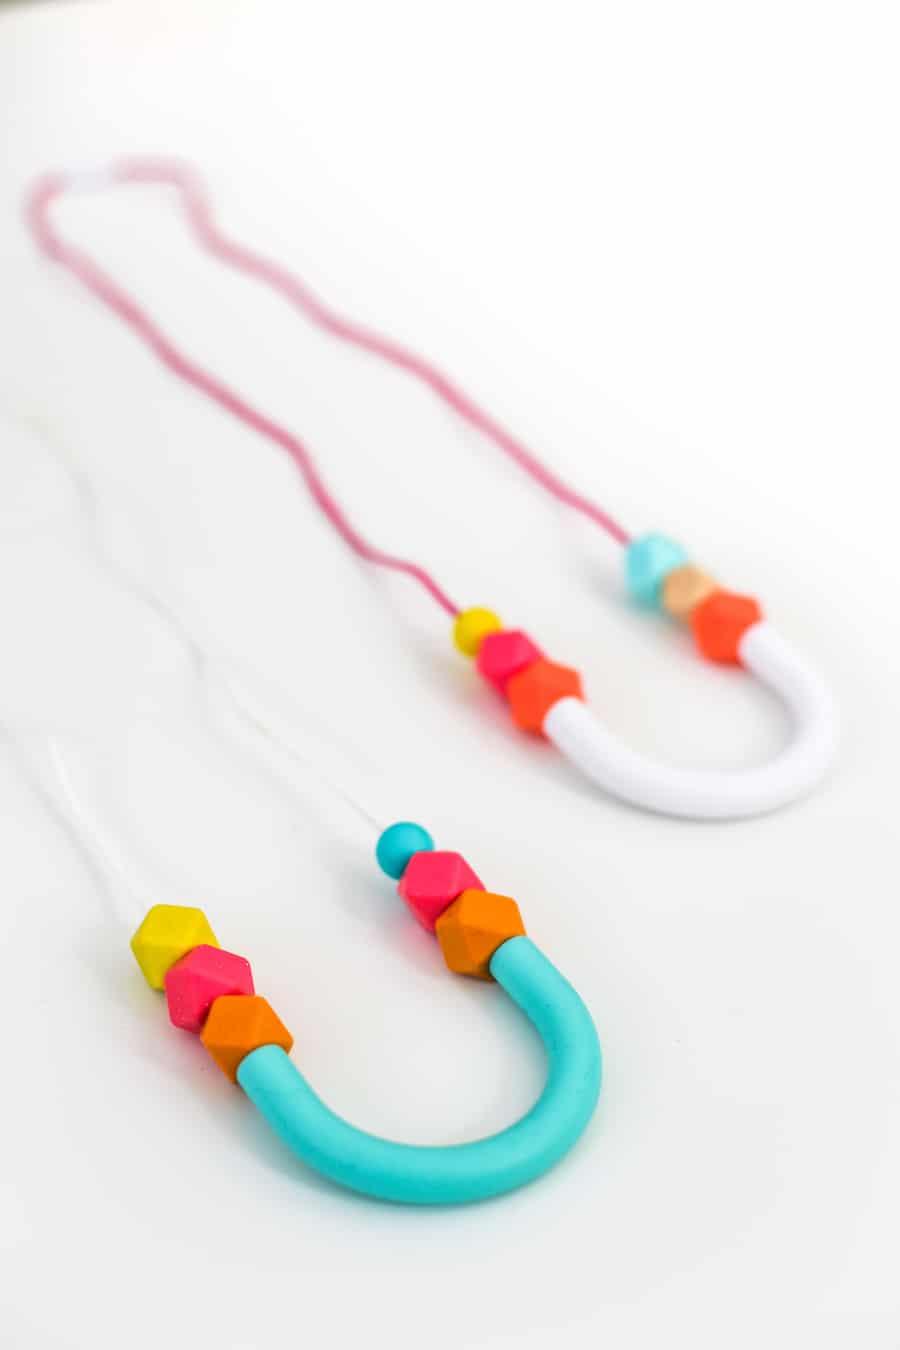
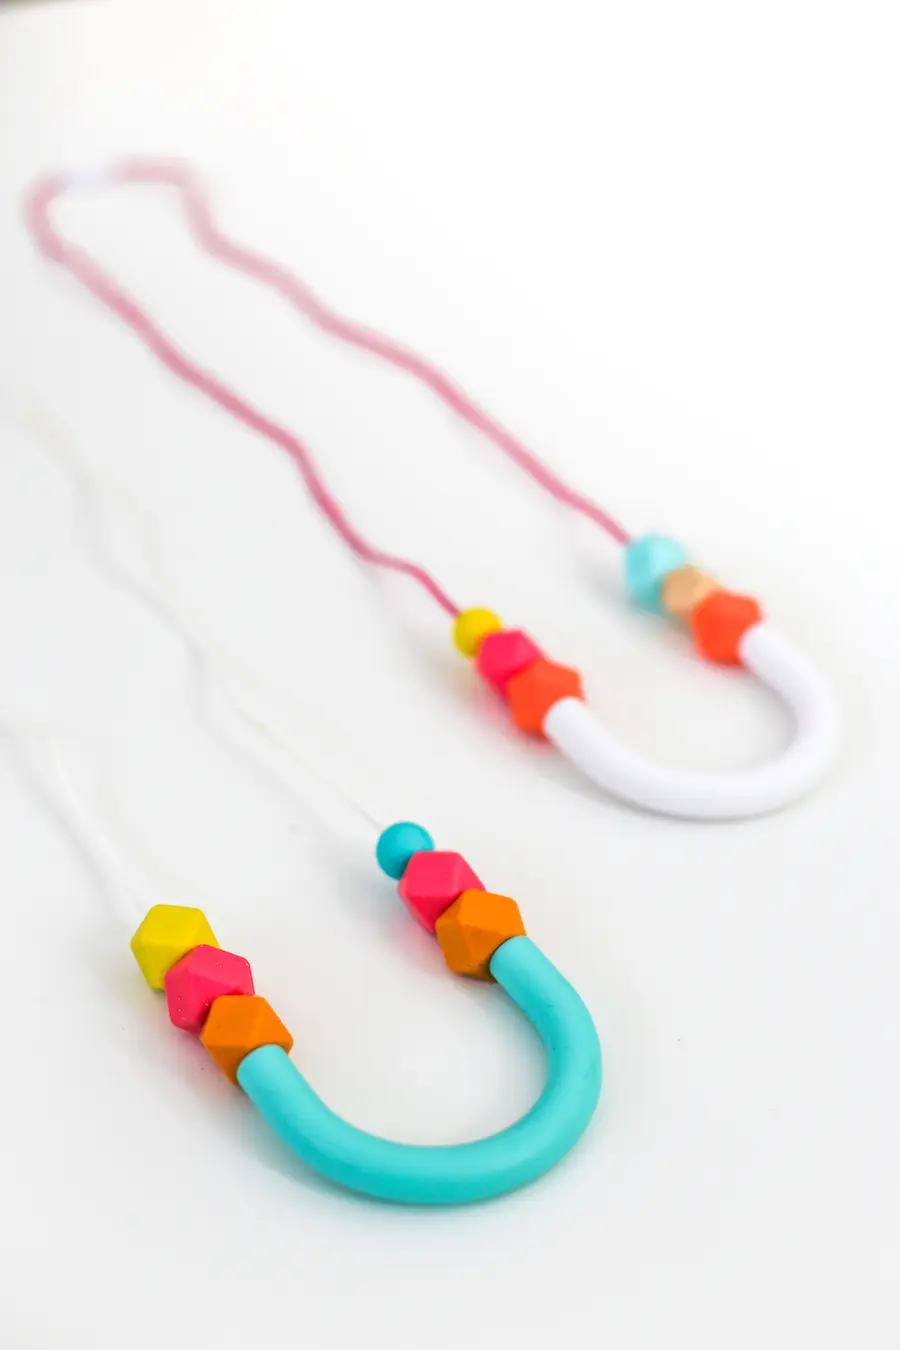
I’m sharing this easy DIY Teething or Nursing Necklace Tutorial because Calder, my third baby, has been so distracted while breastfeeding and he has been biting me! So I needed something to engage him and something else to bite instead of my nipples! I didn’t love any of the ready-made necklaces available on Etsy, so I decided to DIY my own Teething and Nursing Necklace. It’s such a quick and simple craft and it’s relatively inexpensive so you can make one for yourself and gift one to a new mom!

The Teething or Nursing Necklace has definitely helped me reduce Cal’s biting while nursing. I had followed all of the instructions on the internet about how to stop a baby from biting while nursing, but a month later he was still doing it and it hurts! (You can read more about My Breastfeeding Journey here.) So I decided to make these necklaces and I wear one while nursing him. Now when he bites me, I simply tell him, “No, that’s for milkies. If you want to bite, bite this!” and then give him the necklace to chomp on to relieve any teething pressure. It’s worked and he hasn’t bitten me in a few weeks now even though he has a tooth cutting through any day now!
Disclaimer: Never leave an infant or child unattended with a Teething or Nursing Necklace. Crafter assumes full responsibility for items built using this DIY Teething and Nursing Necklace Tutorial. This DIY Teething and Nursing Necklace contains small parts and crafter assumes full responsibility for ensuring it is used in a safe manner. By making a Teething or Nursing Necklace, crafter agrees that use of a DIY Teething and Nursing Necklace is entirely at the crafter’s own risk. Salty Canary, or any of its agents, affiliates, or contact providers shall not be liable in any way for any direct, indirect, incidental, special, or consequential damages arising out of use of a DIY Teething and Nursing Necklace. Again, never leave an infant or child unattended with a Teething or Nursing Necklace.
DIY Teething or Nursing Necklace Tutorial
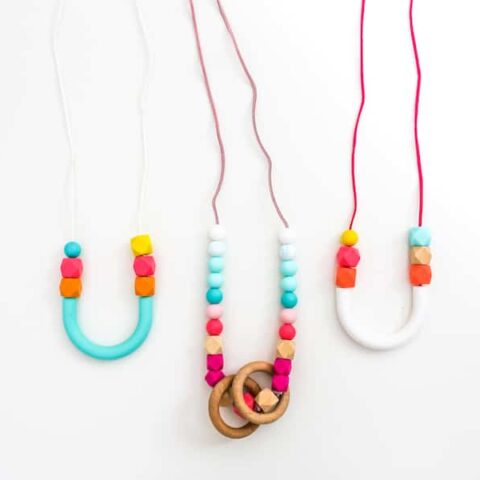
I’m not kidding when I say this is an easy DIY. I made all three of these necklaces during my baby’s nap. Actually, I photographed everything for this post AND made the necklaces during his hour-and-a-half nap, so if you’re just making the necklaces, you could probably make one necklace in fifteen minutes from start to finish.
A printable tutorial is at the bottom in case you want to save it for later, but here is the full tutorial with all the steps.
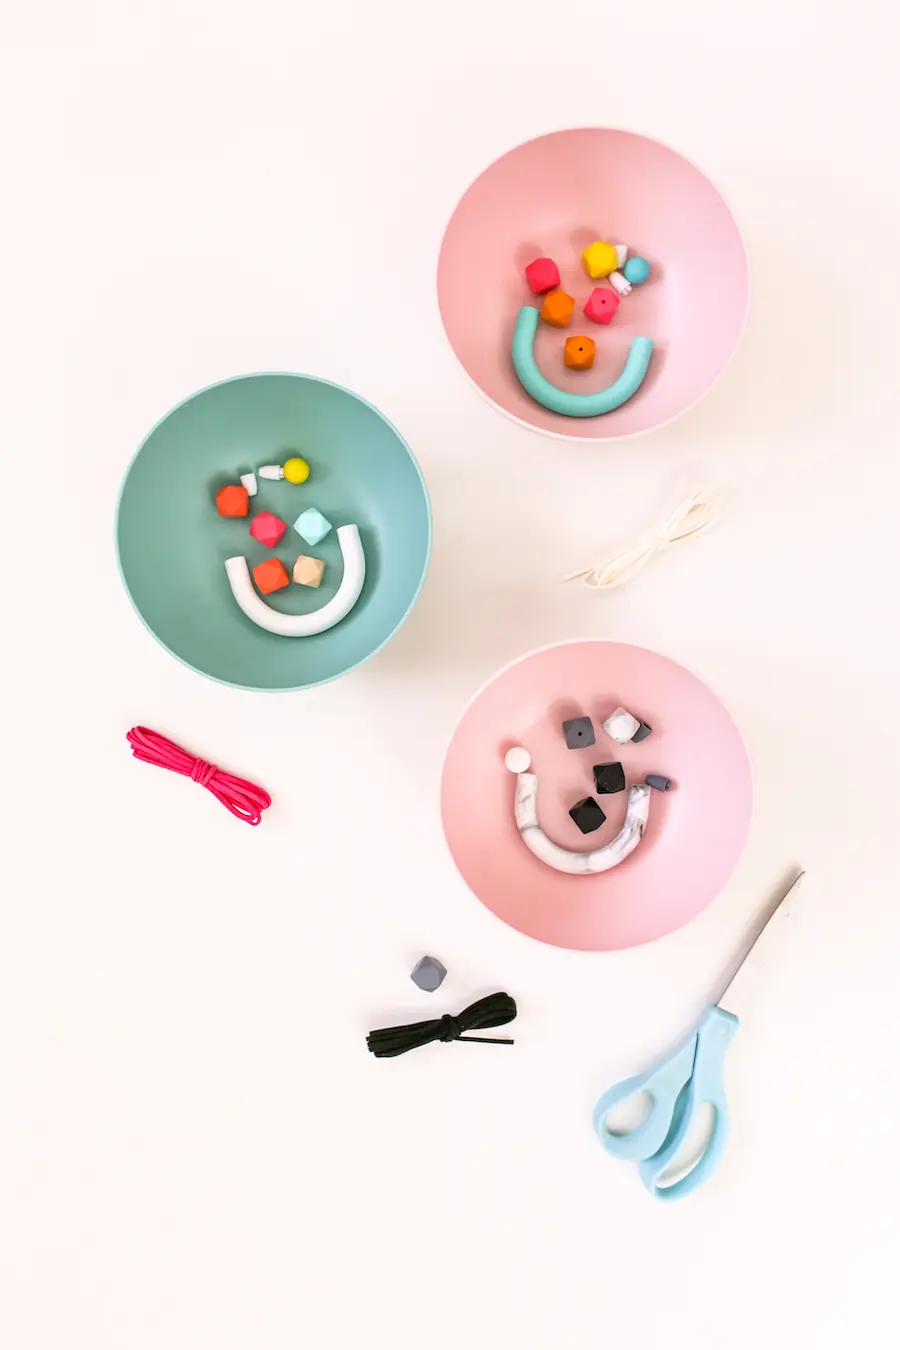
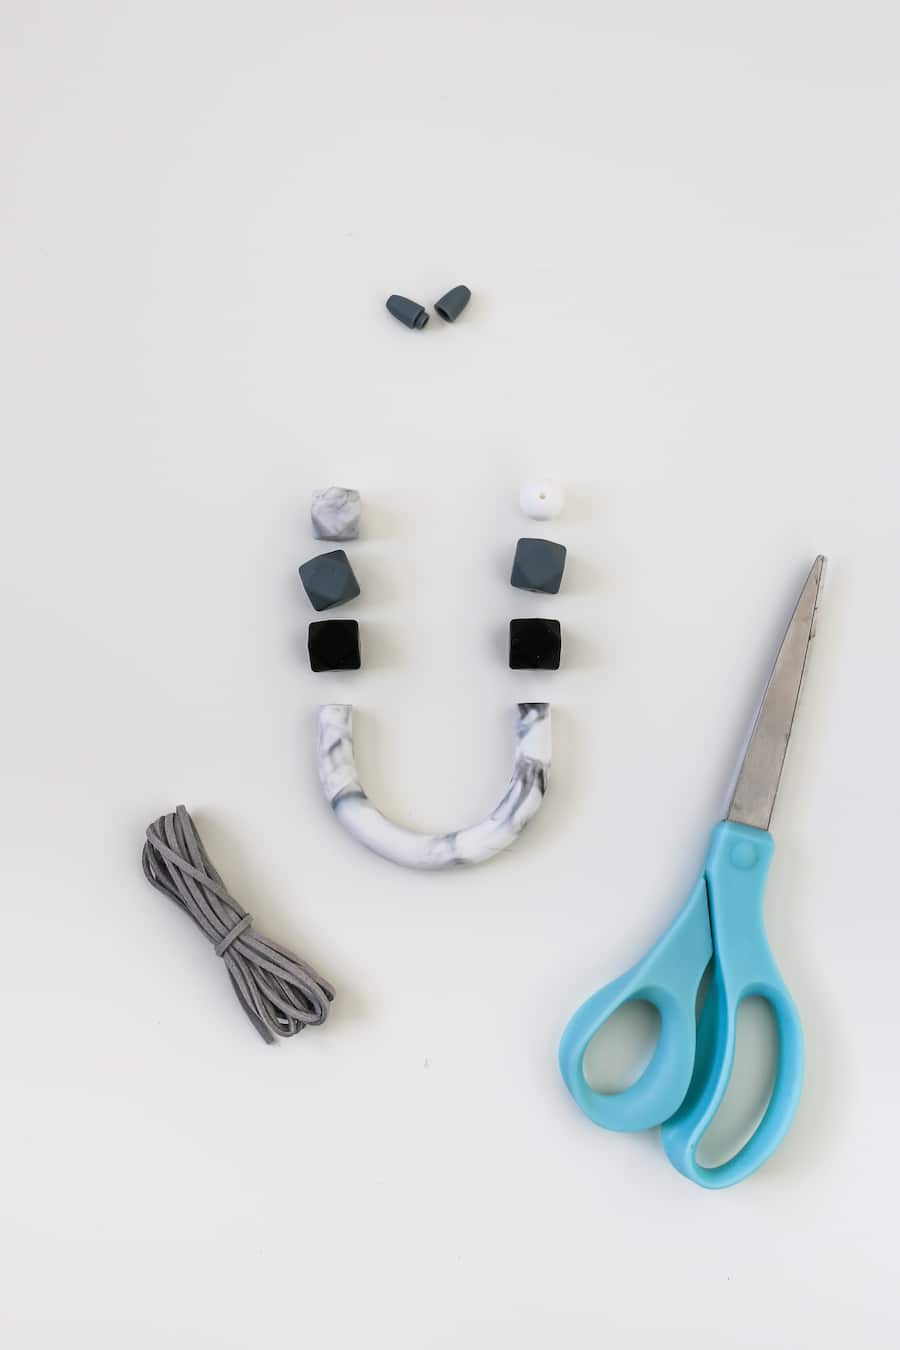
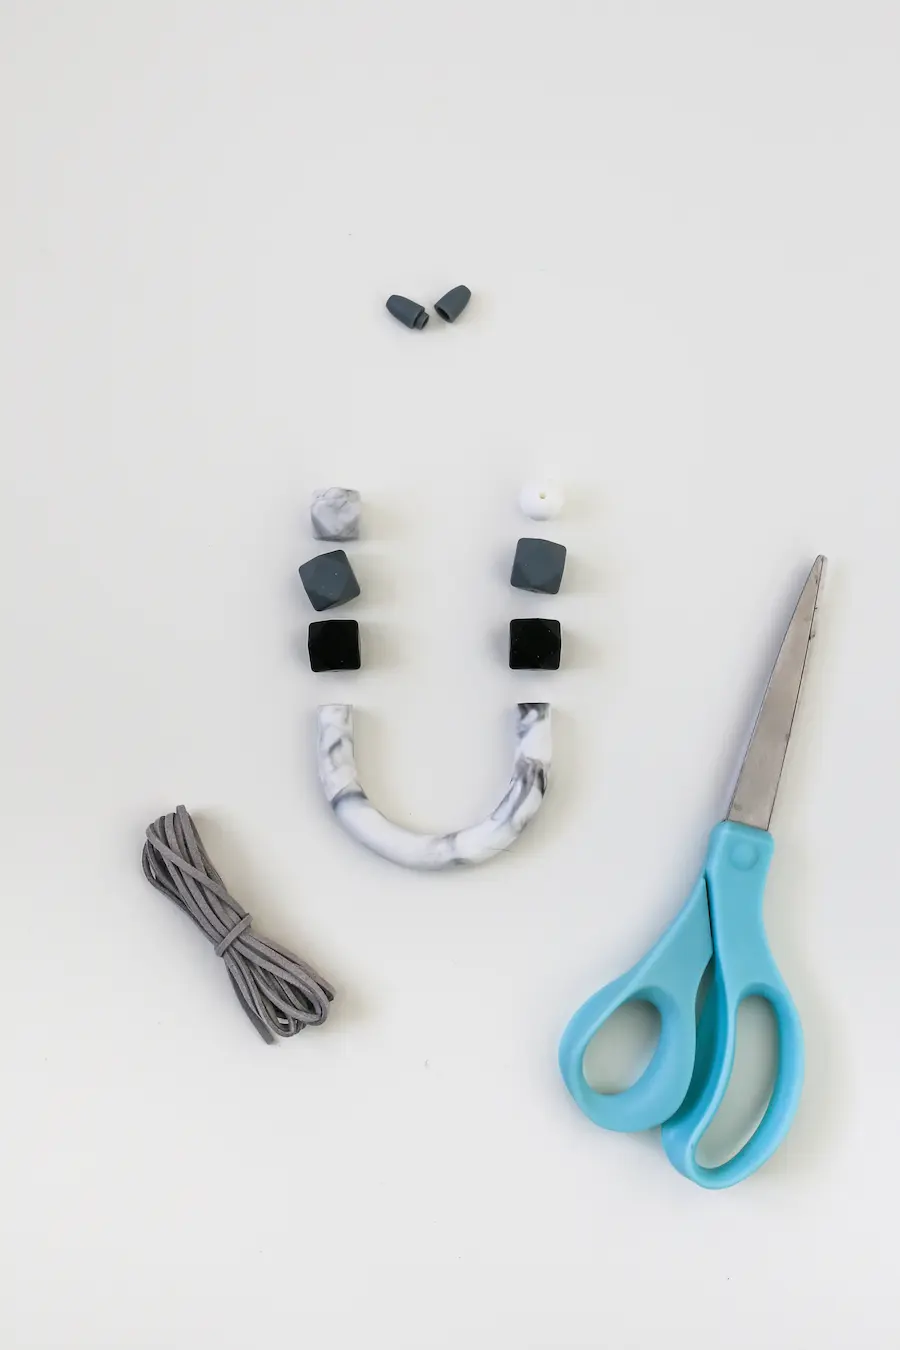
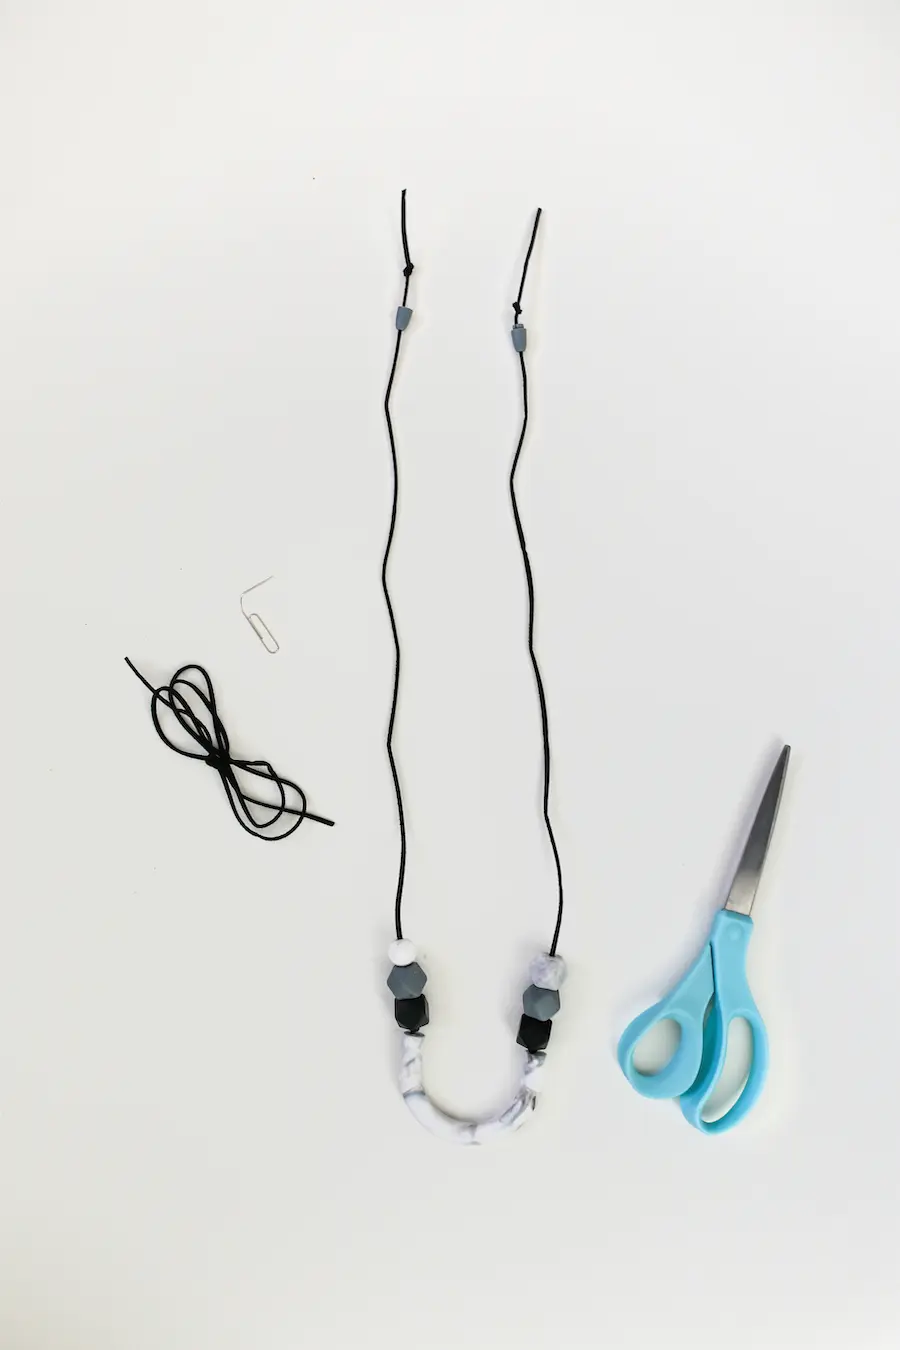
First, you will need a few supplies and tools:
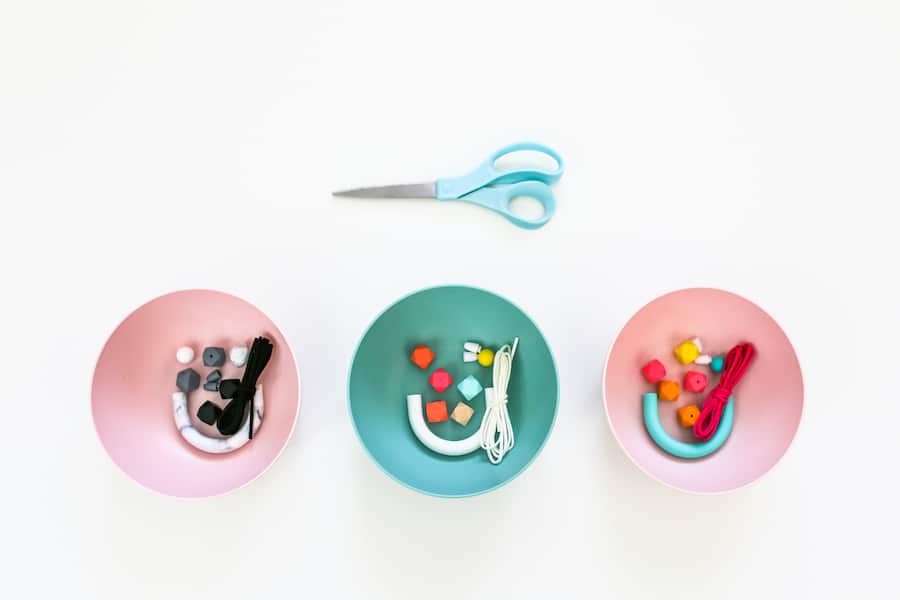
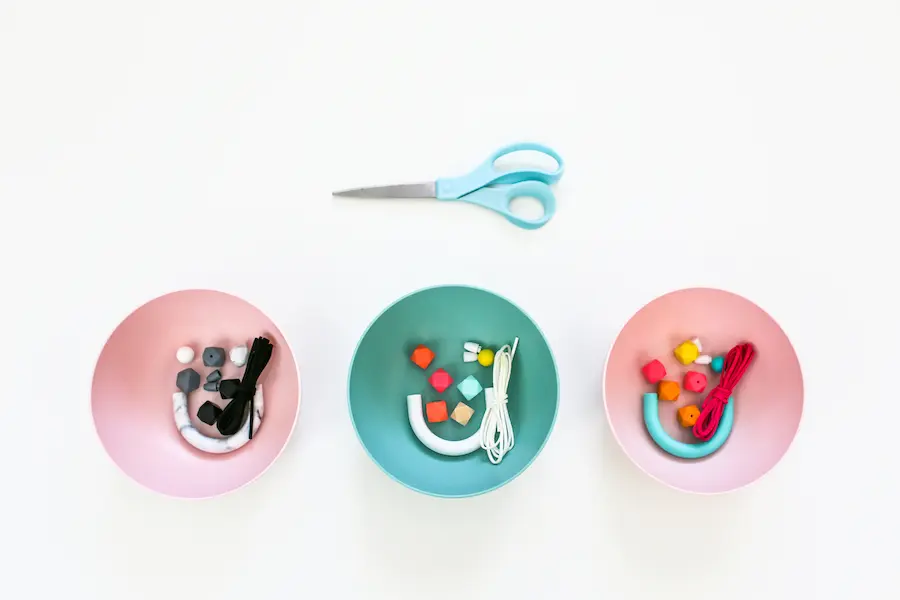
Supplies:
Or … here is a link to an easy and under $5 DIY Silicone Necklace Kit from Etsy with everything you need for a necklace but with NO silicone U-bead. It comes with nylon cording.
Tools:
- Scissors
- Paperclip

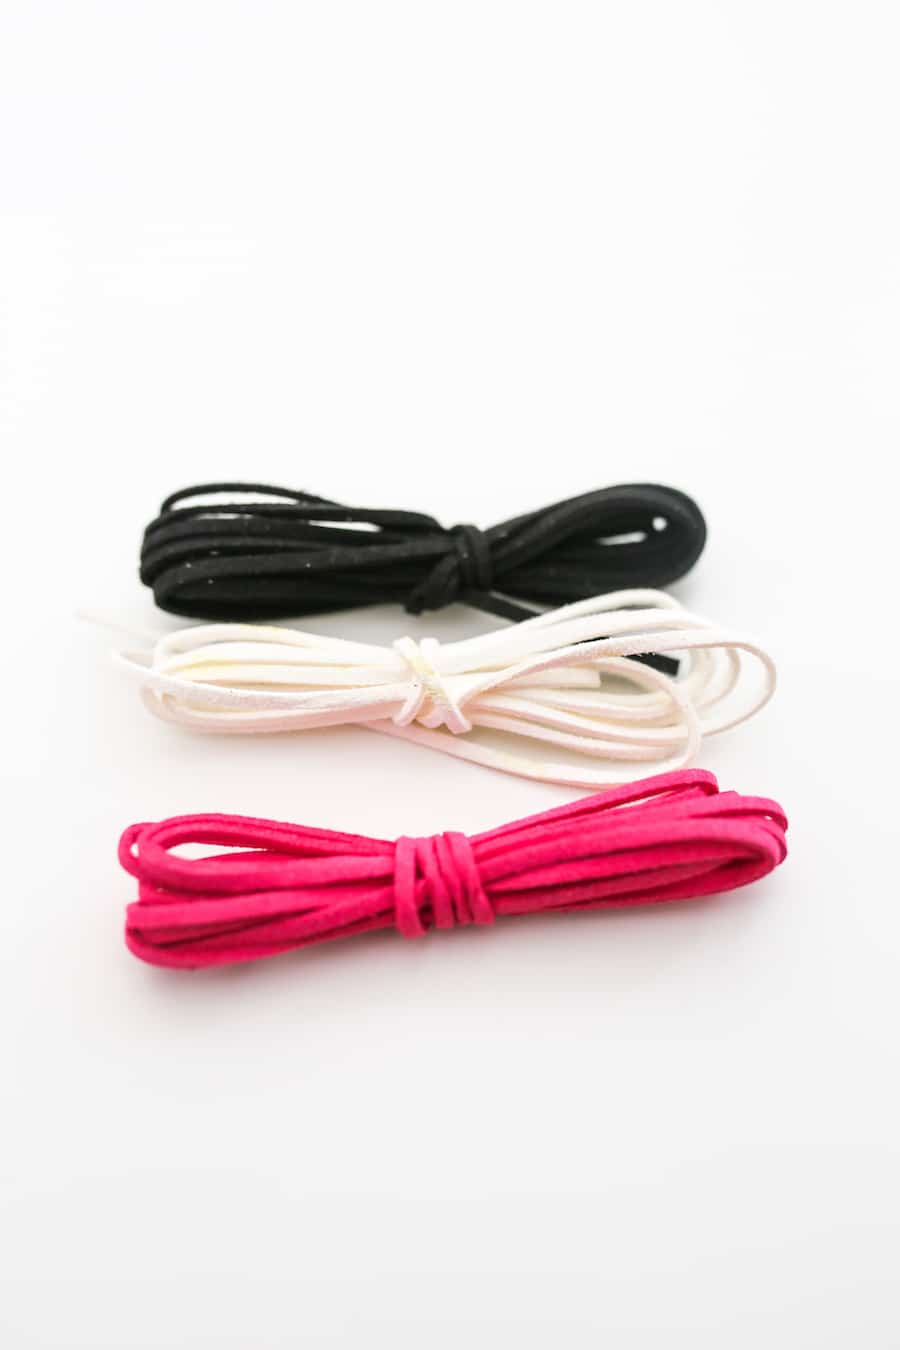
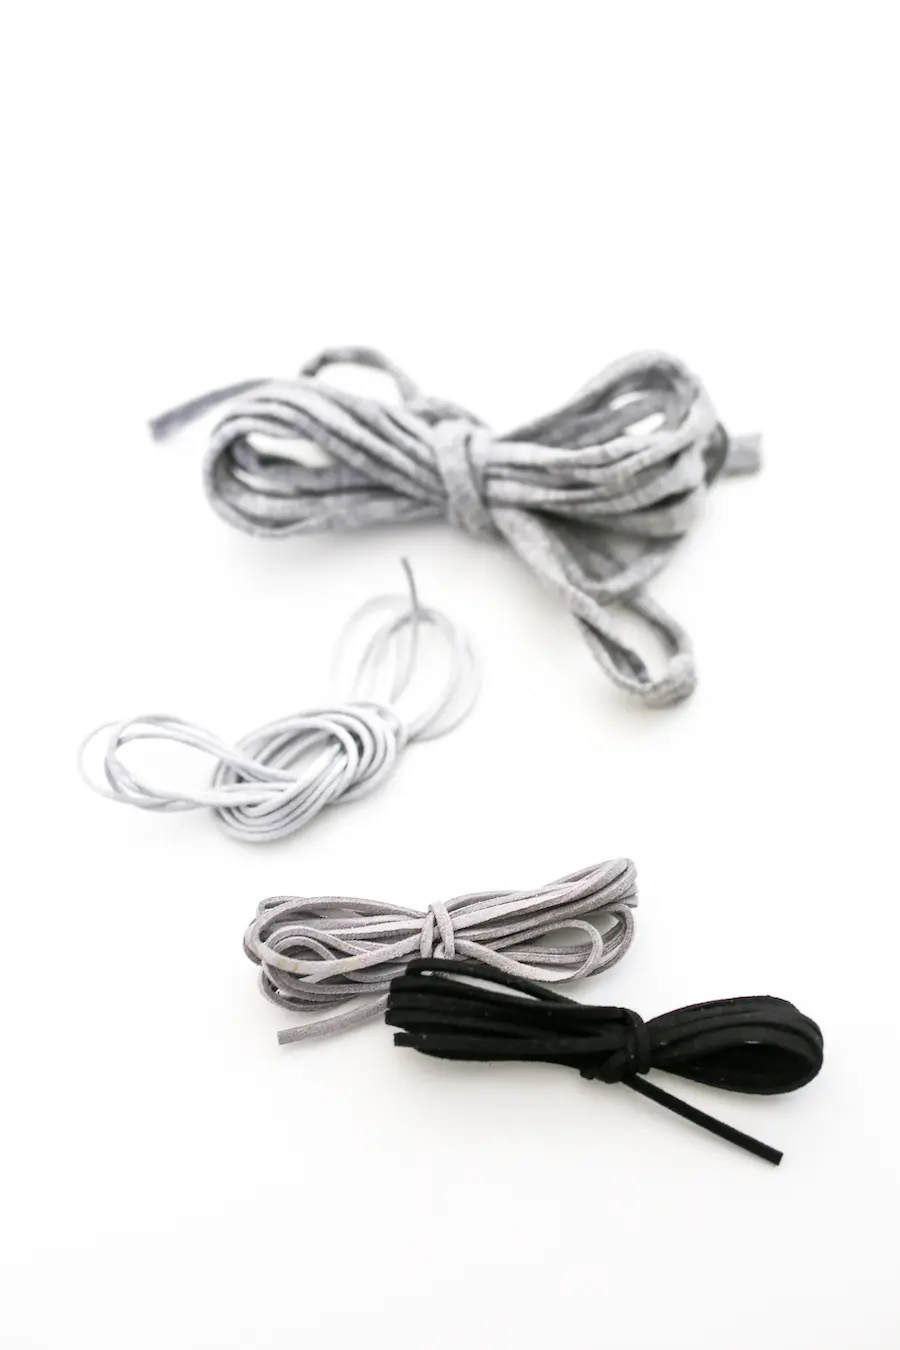
As for cording, you have several different types to choose from. You can do suede cording, nylon cording, or even tee-shirt yarn (if you’re using larger beads with larger holes).
I chose this suede cord because I think it looks a bit more upscale and expensive, although it does rub a bit when Cal yanks on it when around my neck, but so far, no cord burn!
If you would also like to use suede cord, here are a few other links to available suede cord in other colors:

I set out bowls for each of the necklaces I was making with all of the beads, breakaway clasps, and cording inside the bowl so they wouldn’t get mixed up (and so I wouldn’t lose any on the ground – I’m very careful about loose choking hazards around the house because I have so many little kids.)

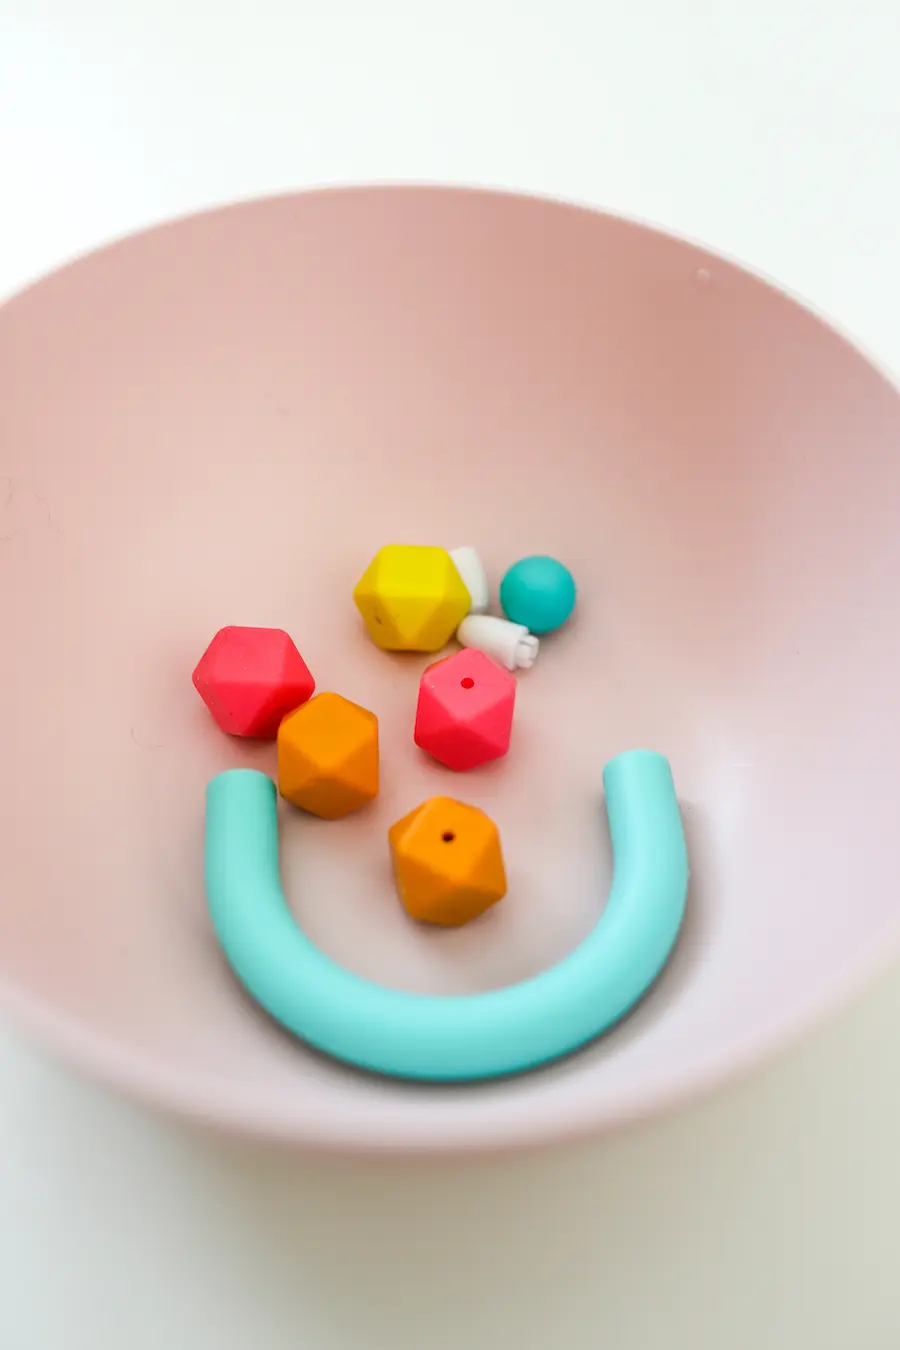
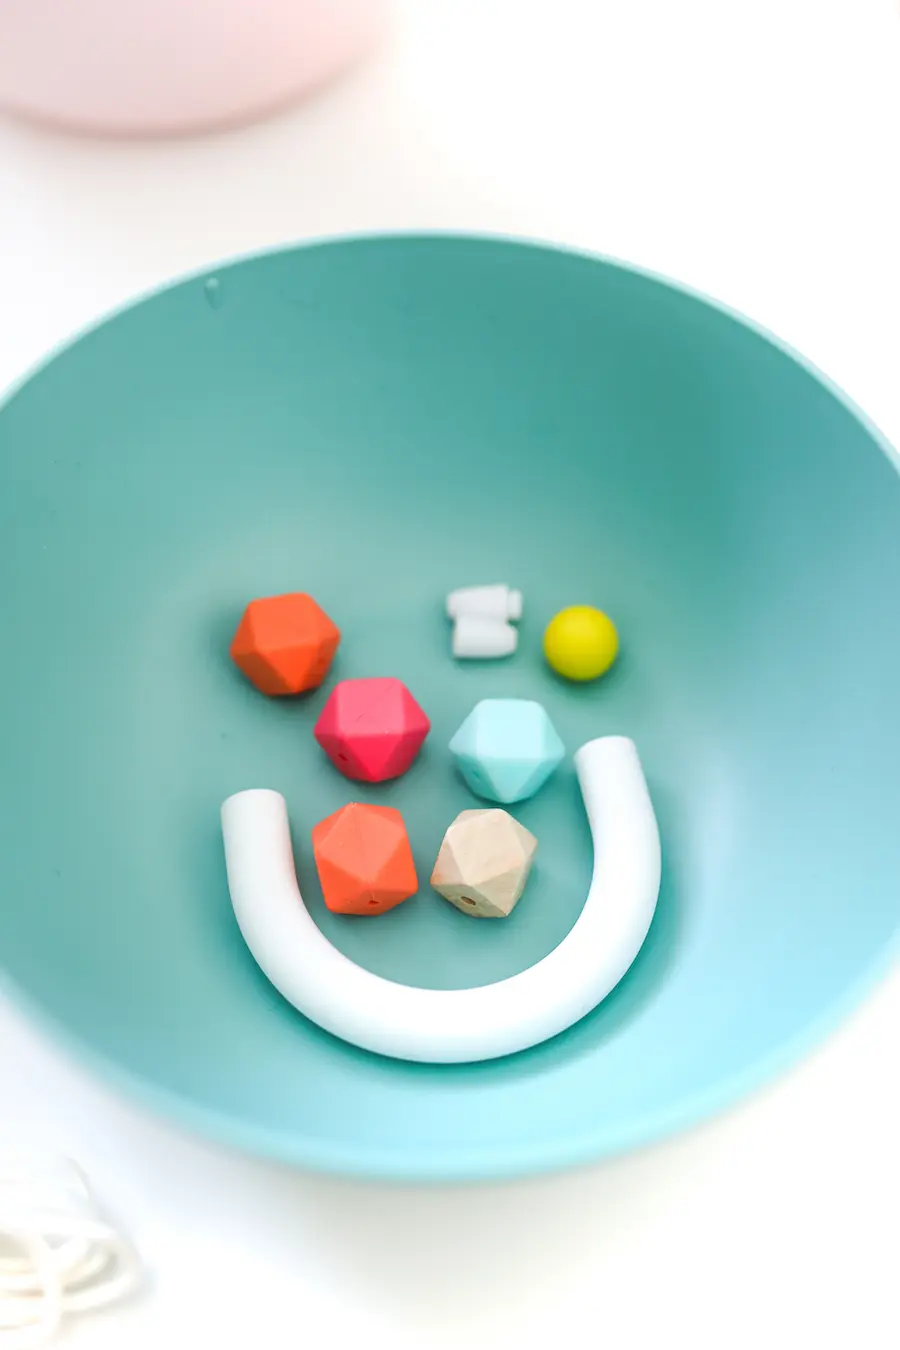
Step 1: First, put together a little mock-up of how you want to position the beads on your necklace and take a photo of it with your phone.
Step 2: Start stringing your beads onto your cord, starting with the middle bead and working your way up one side.
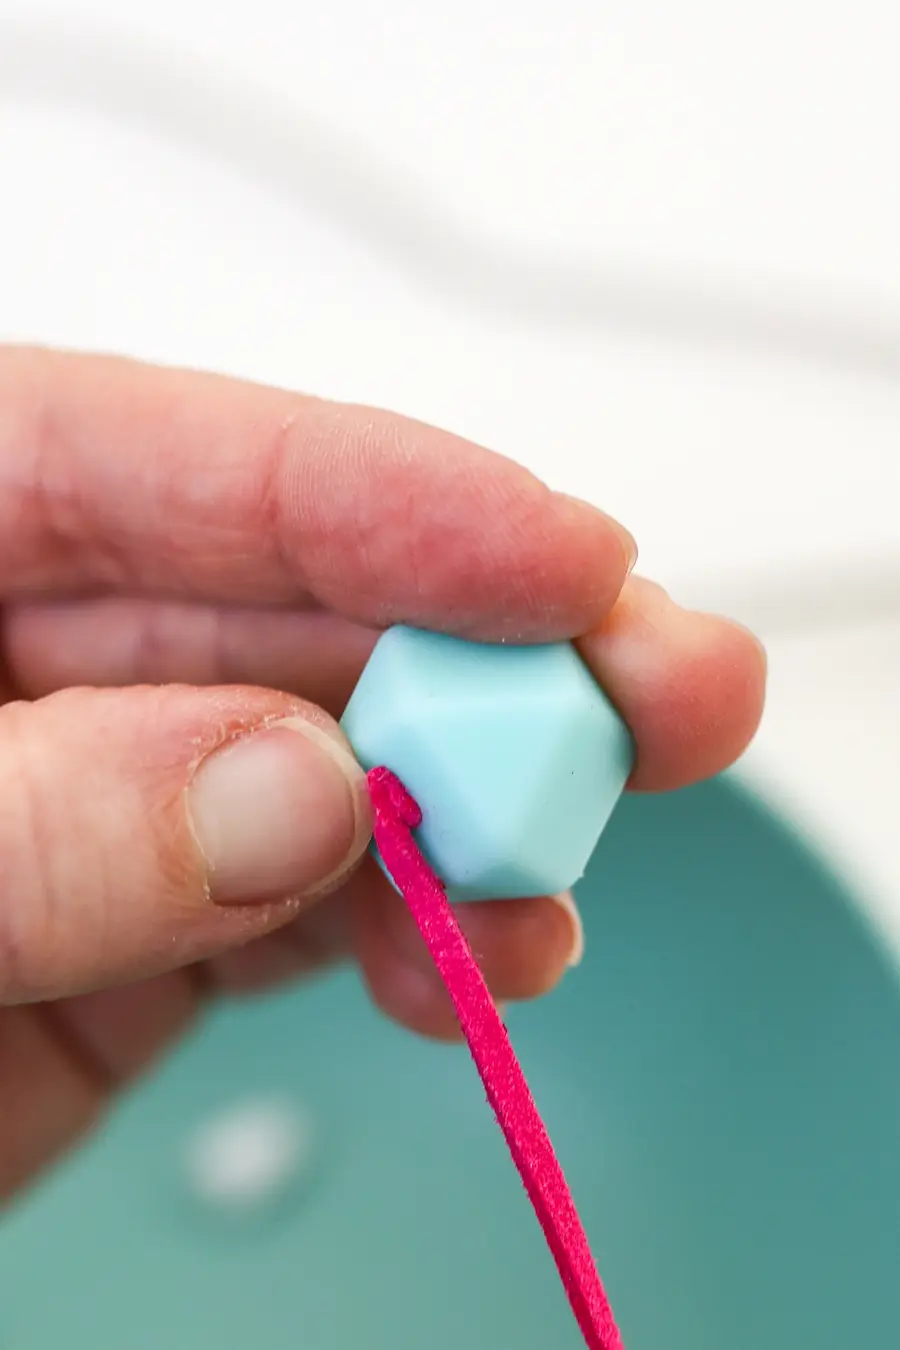
Because the cord I used was a bit too thick, I would have to force the cord through the hole by bunching it up and using my thumbnail to squish it through bit by bit until it started to show on the other side.
Here’s a photo of it bunched up (ignore my poor dry hands and pandemic nails):

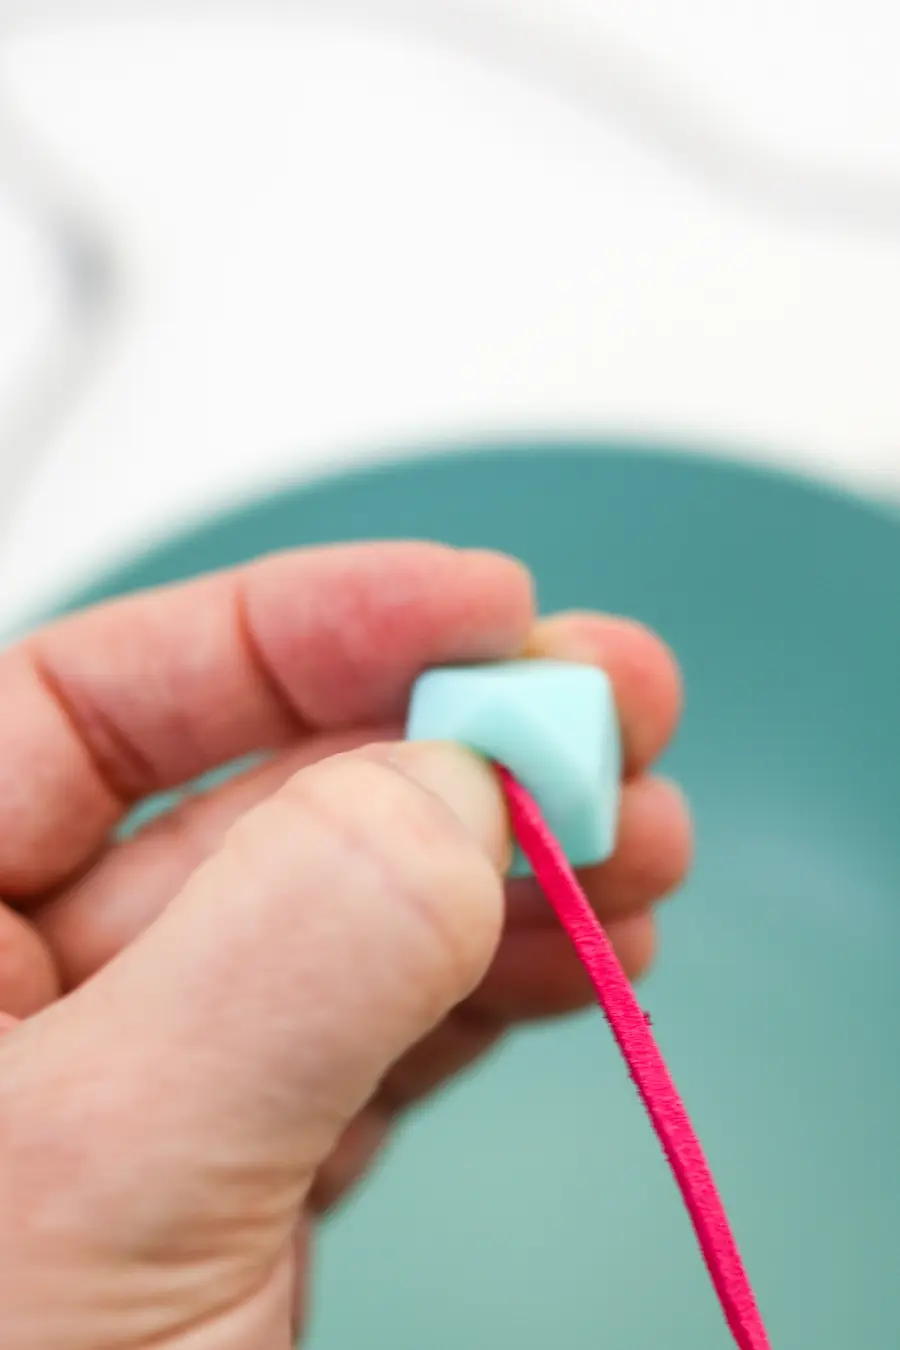
And then squish it through with my thumbnail:

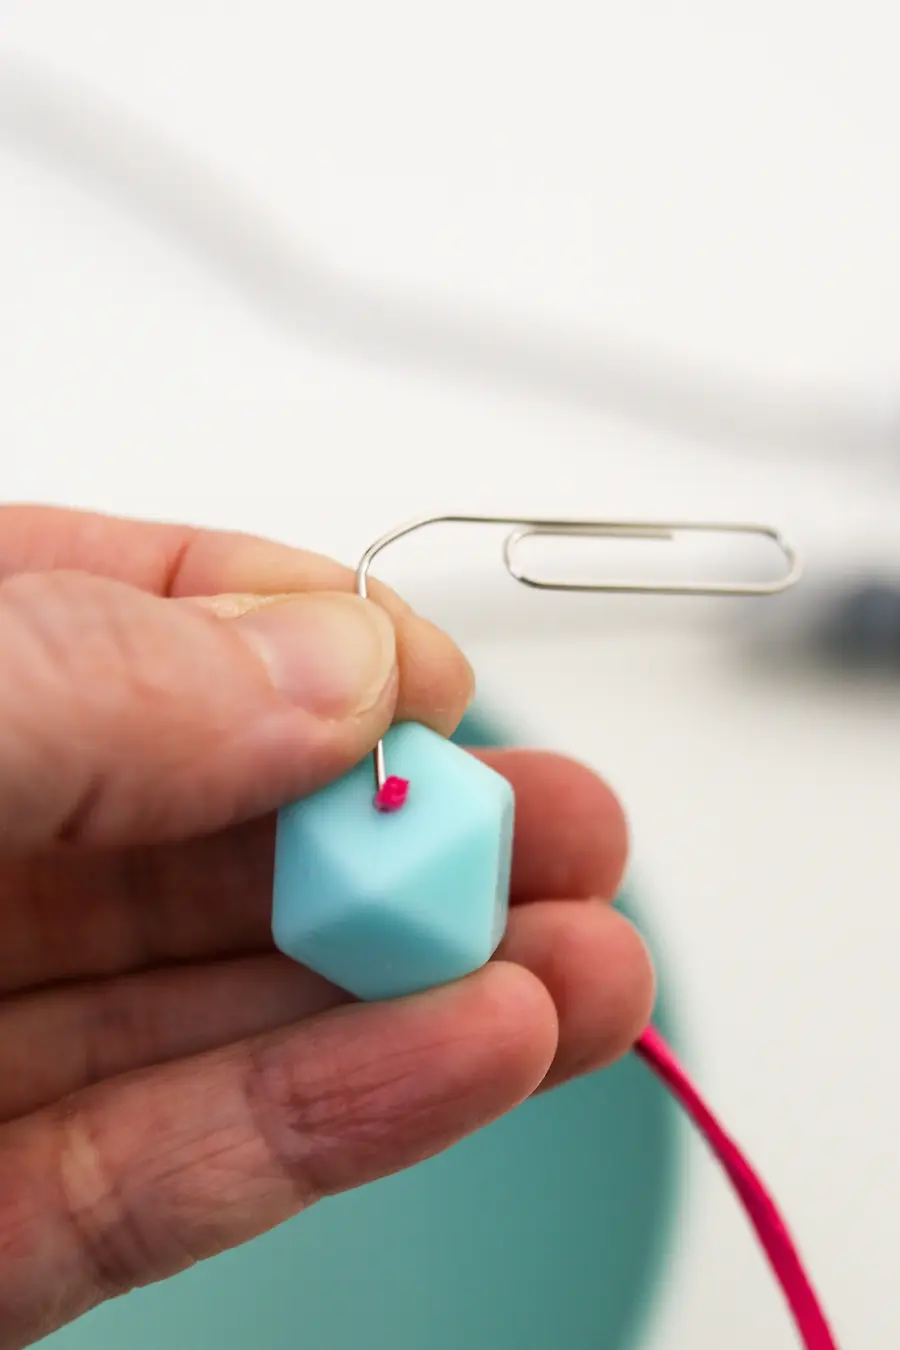
And then when it starts to show on the other side, use one end of a paperclip to pull it out.

Step 3: Continue stringing your beads up one side and then hold it up to yourself to see how long you want it to be before cutting the cord, then continue stringing the beads up the other side.
Step 4: Once all the beads are strung then add your breakaway clasp beads to the ends before tying two double knots (make sure they are small enough to fit into the breakaway clasps) and then pulling the knots into the bases of the breakaway clasps so they’re hidden.
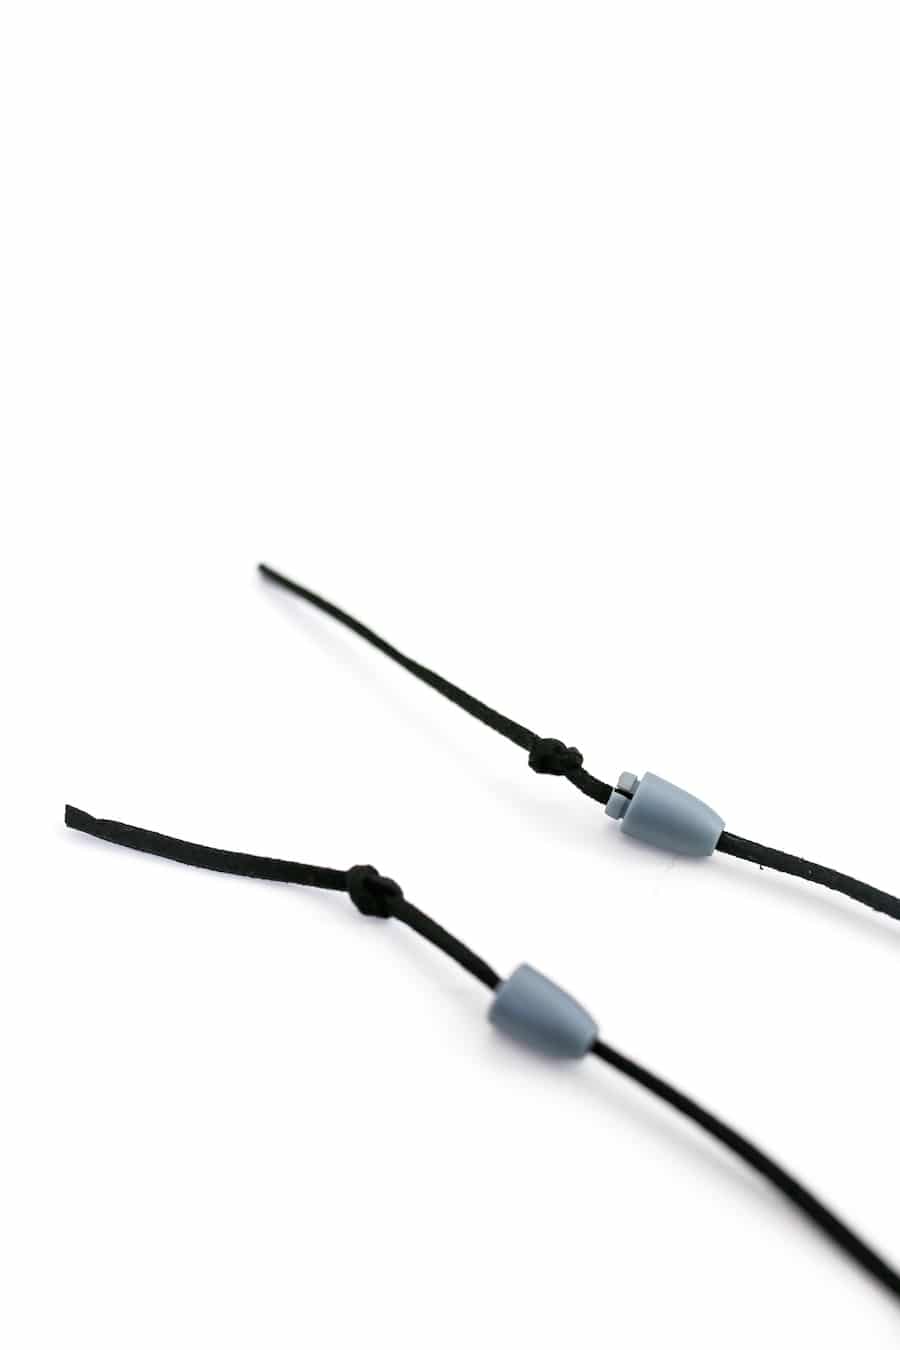
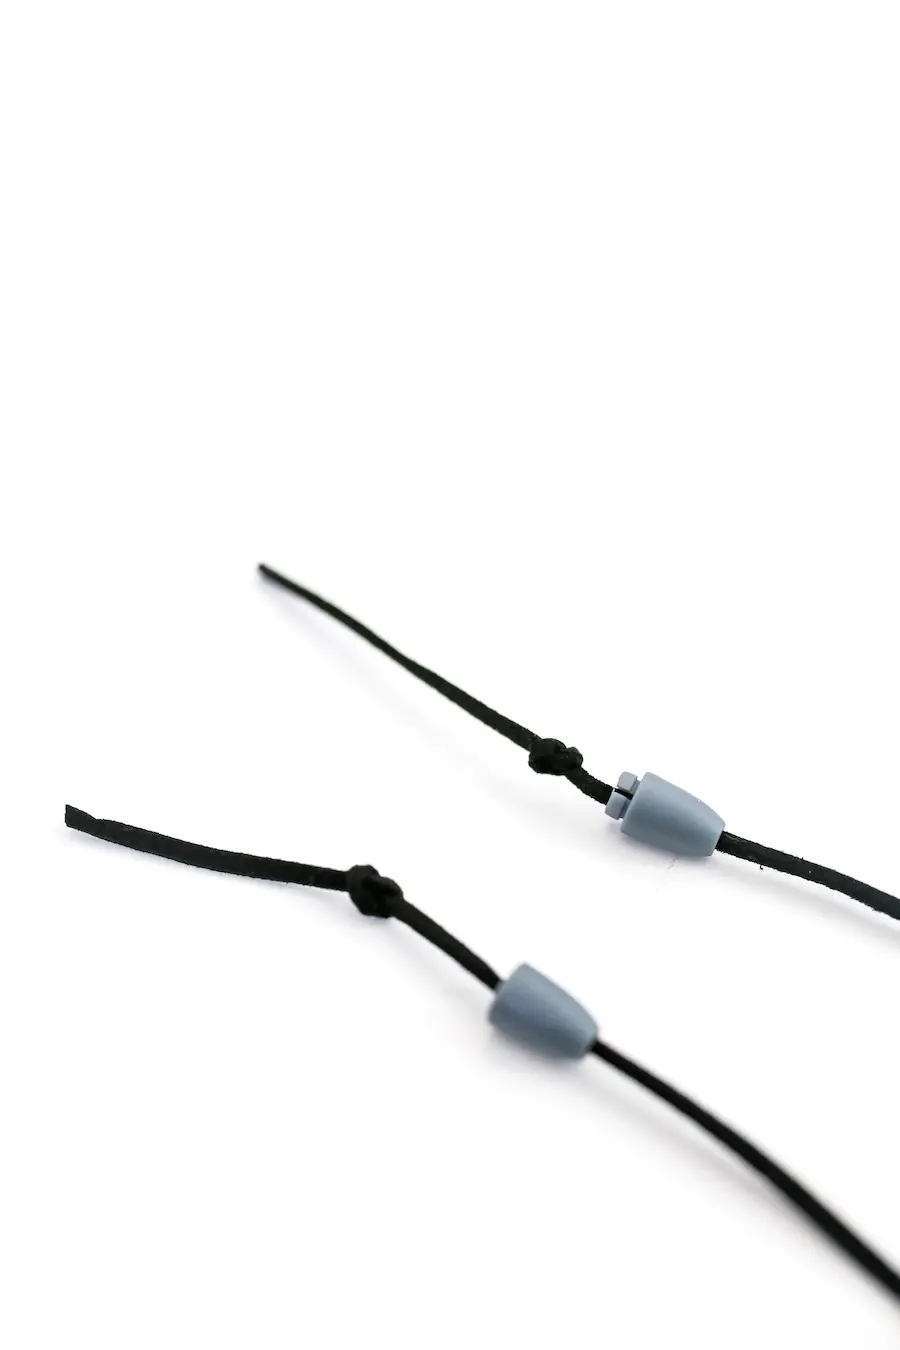
Step 5: Cut any excess cord off just above the knots and fasten your breakaway clasp.
Step 6: You might need to clean off the beads depending upon the type of cord you used. I just used a baby wipe and wiped off any suede cording lint that came off while I was stringing the beads.
That’s it! Seriously, how easy it that?
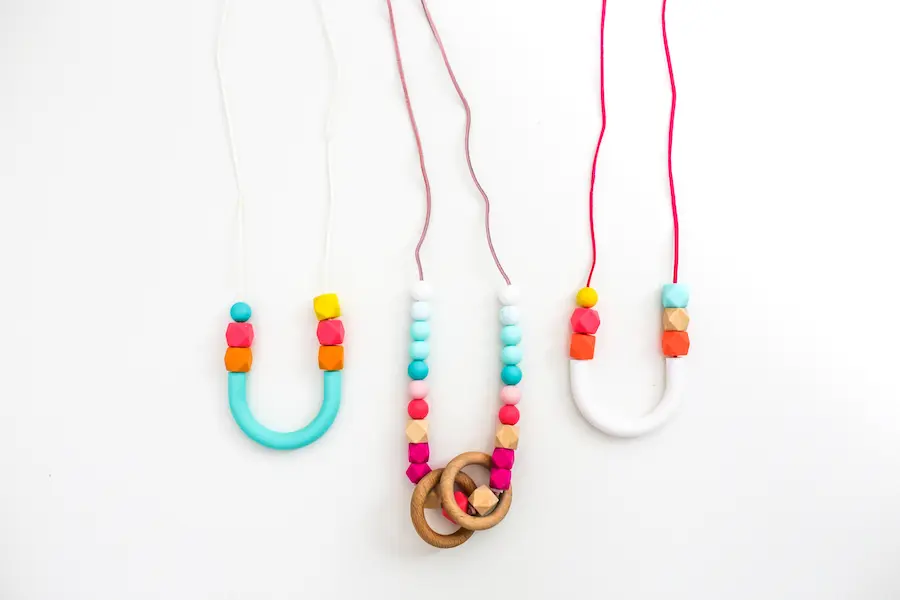
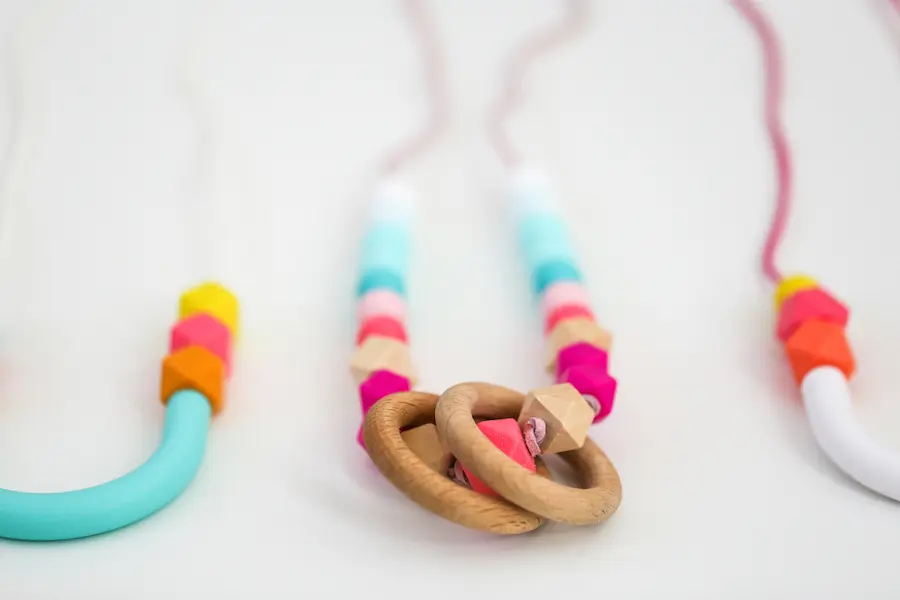
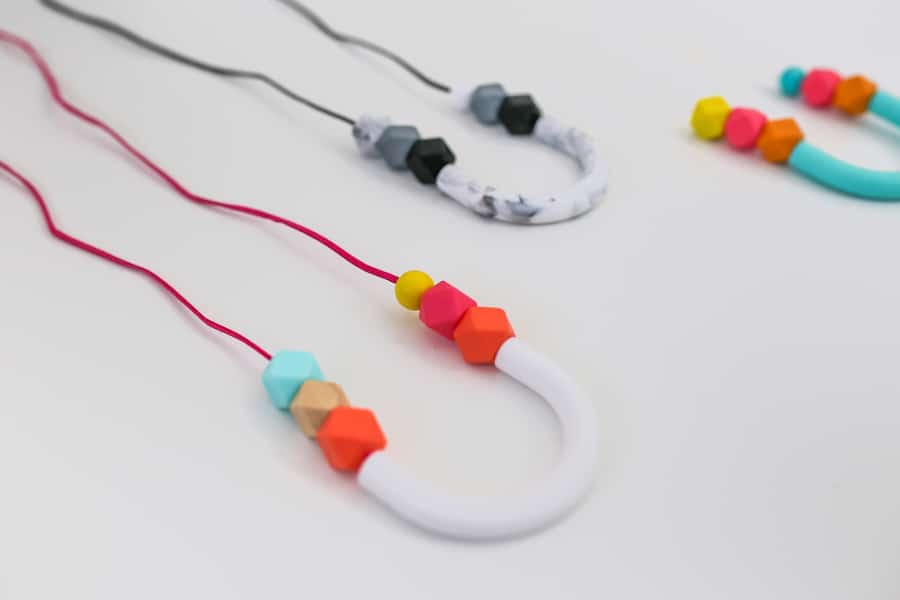
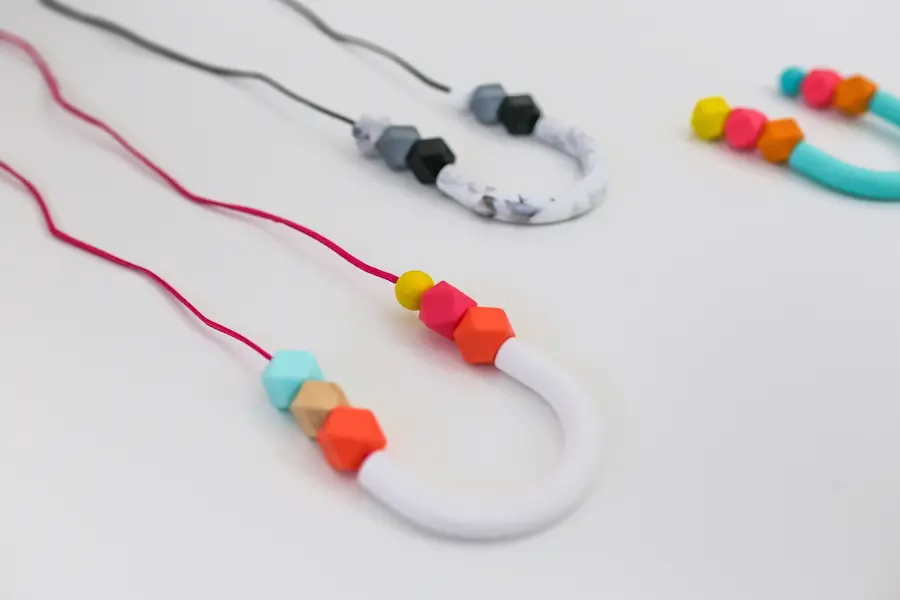
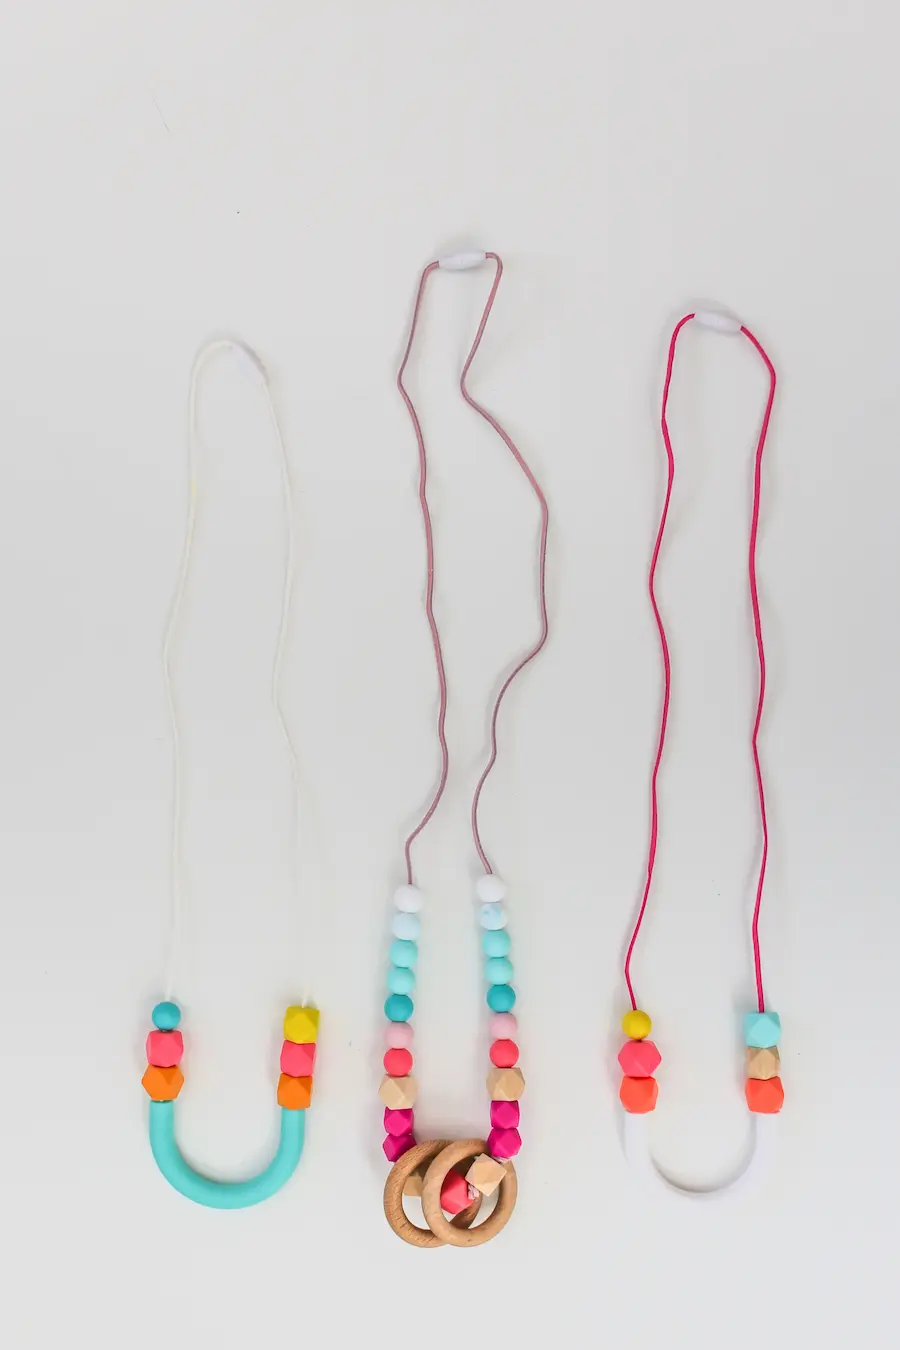
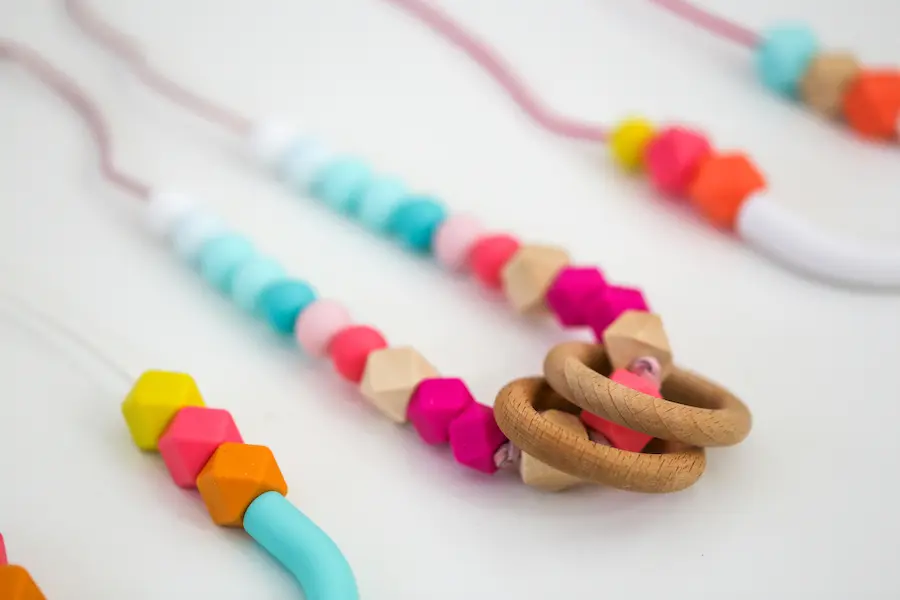
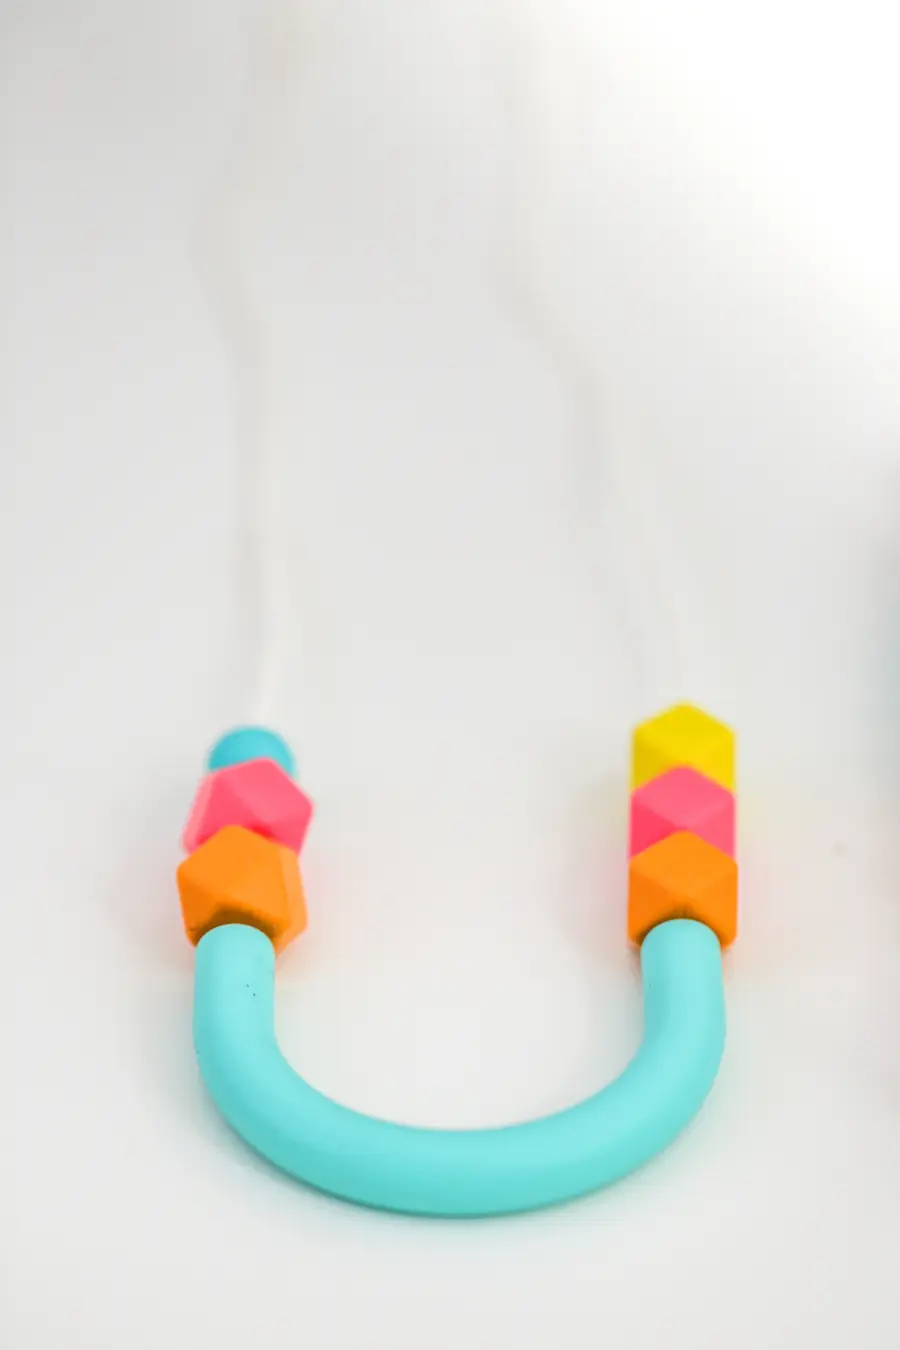
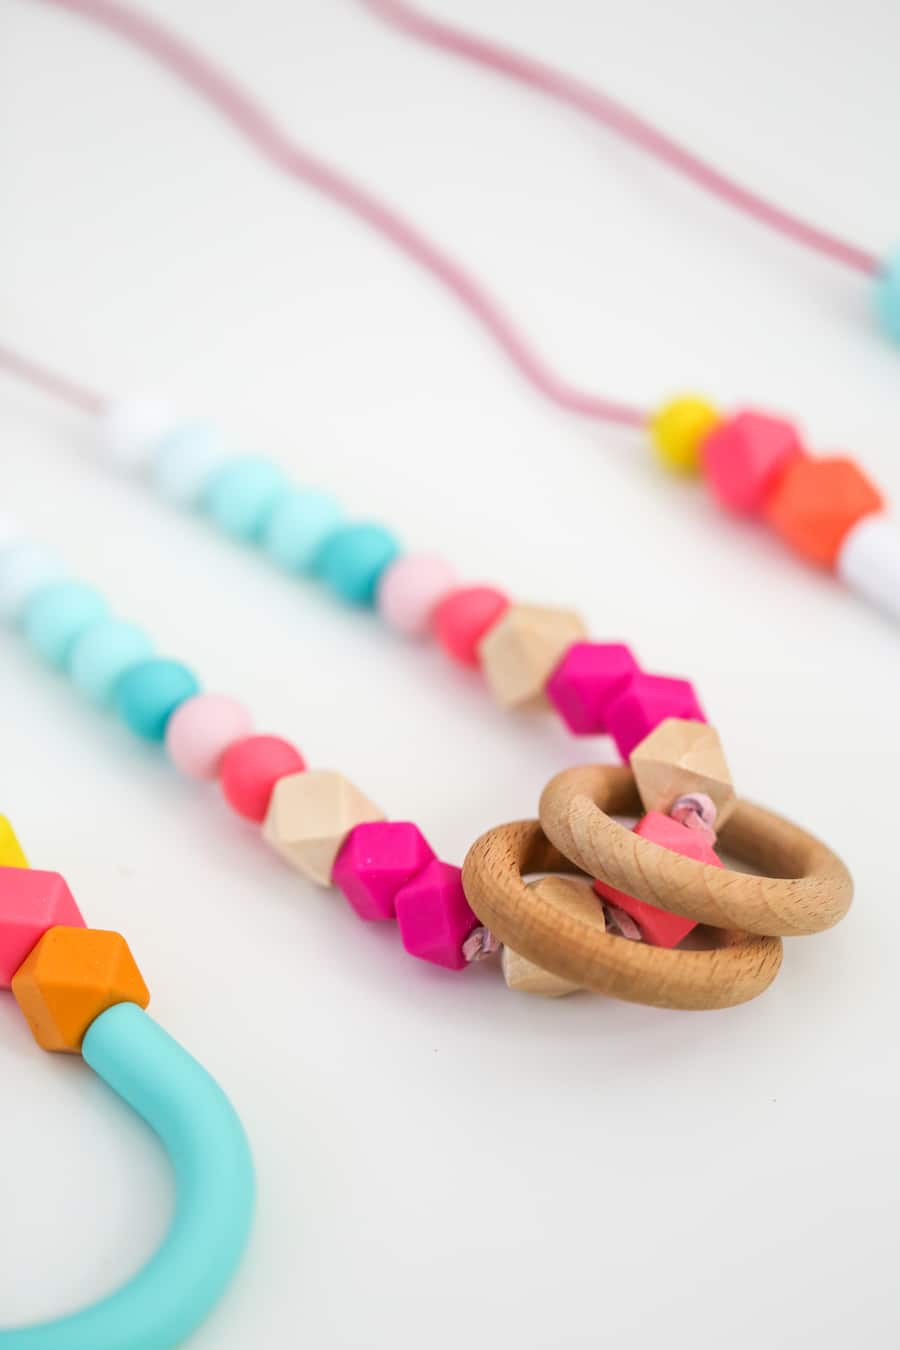
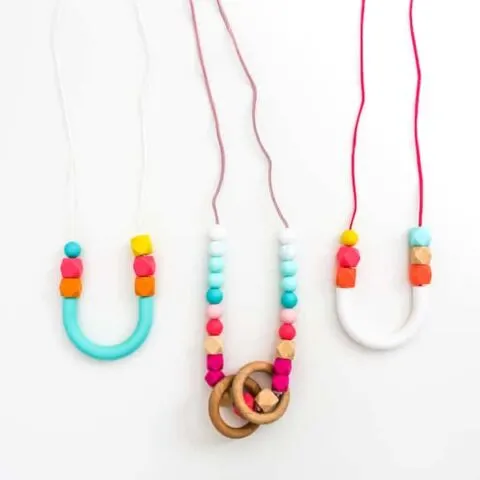
I also made a Teething or Nursing Necklace using some leftover round beads, hexagon beads, and then added a couple of wooden rings to it and I love it!

I can’t tell you how many compliments I get on these necklaces when I wear them outside the house. I’m always a little shy and say something like, “Oh! Thank you! I made it! It’s a teething necklace for my baby.” And then the person is always shocked and says something like, “Really?!? Well, it’s awesome!”
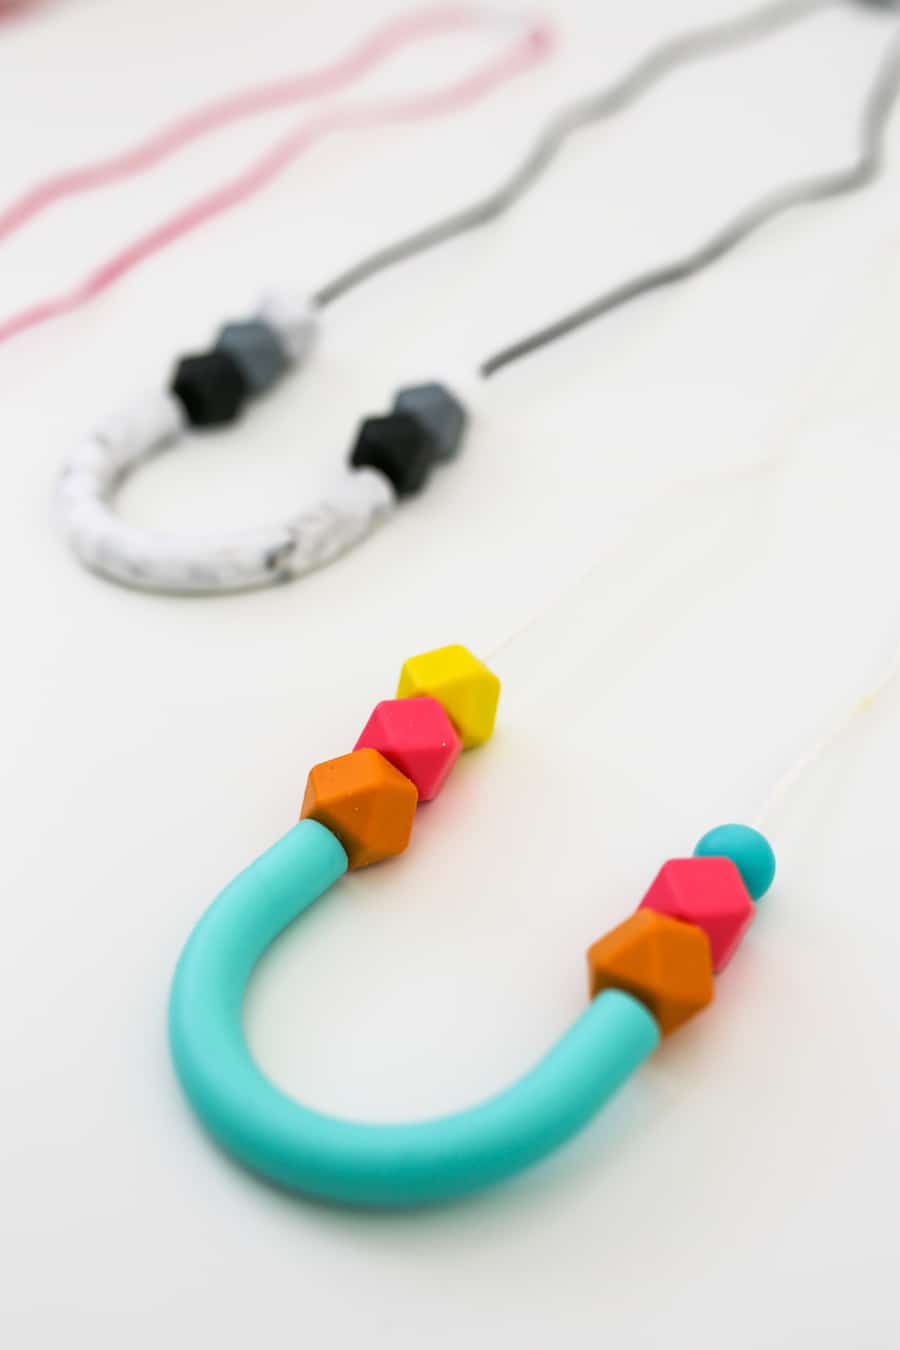
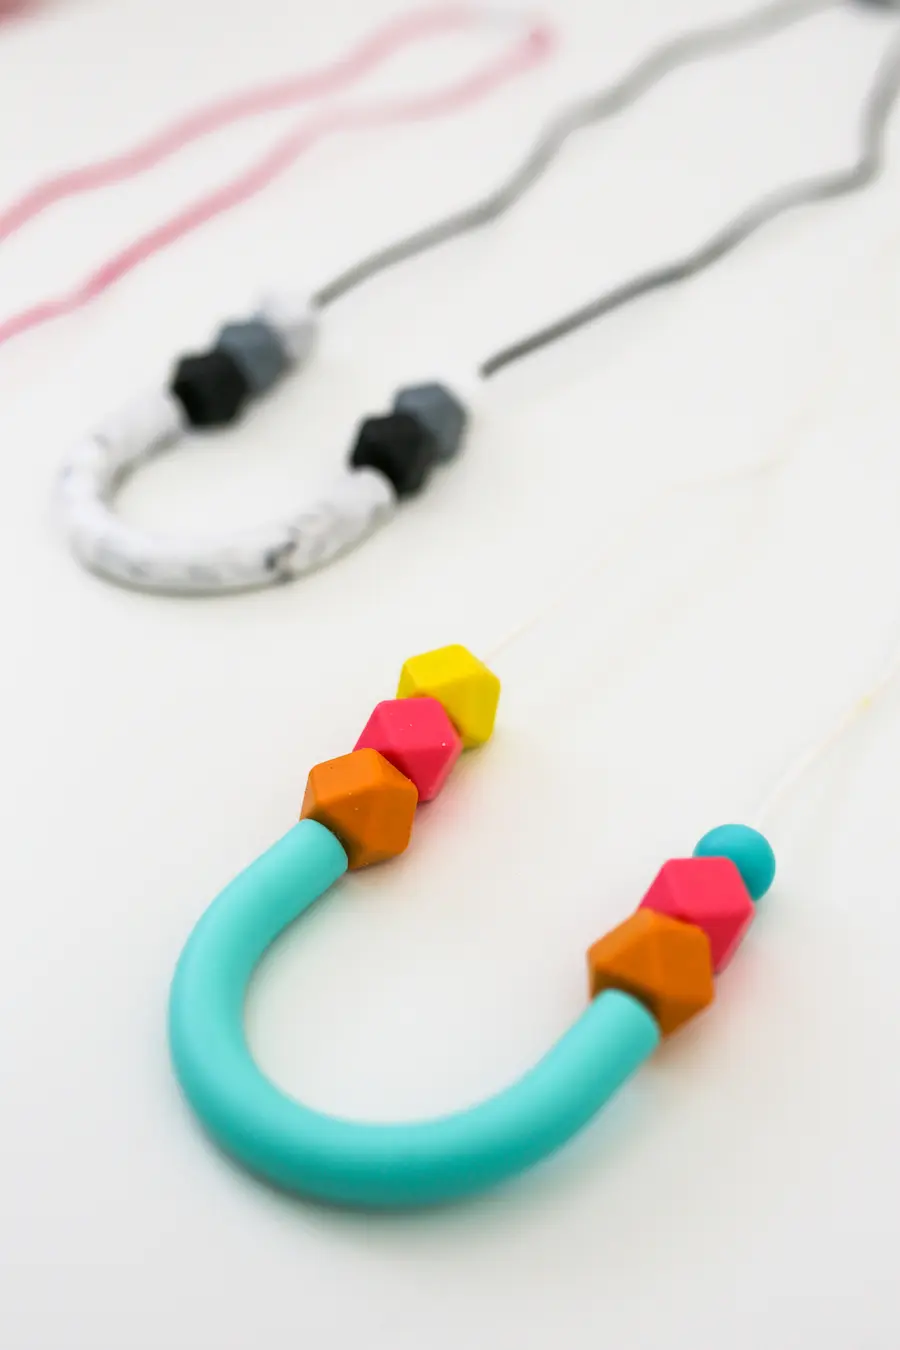
Here’s some more photos and close-ups!

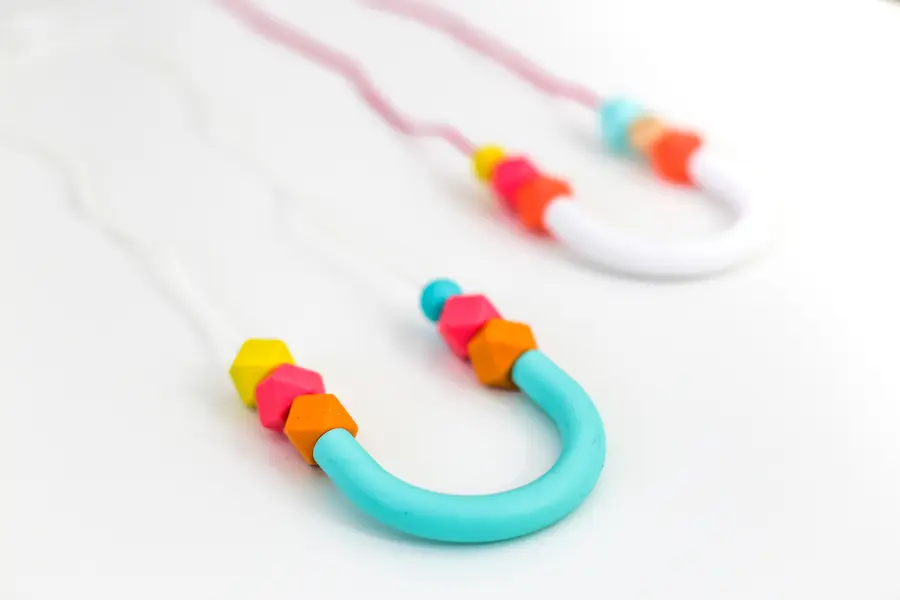
I included some knots in the cord as part of the design on this one:


Disclaimer: Never leave an infant or child unattended with a Teething or Nursing Necklace. Crafter assumes full responsibility for items built using this DIY Teething and Nursing Necklace Tutorial. This DIY Teething and Nursing Necklace contains small parts and crafter assumes full responsibility for ensuring it is used in a safe manner. By making a Teething or Nursing Necklace, crafter agrees that use of a DIY Teething and Nursing Necklace is entirely at the crafter’s own risk. Salty Canary, or any of its agents, affiliates, or contact providers shall not be liable in any way for any direct, indirect, incidental, special, or consequential damages arising out of use of a DIY Teething and Nursing Necklace. Again, never leave an infant or child unattended with a Teething or Nursing Necklace.
DIY Teething or Nursing Necklace Tutorial
Materials
- Silicone U-bead
- 17 mm Silicone beads
- Wood beads
- Suede cord
- Breakaway clasps
- Optional: Wooden rings
Tools
- Scissors
- Paper clip
Instructions
Step 1: First, put together a little mock-up of how you want to position the beads on your necklace and take a photo of it with your phone.
Step 2: Start stringing your beads onto your cord, starting with the middle bead and working your way up one side. Because the cord I used was a bit too thick, I would have to force the cord through the hole by bunching it up and using my thumbnail to squish it through bit by bit until it started to show on the other side.
Step 3: Continue stringing your beads up one side and then hold it up to yourself to see how long you want it to be before cutting the cord, then continue stringing the beads up the other side.
Step 4: Once all the beads are strung then add your breakaway clasp beads to the ends before tying two double knots and then pulling the knots into the bases of the breakaway clasps.
Step 5: Cut any excess cord off just above the knots and fasten your breakaway clasp.
Step 6: You might need to clean off the beads depending upon the type of cord you used. I just used a baby wipe and wiped off any suede cording lint that came off while I was stringing the beads.
Notes
Disclaimer: Never leave an infant or child unattended with a Teething or Nursing Necklace. Crafter assumes full responsibility for items built using this DIY Teething and Nursing Necklace Tutorial. This DIY Teething and Nursing Necklace contains small parts and crafter assumes full responsibility for ensuring it is used in a safe manner. By making a Teething or Nursing Necklace, crafter agrees that use of a DIY Teething and Nursing Necklace is entirely at the crafter's own risk. Salty Canary, or any of its agents, affiliates, or contact providers shall not be liable in any way for any direct, indirect, incidental, special, or consequential damages arising out of use of a DIY Teething and Nursing Necklace. Again, never leave an infant or child unattended with a Teething or Nursing Necklace.