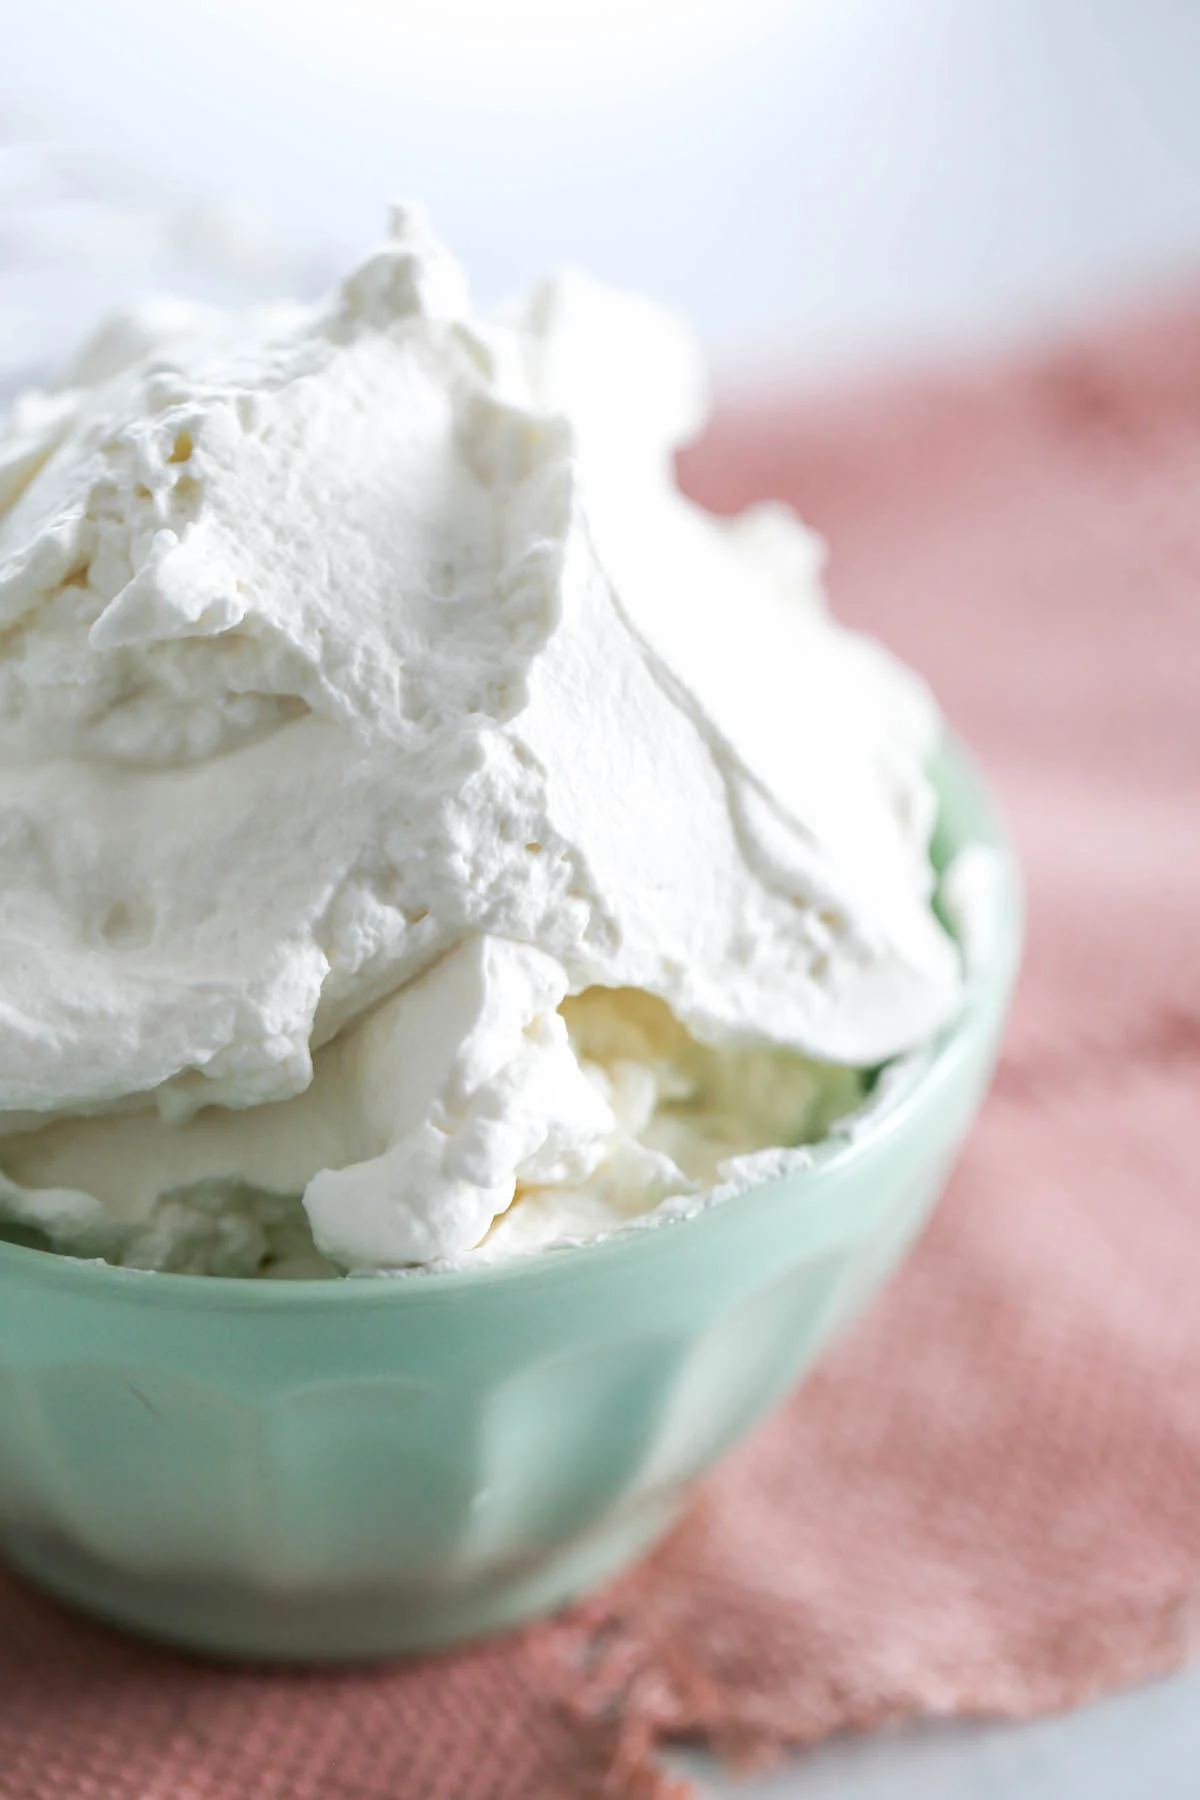
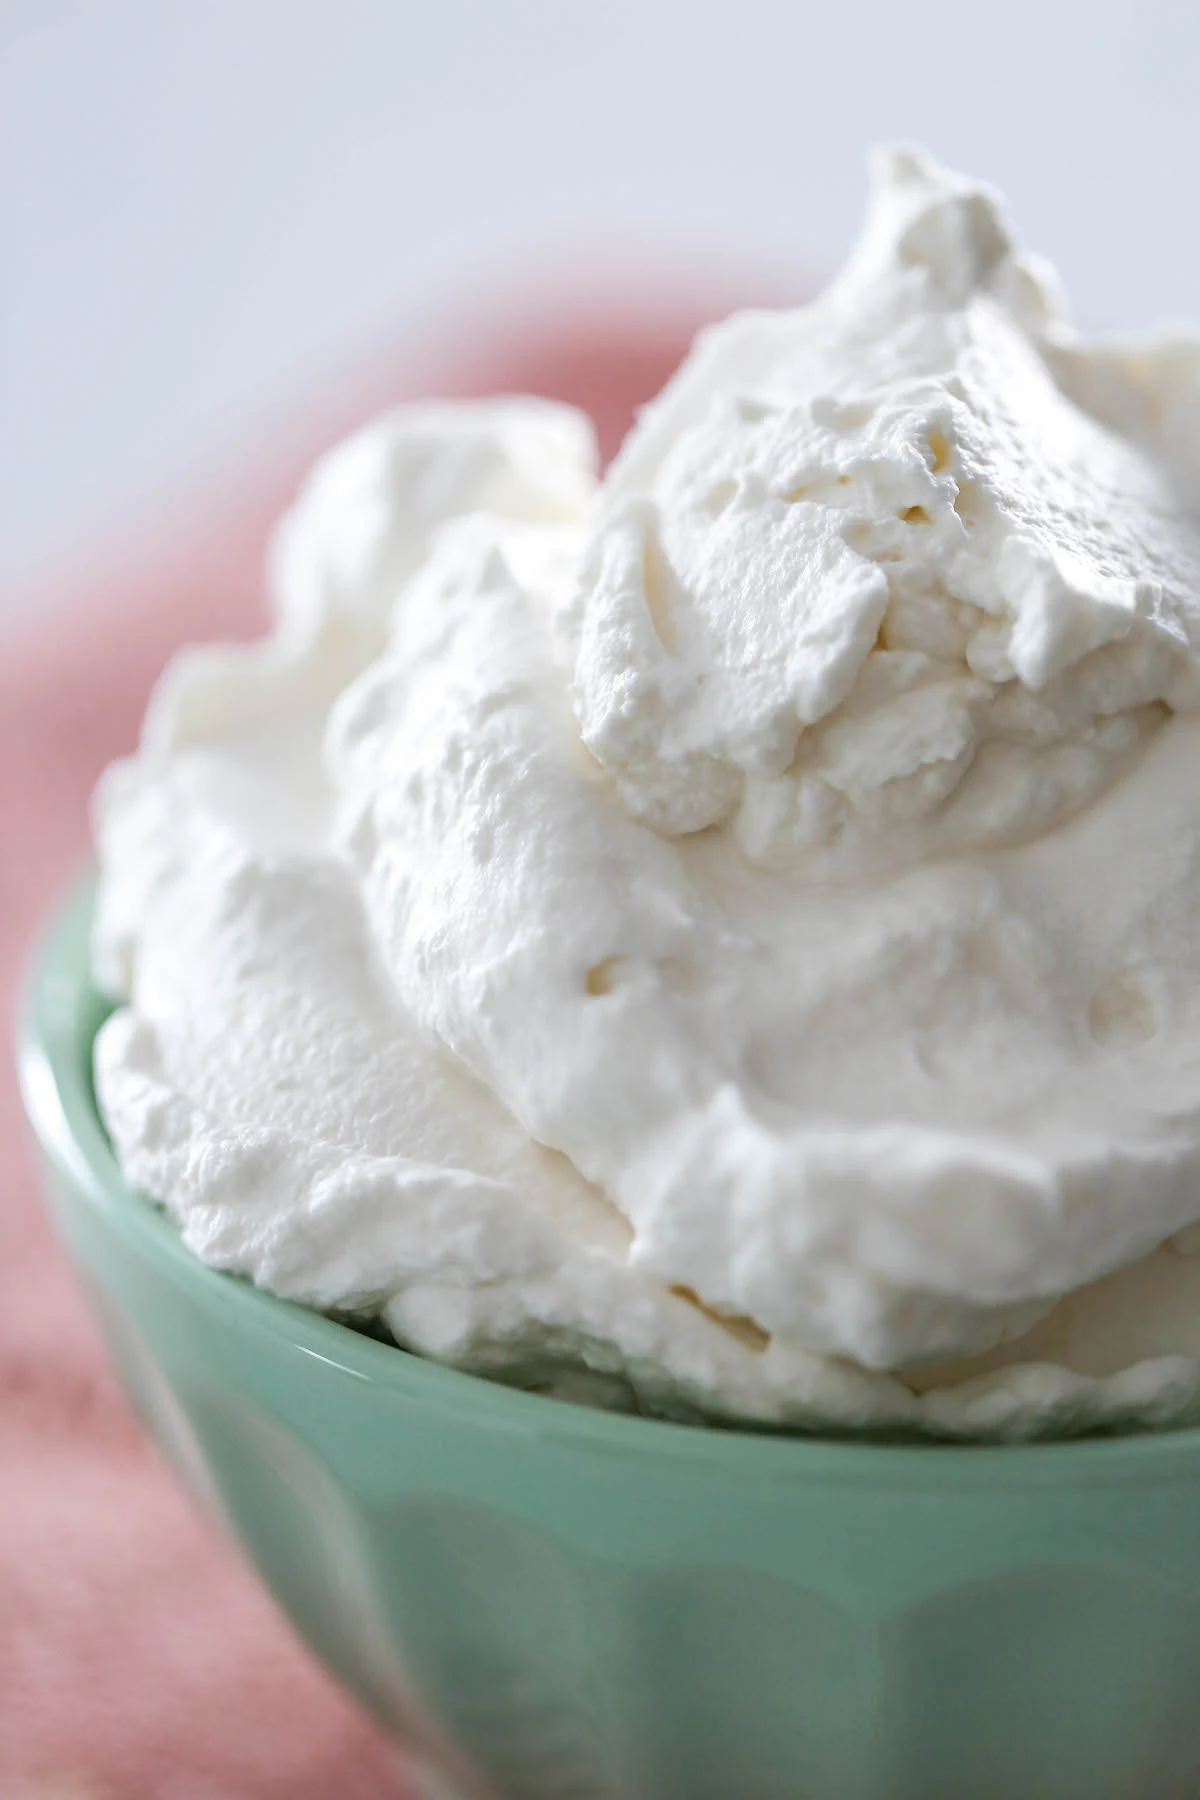
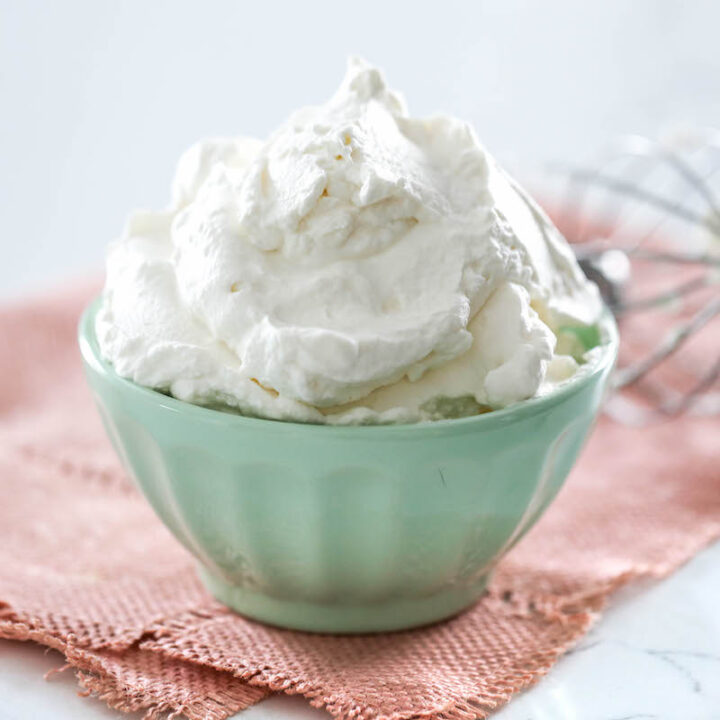
This Homemade Whipped Cream Recipe is both simple and delicious! You just need heavy whipping cream, granulated sugar, and vanilla extract to make delicious whipped cream at home and either a stand mixer, a hand mixer, or really, really strong biceps and some stamina!
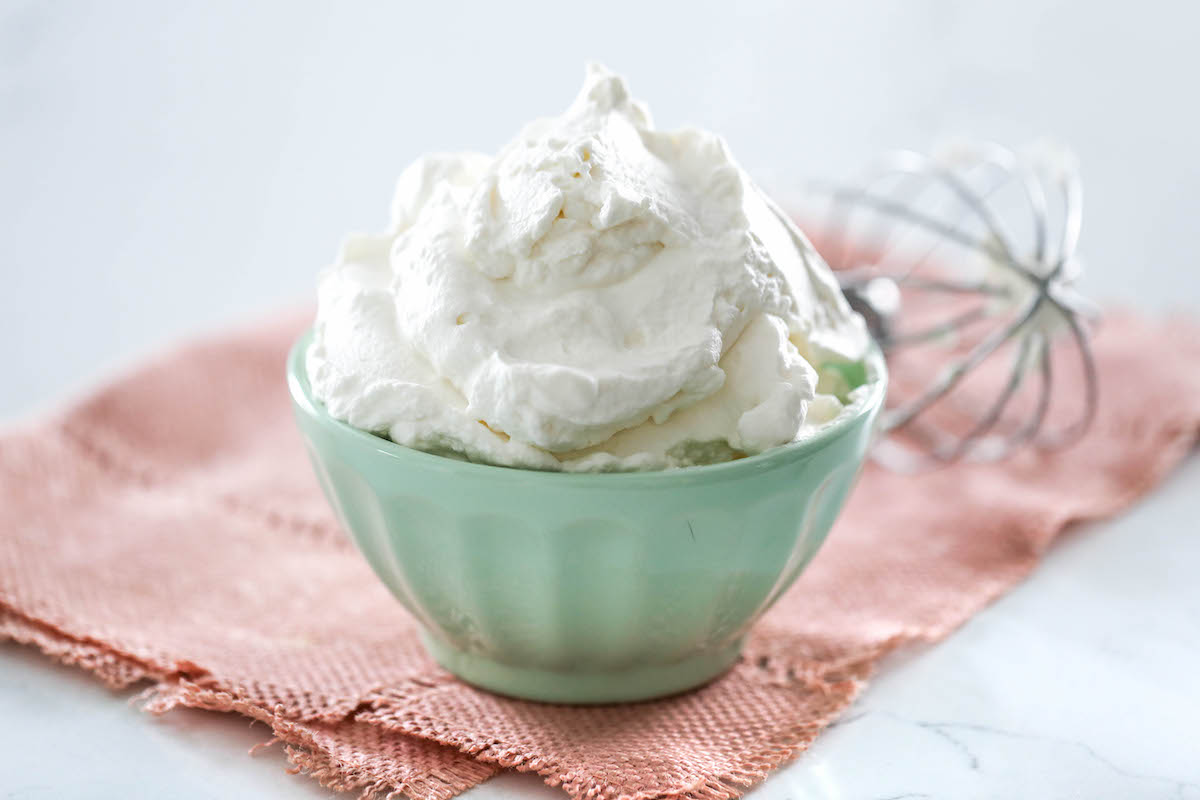

Homemade Whipped Cream Recipe
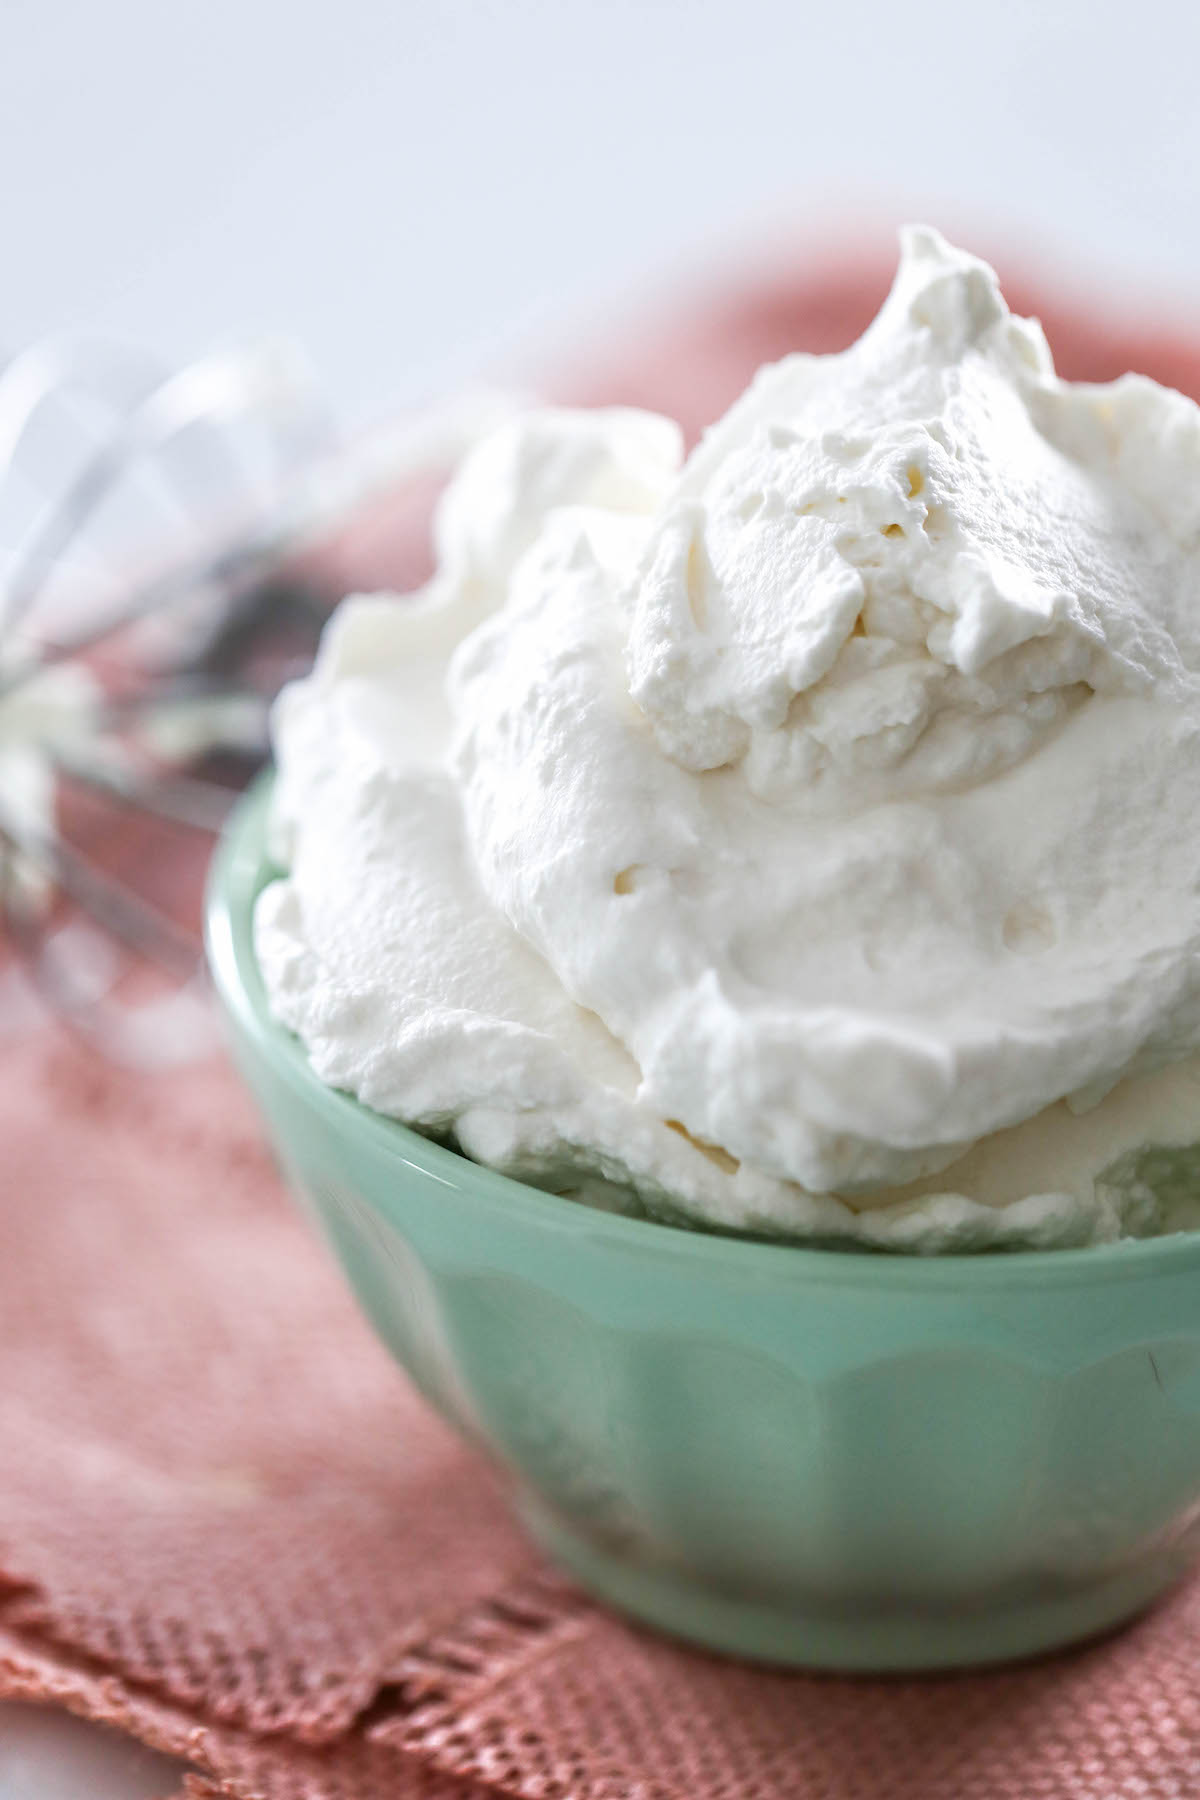
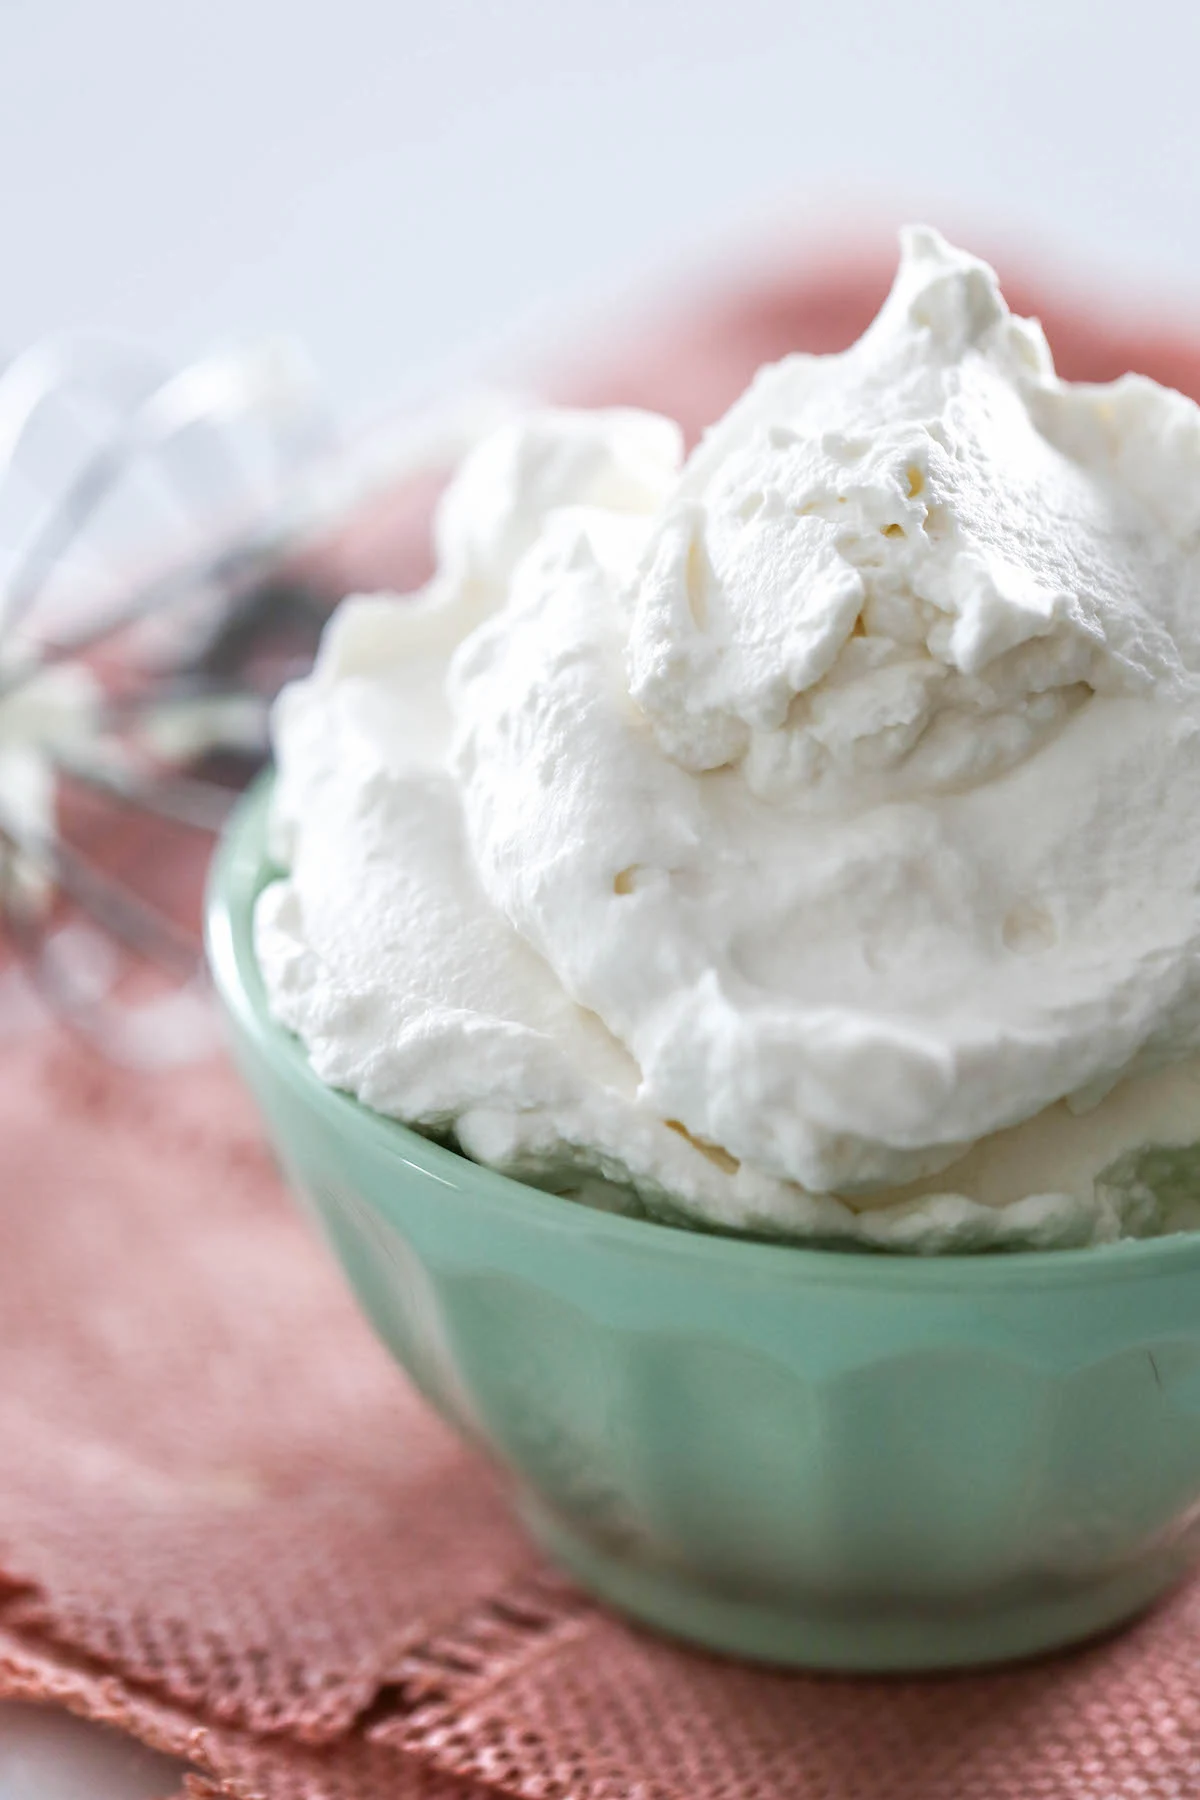
I love making my own homemade whipped cream for all of my milkshakes, pies, desserts, and hot chocolate! I think homemade whipped cream just tastes better and it “holds up” longer than whipped cream in a canister – meaning it doesn’t melt as fast and can literally hold up toppings, such as sprinkles, on top of the whipped cream without sinking.
I make my own homemade whipped cream using my KitchenAid Stand Mixer with the whisk attachment, but you can also use a hand mixer or, if you’re really optimistic and you’ve been working out, you can whip it yourself using a whisk and 5-10 minutes of human super power! I am not exaggerating at all when I say that it will be a wrist workout!

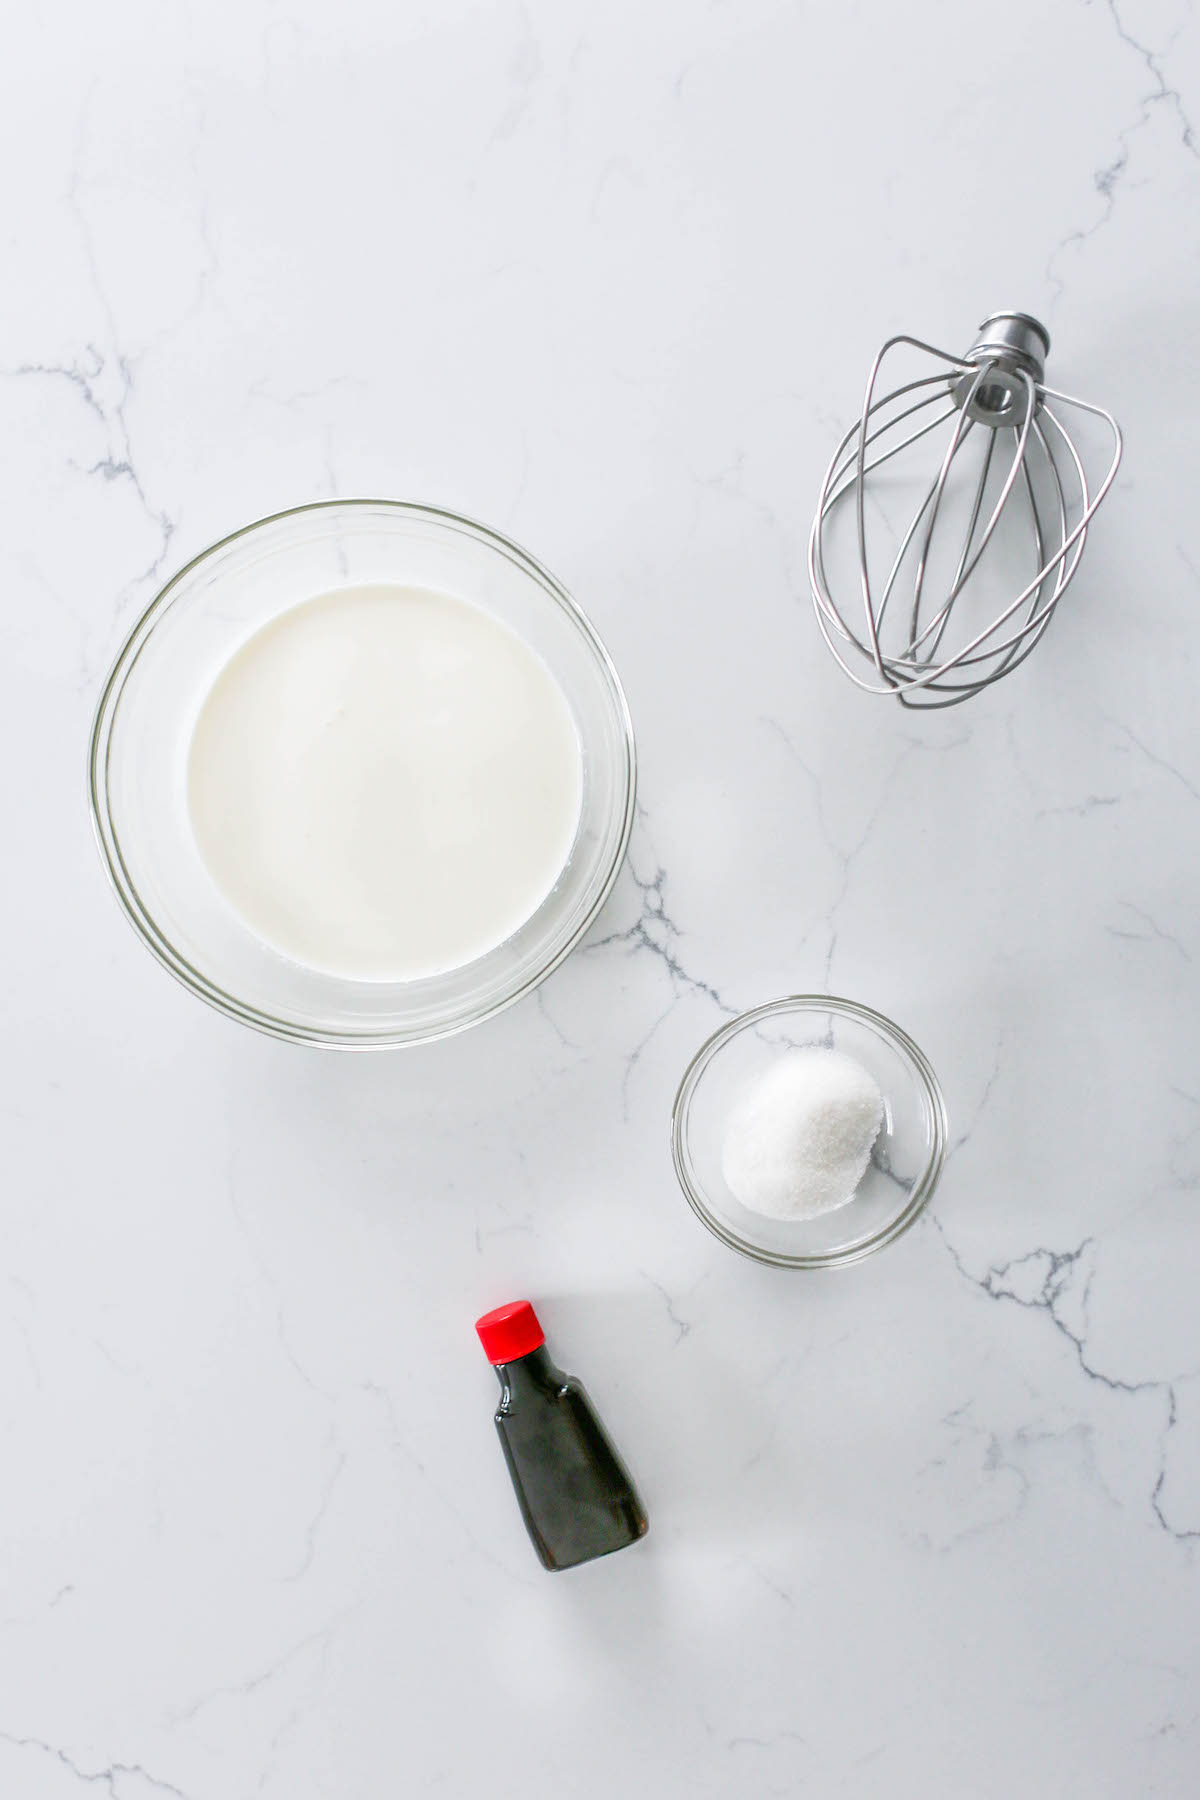
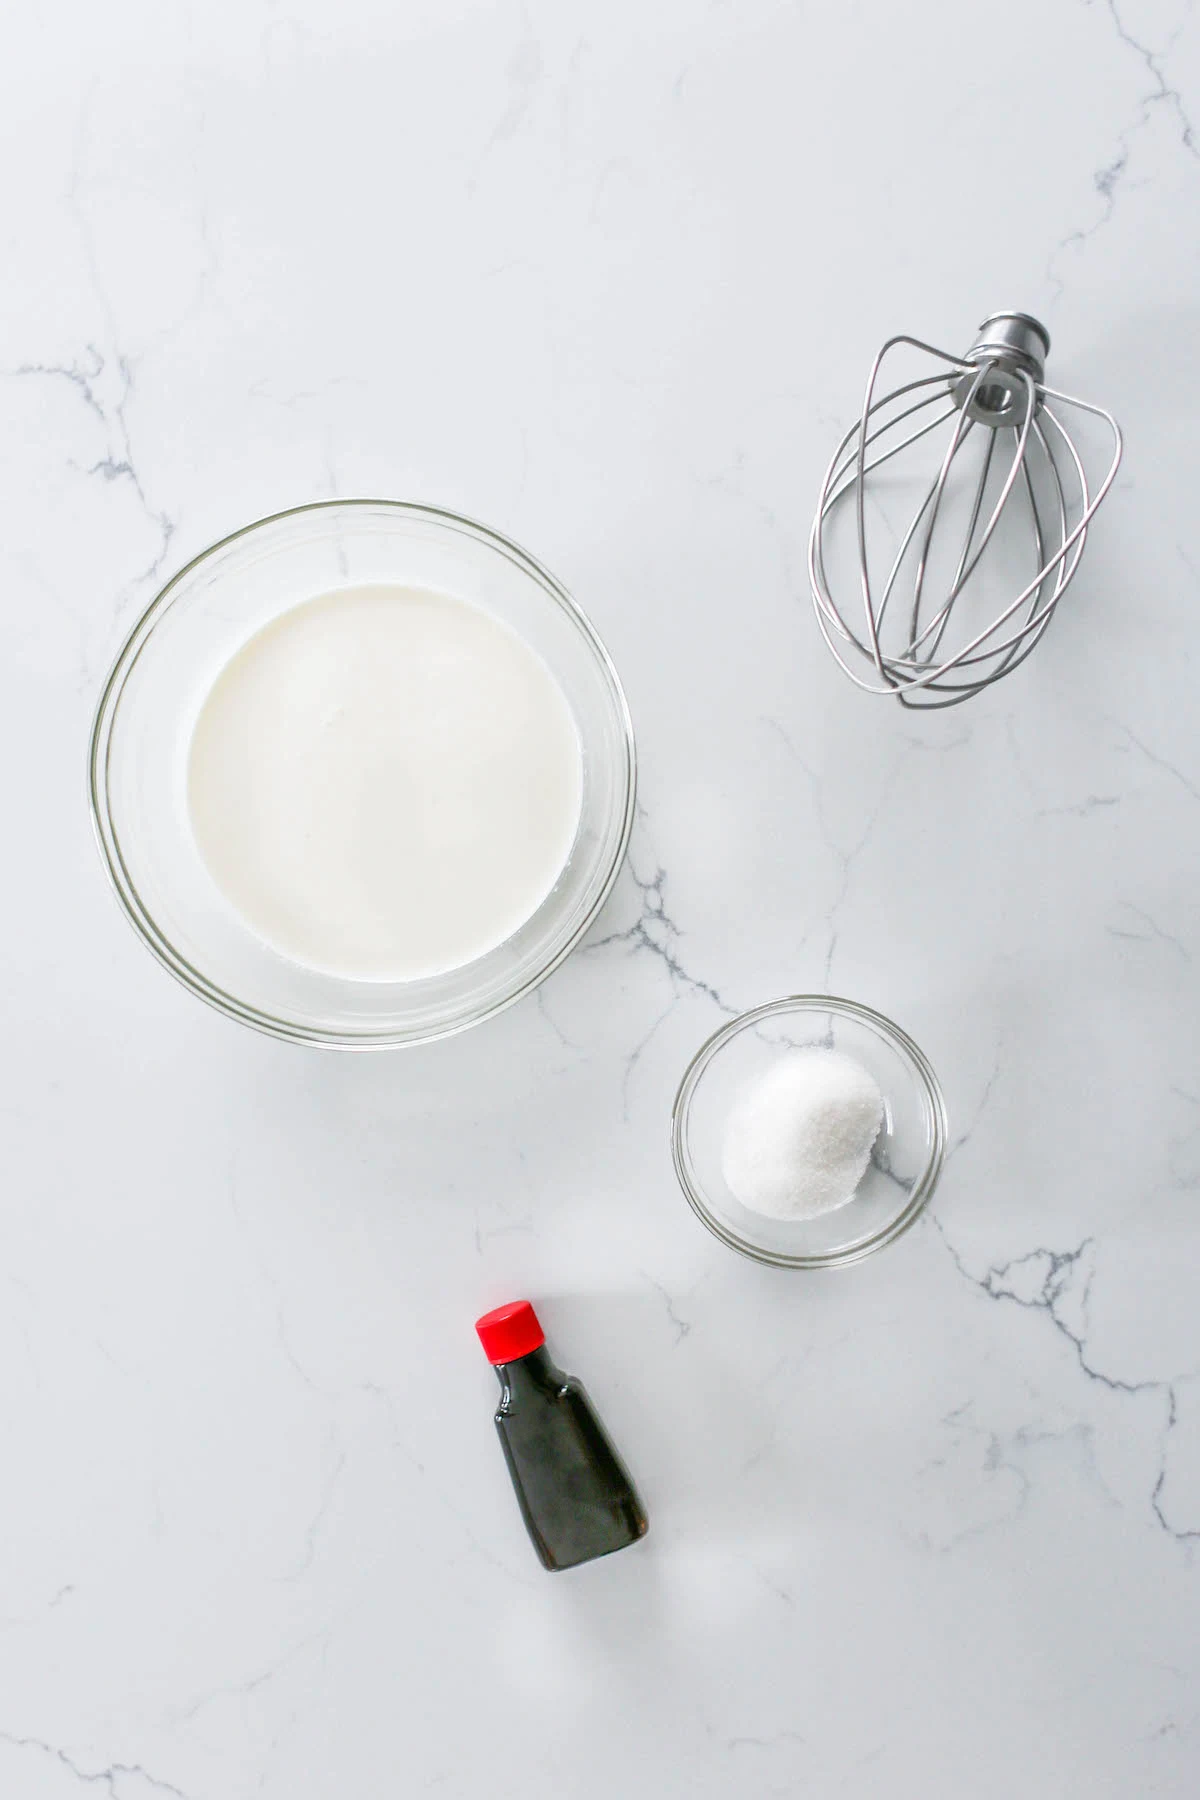
The full, printable recipe is below, but here are the needed ingredients.
Homemade Whipped Cream Ingredients:
- Heavy Whipping Cream
- Granulated Sugar
- Vanilla Extract
That’s it!
You probably already have sugar and vanilla extract on hand … so it’s probably just the heavy whipping cream that you might need to get from the grocery store.
Recommended Kitchen Equipment:
- KitchenAid Stand Mixer with whisk attachment, or
- Hand Mixer and a metal bowl

How to Make Homemade Whipped Cream:
Simply add all of the ingredients to your KitchenAid stand mixer bowl or a mixing bowl and start mixing on medium high. Continue whisking until stiff peaks form.
That’s it!
So easy, right?
I like to add my whipped cream to a reusable pastry bag outfitted with an open star pastry tip for adding perfectly swirled whipped cream to milkshakes or pies!

Ok, but maybe you have a few questions …
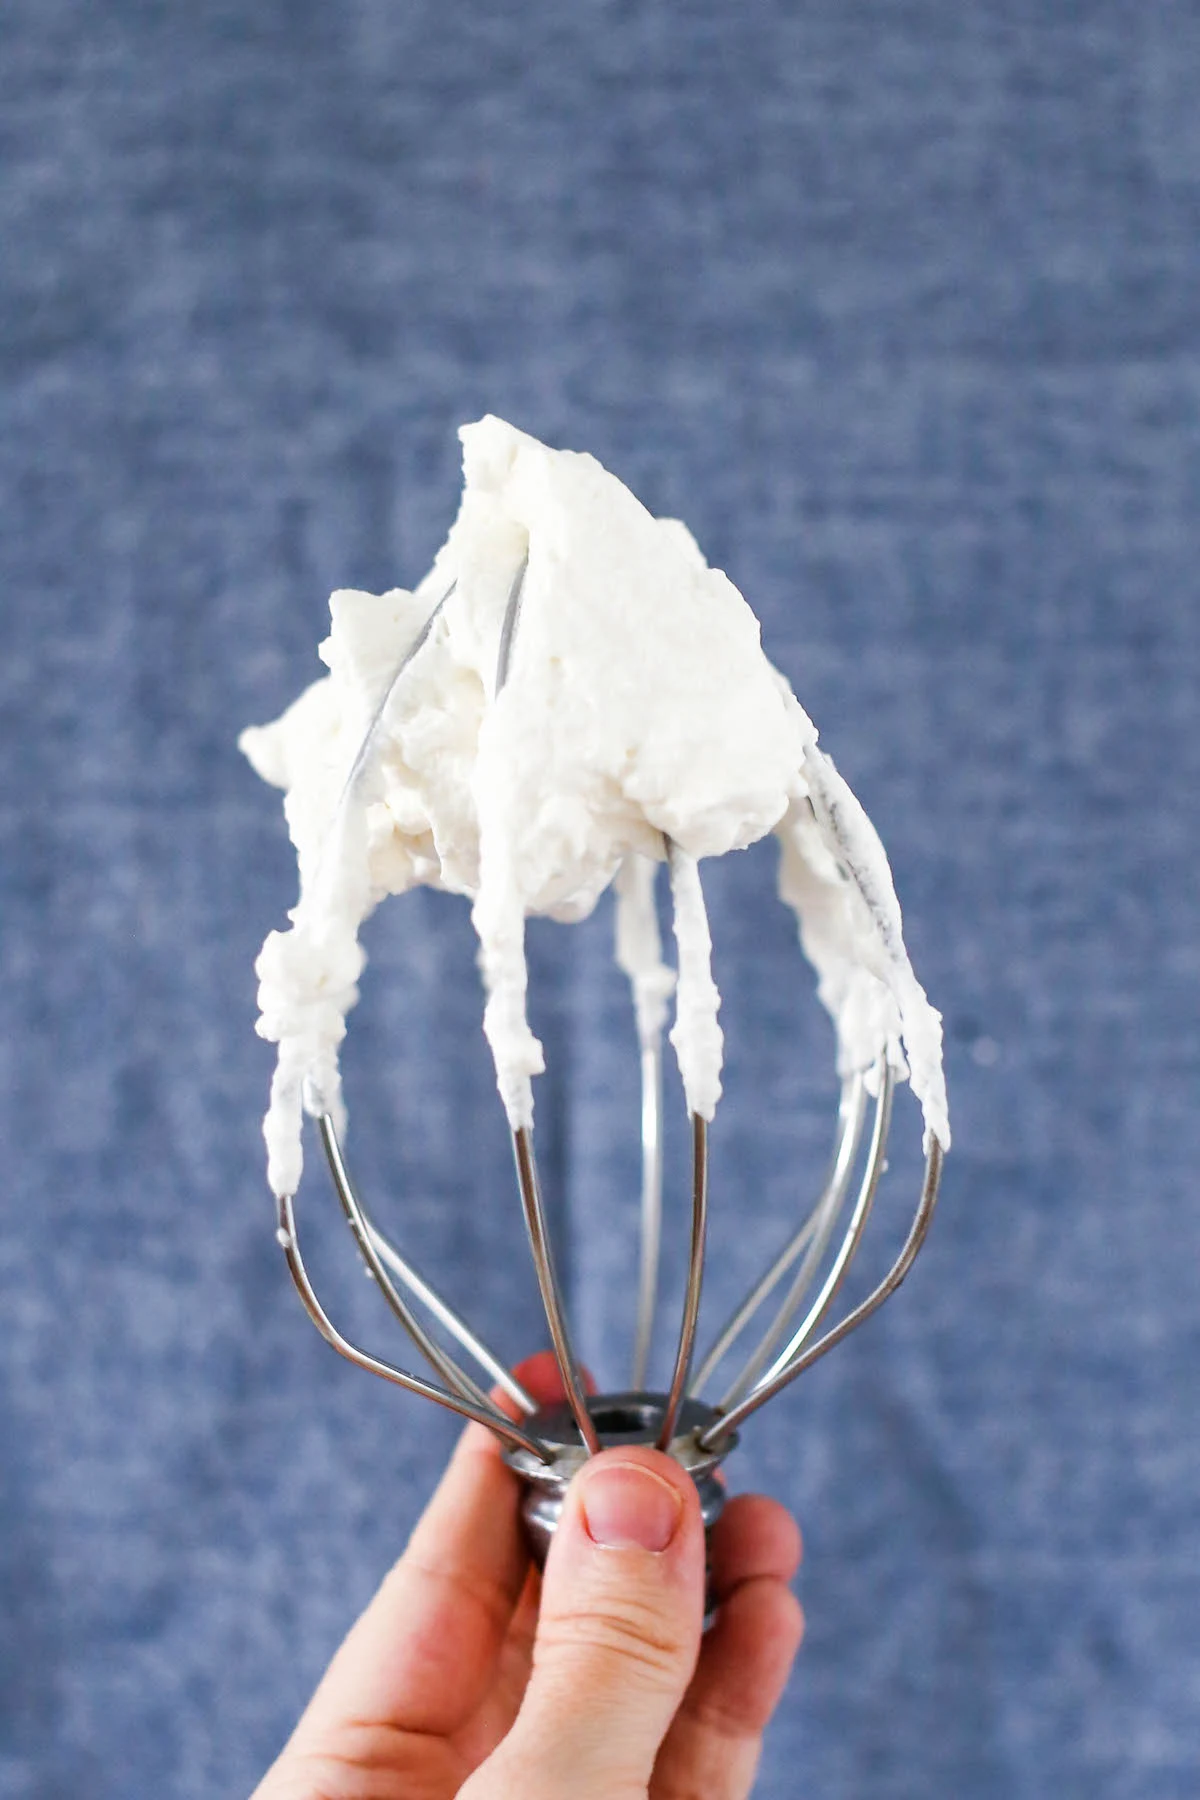
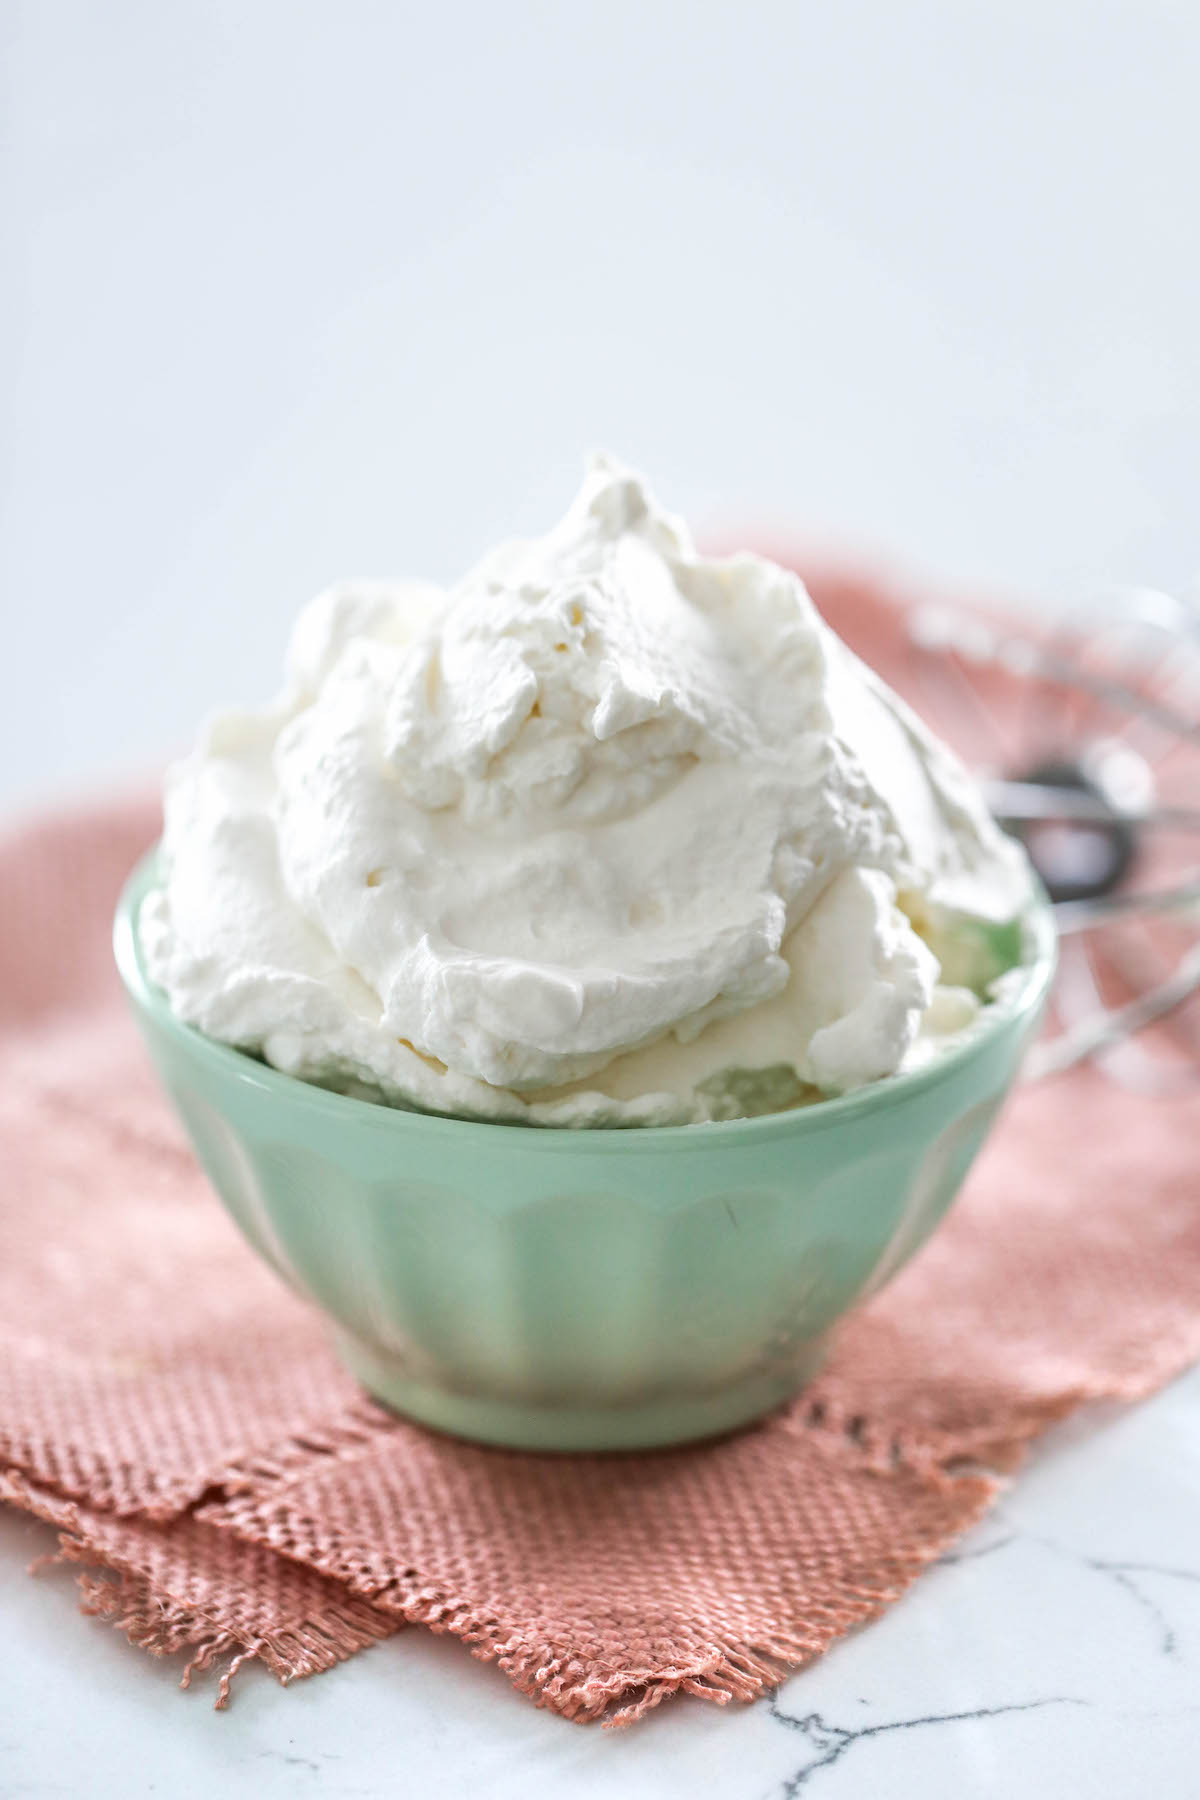
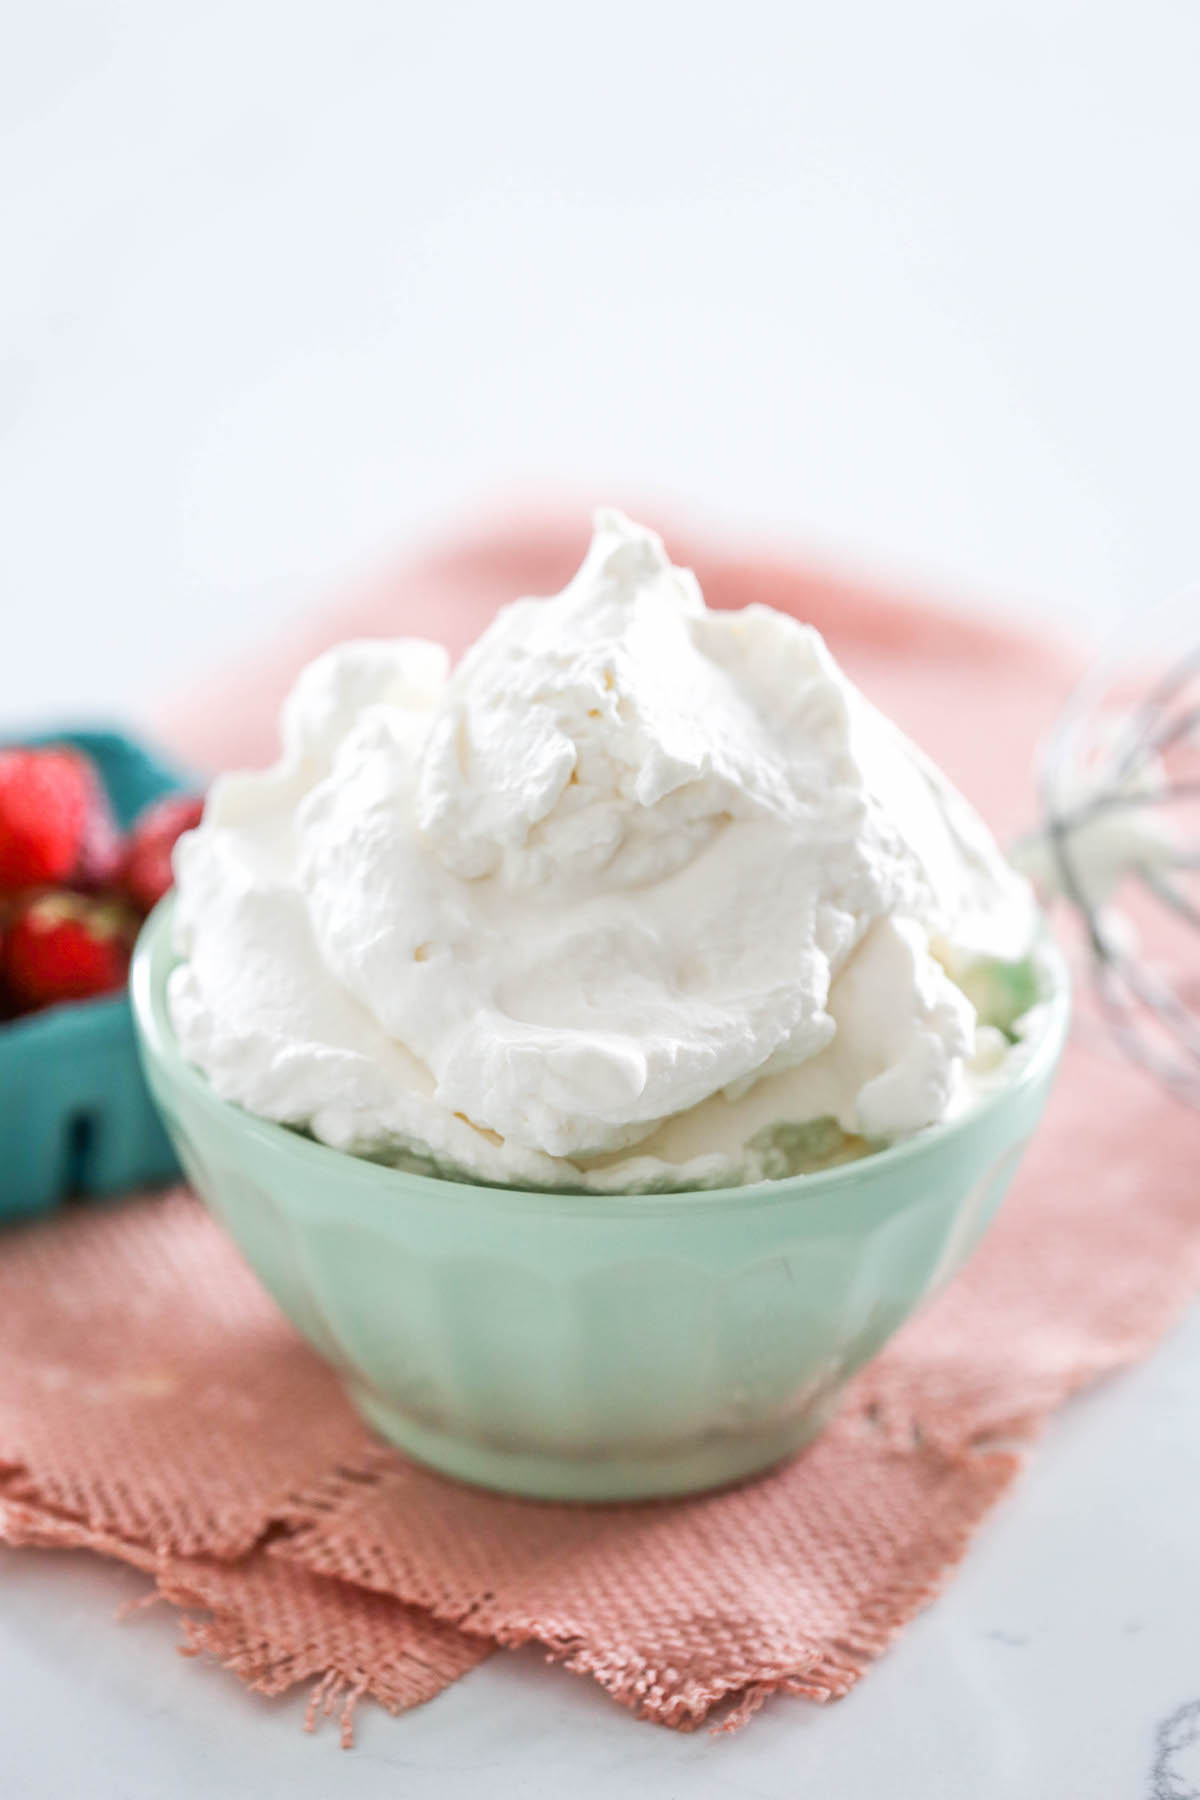
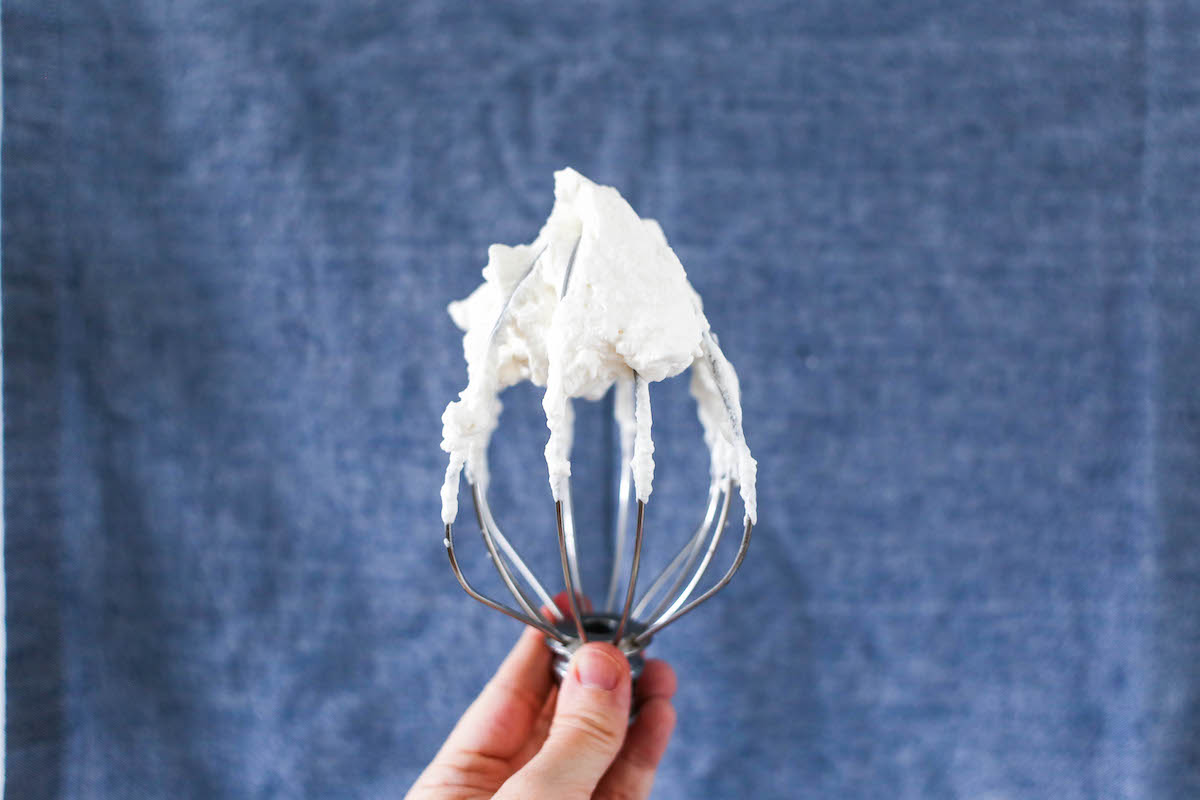
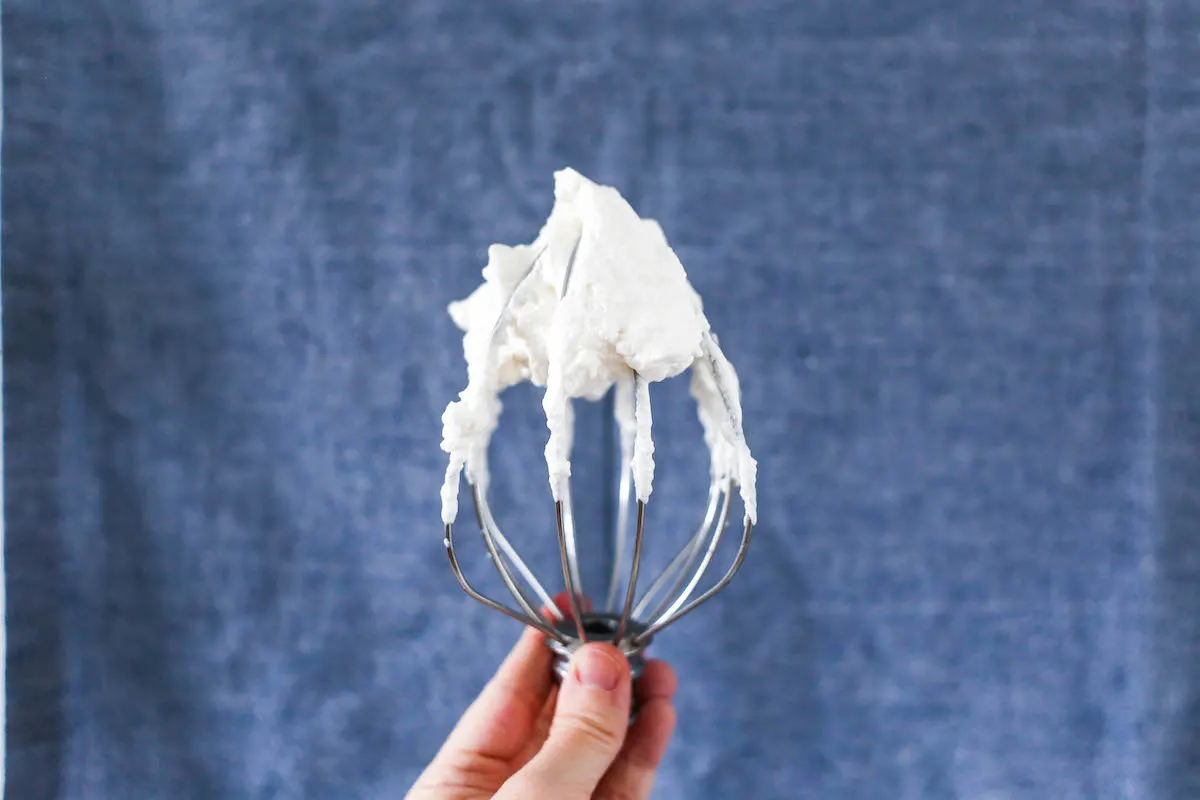
What does it mean to form “stiff peaks”?
You’ll know your whipped cream is done once stiff peaks form. This means that when you hold up the whisk attachment or hand mixer beaters, the whipped cream sticks straight up, keeps its shape, and doesn’t start to melt over onto itself.
Do I have to chill the metal bowl before whipping?
The short answer is no.
My freezer is always full of prepared freezer meals (such as my Freezer Friendly Chicken Taquitos or my Freezer Friendly Blueberry Banana Oatmeal) and I usually do not have any room in it for chilling bowls to make whipped cream. So honestly, I do not chill my metal bowls or my whisk attachment and my whipped cream always turns out just fine and I don’t notice any difference.
But others say that cream whips best when cold and you’ll get more volume from a chilled bowl. So if you have the room in your freezer for the metal bowl and you remember to put it in there 15 minutes ahead of time, feel free to chill your metal bowl before whipping up your whipped cream, but if you don’t have the room or you forget, don’t worry about it!

What is the difference between whipping cream, heavy whipping cream, heavy cream, and half-n-half?
- Milkfat. The difference between the different kinds of cream is the amount of milkfat in each of them. The cream with the most milkfat is going to make a creamier, thicker whipped cream.
- Whipping cream has about 30% milkfat.
- Heavy cream and heavy whipping cream are the same and contain about 36% milkfat.
- But half-n-half only contains 10-18% milkfat which isn’t enough fat to to be stable in a whipped state.
So, you can use whipping cream, but heavy cream or heavy whipping cream will be better. But do NOT use half-n-half.
What about the boxed shelf-stable whipping cream from Trader Joe’s?
Yes! It works! But it has its pros and cons.
First, I only recommend using the boxed, shelf-stable Trader Joe’s whipping cream when you’re making a last-minute dessert and don’t want to run to the store for heavy whipping cream. It simply doesn’t taste as good as whipped cream made with heavy whipping cream, but it works in a pinch.
However, here’s the con: it needs to be chilled for 6+ hours before whipping. So if you purchase this to have on hand for those “in a pinch” moments, store yours in your refrigerator so it’s already chilled!
Also, it’s only an 8 oz. box, so if you need to make a lot of whipped cream, you’ll need to keep TWO boxes in the fridge.

What about using Coconut Milk?
Yes, you can use coconut milk as a dairy-free vegan alternative to classic whipped cream; however, I have tried this a few times and I have both succeeded and failed!
You have to use specific brands of coconut milk and you have to chill it for a very long time in the refrigerator before whipping. I’ve used Aroy-D coconut milk and it worked. I tried both Trader Joe’s Organic Coconut Cream and Coconut Milk and it did not.
But you have to chill it overnight in the refrigerator for the coconut milk to harden. The freezer does not work.
And remember how I said you don’t have to chill your metal bowl? Well, in this case, yes, you do!
I truly recommend that you Google “Coconut Milk Whipped Cream” and read several blog posts written by experts on making vegan food and have made coconut whipped cream several times using several different brands and have specific tips and tricks.
Here’s the full printable recipe:

Homemade Whipped Cream Recipe
Ingredients
- 1 cup Heavy Whipping Cream
- 2 Tablespoons Granulated Sugar
- 1 tsp Vanilla Extract
Instructions
- Combine all of the ingredients in a metal bowl and beat either with the whisk attachment if using a stand mixer, a hand mixer, or by hand until stiff peaks form.
- Store in an airtight container in the refrigerator for up to 3 days or freeze up to 2 months.
Notes
Double the recipe if you need a lot of whipped cream for a recipe, want to freeze the leftovers, or you're serving several people.
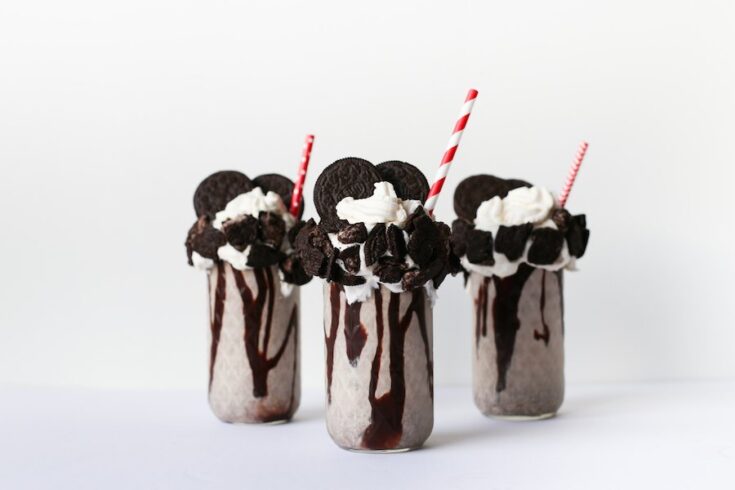
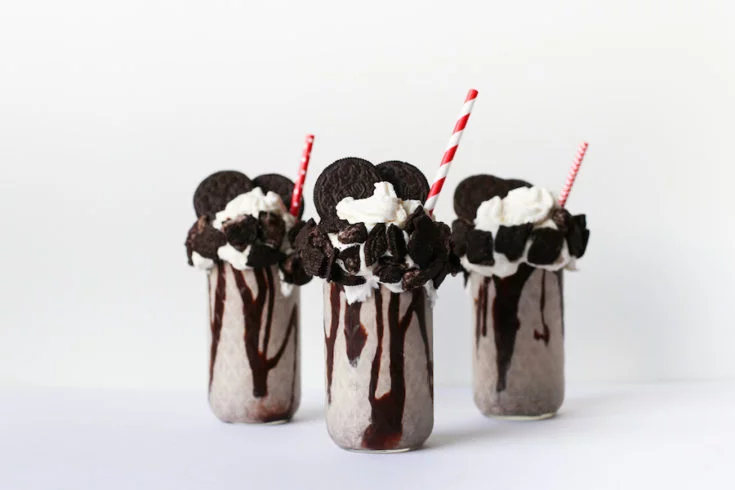
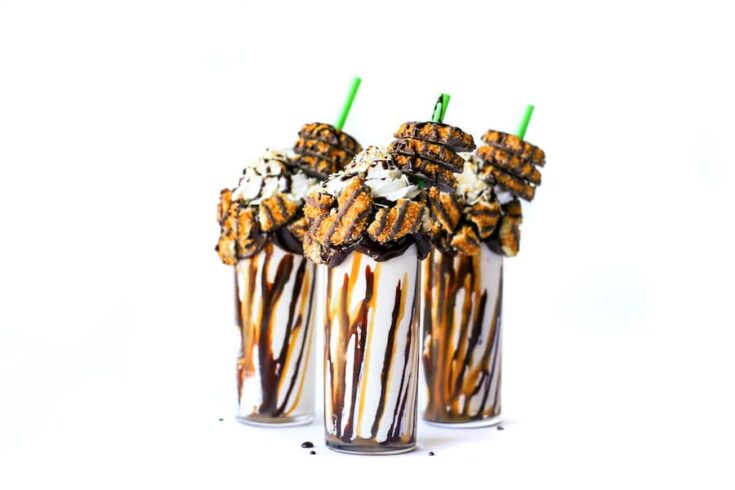
Need some inspiration for what to put the whipped cream on? Check out a few of my over-the-top milkshakes right here: